> ## Documentation Index
> Fetch the complete documentation index at: https://kb.hosting.com/llms.txt
> Use this file to discover all available pages before exploring further.
# Changing the primary domain in a WordPress multisite installation
> Learn how to change the primary domain in a WordPress multisite, essential after migrating to a new server.
This article describes how to change the primary domain in a WordPress [multisite](https://wordpress.org/documentation/article/wordpress-glossary/#multisite) installation. You may need to do this, for example, after migrating a WordPress site to a new server.
## Changing the primary domain
To change the primary domain in a WordPress multisite installation, you must update several database entries and a setting in the *wp-config.php* file. The following procedures demonstrate how to do this.
### Step 1: Update the database
To change the primary domain for WordPress multisite, you must first update several database locations. To do this, follow these steps:
1. Log in to cPanel.
> 📘 Note
>
> If you do not know how to log in to your cPanel account, please see [this article](/docs/accessing-cpanel).
2. On the **Tools** page, in the **Databases** section, click **phpMyAdmin**:\

3. phpMyAdmin opens in a new page. In the left sidebar, click the WordPress database (in the image below the database is named *example\_wp922* ). A list of tables in the database appears:\
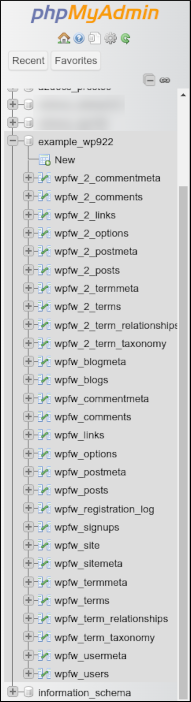
Typically, the WordPress database is **username\_wpXXX** or **username\_a2wpXXX**, where **username** represents your cPanel username, and **XXX** is a three-digit number.
4. In the left sidebar, click the **wpXX\_blogs** table:\
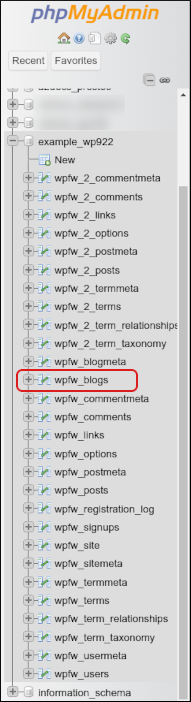
**XX** is a random two-letter prefix used in the database table names.
5. In the **domain** column, for each row, double-click the value, type the new domain name, and then press Enter:\

6. In the left sidebar, click the **wpXX\_options** table:\
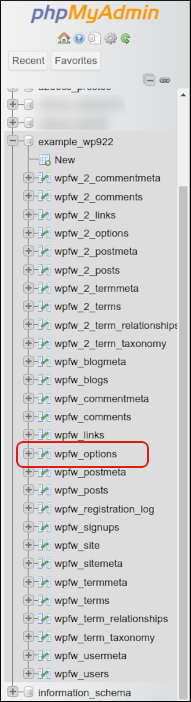
7. In the **siteurl** and **home** rows, in the **option\_value** column, double-click the value, type the new domain name, and then press Enter:\

8. In the left sidebar, click the **wpXX\_site** table:\
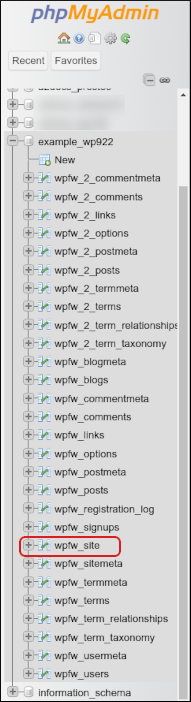
9. In the **domain** column, double-click the value, type the new domain name, and then press Enter:\

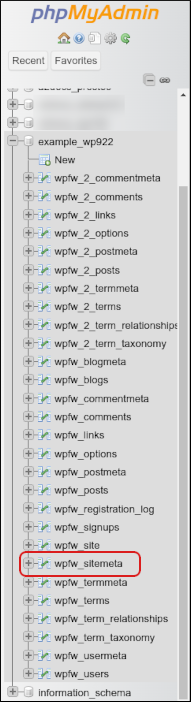
10. In the left sidebar, click the **wpXX\_sitemeta** table:\
11. In the **siteurl** row, in the **meta\_value** column, double-click the value, type the new domain name, and then press Enter:\

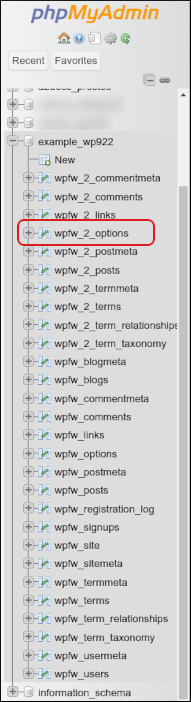
12. If you have added additional sites, then the database contains additional tables named **wpXX\_2\_options**,**wpXX\_3\_options**, and so on. For each of these tables, change the **siteurl** and **home** values as you did in step 7.\
13. The database is now configured to use the new primary domain, and you are ready to update the *wp-config.php* file.
### Step 2: Update the wp-config.php file
To update the *wp-config.php* file, follow these steps:
1. On the server, open the *wp-config.php* in your preferred text editor.
2. Locate the line that contains the **DOMAIN\_CURRENT\_SITE** setting:
```
define( 'DOMAIN_CURRENT_SITE', 'example.com' );
```
3. Replace ***example.com*** with the new primary domain.
4. Save your changes to the *wp-config.php* file. The domain change is now complete.
## More information
For more information about the WordPress multisite feature, please visit [https://wordpress.org/documentation/article/create-a-network/](https://wordpress.org/documentation/article/create-a-network/).
## Related articles
* [Configuring a WordPress multisite network](/docs/configuring-a-wordpress-multisite-network)
* [Updating WordPress database configuration settings](/docs/updating-wordpress-database-configuration-settings)
* [Resetting the WordPress administrator password](/docs/resetting-the-wordpress-administrator-password)