> ## Documentation Index
> Fetch the complete documentation index at: https://kb.hosting.com/llms.txt
> Use this file to discover all available pages before exploring further.
# Configuring WordPress to use Redis
> Boost your site's performance by configuring WordPress with Redis. Learn to install Redis Object Cache & WP Redis plugins. VPS required.
This article describes how to configure [WordPress](https://hosting.com/hosting/platforms/wordpress-hosting) to use [Redis](https://redis.io/).
Redis is an open-source memory object caching system that web sites can use to help accelerate page load times. Redis works by caching in RAM frequently accessed data, such as the results of API calls, database queries, and more. It is frequently used as an alternative to [memcached](https://memcached.org), another caching system.
By adding Redis caching to WordPress, you can help improve your site's performance and page load times.
* Redis is currently enabled on Turbo shared, Turbo reseller, Managed VPS, and Managed Dedicated server accounts.
* If you have an unmanaged VPS, you have full root access and can install and configure Redis yourself.
* Redis is not supported on non-Turbo shared hosting accounts at this time.
## WordPress plugin support for Redis
There are several plugins available for integrating Redis caching with WordPress. This article describes how to do so with two of the most popular Redis plugins, Redis Object Cache and WP Redis.
You can use whichever plugin you prefer (and you should only use one of these plugins at a time, not simultaneously). With [Redis Object Cache](https://wordpress.org/plugins/redis-cache/), you can do all configuration through the WordPress UI. For [WP Redis](https://wordpress.org/plugins/wp-redis/), you use the command line to complete the configuration.
## Option #1: Redis Object Cache plugin
The [Redis Object Cache](https://wordpress.org/plugins/redis-cache/) plugin enables you to easily set up your WordPress site to use Redis.
**Important**
By default, Redis Object Cache uses the WordPress database table prefix defined in*wp-config.php* for its own key prefix in the Redis cache. If you have multiple WordPress sites that use the same MySQL table prefix, content from the sites can become mixed together in the Redis cache and cause site display problems. Note that this scenario only happens if **all** of the following conditions are true:
* You installed two or more WordPress sites manually (in other words, you did not use Softaculous to install the sites).
* Two or more of the manually installed WordPress sites use the same database table prefix (for example, the default table prefix of **wp\_** ).
* The WordPress sites that share the same database table prefix also have Redis Object Cache installed and activated.
In such a scenario, you can disable Redis Object Cache and the site display issues will be resolved. Consider changing the sites' database table prefixes, or changing the cache key prefix for Redis Object Cache. For more information, please see [https://github.com/rhubarbgroup/redis-cache/wiki](https://github.com/rhubarbgroup/redis-cache/wiki).
To install and configure Redis Object Cache on your WordPress site, follow these steps:
1. Log in to WordPress as the administrator.
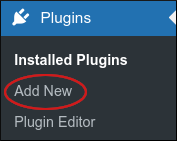
2. On the Dashboard in the left sidebar, click **Plugins**, and then click **Add New**:\
3. On the **Add Plugins** page, in the **Search plugins** text box, type `redis object cache` and then press Enter.
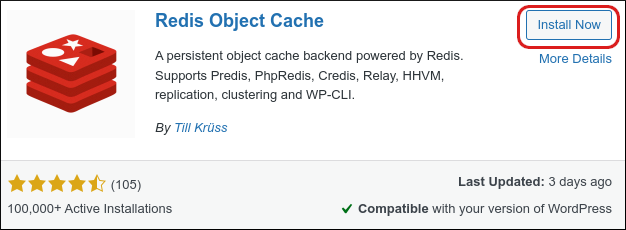
4. Locate the **Redis Object Cache** section, and then click **Install Now**:\
5. When installation is complete, click **Activate**. The **Redis Object Cache** page appears:\
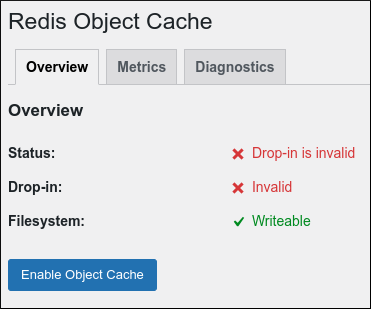
6. Configure the plugin:
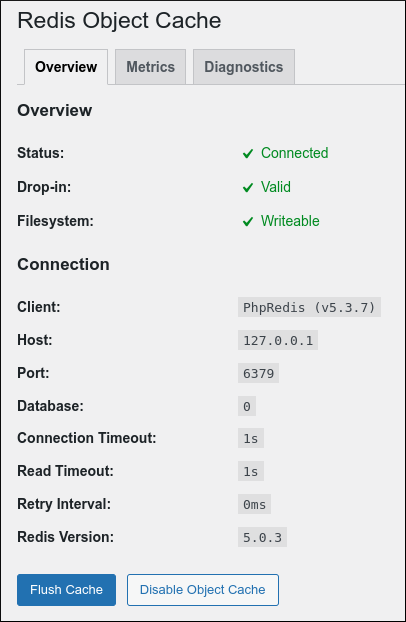
* If you have a **Managed VPS or Dedicated Server**, click **Enable Object Cache**. When you see green checkmarks for **Status**, **Drop-in**, and **Filesystem**, Redis is activated and running for WordPress:\
* If you have a **Turbo shared or reseller account**, follow these steps:
i. In the directory where you installed WordPress, use your preferred text editor to open the *wp-config.php* file. Just above the **/ *"That's all, stop editing! Happy publishing.*/** line near the end of the file, paste the following text:
```
define( 'WP_REDIS_SCHEME', 'unix');
define( 'WP_REDIS_PATH', '/home/username/.redis/redis.sock');
```
```
ii. Replace **_username_** with your own account username.
iii. Save your changes to the _wp-config.php_ file.
iv. In WordPress, on the **Redis Object Cache** page, click **Enable Object Cache**. When you see green checkmarks for **Status**, **Drop-in**, and **Filesystem**, Redis is activated and running for WordPress.
```
7. You do not need to do anything further to take advantage of performance improvements from Redis caching. The following options are available:
* To view statistics about Redis caching on your site, click the **Metrics** tab.
* To view detailed configuration and debugging information, click the **Diagnostics** tab.
* To flush the Redis cache, click **Flush Cache**.
* To disable Redis caching, click **Disable Object Cache**.
## Option #2: WP Redis plugin
To install and configure WP Redis on your WordPress site, follow these steps:
1. Log in to WordPress as the administrator.
2. On the Dashboard in the left sidebar, click **Plugins**, and then click **Add New**:\

3. On the **Add Plugins** page, in the **Search plugins** text box, type `wp redis` and then press Enter.
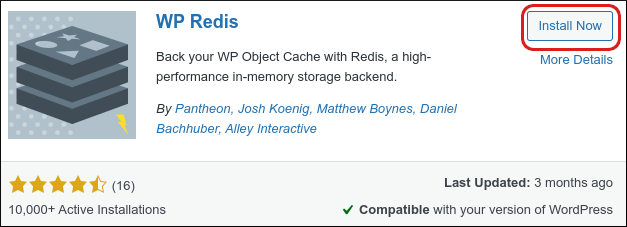
4. Locate the **WP Redis** section, and then click **Install Now**:\
5. When installation is complete, click **Activate**.
6. Log in to your account [using SSH](/docs/using-ssh-secure-shell).
7. At the command prompt, change to the directory where you installed WordPress. If you have a **Managed VPS or Dedicated Server**, go to step 9.
8. If you have a **Turbo shared or reseller account**, follow these steps:
* In the directory where you installed WordPress, use your preferred text editor to open the *wp-config.php* file. Just above the **/ *"That's all, stop editing! Happy publishing.*/** line near the end of the file, paste the following text:
```
$redis_server = array(
'host' = '/home/username/.redis/redis.sock',
);
```
* Replace ***username*** with your own account username.
* Save your changes to the *wp-config.php* file, and then go to step 9.
9. To enable the object cache, type the following command:
```bash theme={null}
wp redis enable
```
10. You do not need to do anything further to take advantage of performance improvements from Redis caching. To view status information about the object cache, type the following command:
```bash theme={null}
wp redis info
```
To list all of the keys in the object cache, type the following command:
```bash theme={null}
redis-cli KEYS '*'
```
> To clear the entire cache at once, type the following command:
```bash theme={null}
redis-cli FLUSHALL
```
## More information
* For more information about Redis, please visit [https://redis.io](https://redis.io).
* To view the official WordPress documentation, please visit [https://codex.wordpress.org](https://codex.wordpress.org).
## Related articles
* [Using memcached on managed servers](/docs/using-memcached-on-managed-servers)
* [Optimizing WordPress with W3 Total Cache and GTmetrix](/docs/using-w3-total-cache-and-gtmetrix-to-optimize-wordpress)