> ## Documentation Index
> Fetch the complete documentation index at: https://kb.hosting.com/llms.txt
> Use this file to discover all available pages before exploring further.
# Generating a CSR and installing an SSL certificate in Plesk
> Generate a CSR and install an SSL certificate in Plesk with our step-by-step guide and video demo.
This article describes how to generate a Certificate Signing Request (CSR) and install an SSL certificate in Plesk.
Plesk is no longer included with new hosting.com plans, but it is still available on legacy Managed WordPress accounts. You can install Plesk manually on unmanaged VPS and Dedicated servers.
## Generating a Certificate Signing Request (CSR)
To watch a video that demonstrates the following procedure, please click below:
To generate a Certificate Signing Request for your site, follow these steps:
1. Log in to Plesk.
> 📘 Note
>
> If you do not know how to log in to your Plesk account, please see [this article](/docs/logging-in-and-out-of-plesk).
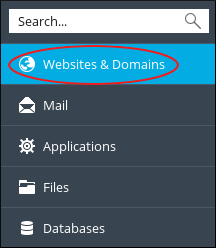
2. In the left sidebar, click **Websites & Domains**:\
3. Click **SSL/TLS Certificates**:\

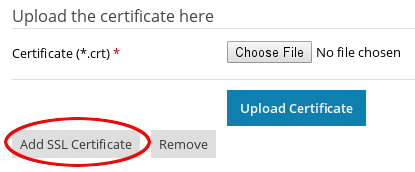
4. Click **Add SSL/TLS Certificate**:\
5. On the **Add SSL/TLS Certificate** page, complete the fields in the request form, and then click **Request**.
Most of the fields in the request form are self-explanatory, but a few fields require special attention:
* **Certificate name:** This is how the certificate is displayed in Plesk. To make it easy to identify later, you should use the domain name.
* **Domain name:** If you want your SSL certificate to protect the domain with and without the *www* prefix, you must type *www*, for example, *[www.example.com](http://www.example.com)*.
* A certificate for *[www.example.com](http://www.example.com)* protects both *example.com* and *[www.example.com](http://www.example.com)*.
* A certificate for *example.com* only protects *example.com*.
* **Email:** Plesk sends the CSR to this e-mail address.
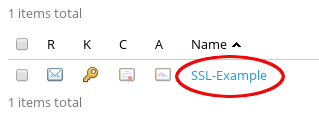
6. The **SSL Certificates** page for the domain appears. Click the certificate name:\
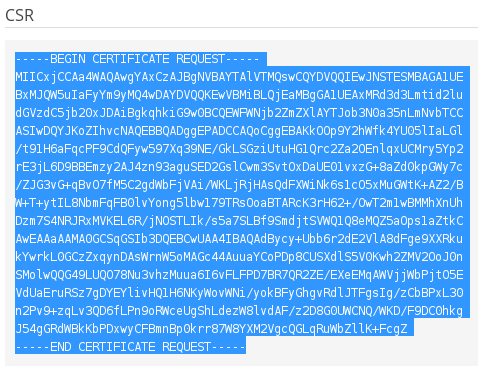
7. Scroll down to the **CSR** section, and then copy all of the text, including the **BEGIN CERTIFICATE REQUEST** and **END CERTIFICATE REQUEST** headers:\
## Ordering the SSL certificate
After you have generated a CSR, you are ready to order the SSL certificate. The following procedure demonstrates how to order an SSL certificate through the hosting.com Hosting Panel and submit the CSR to the signing authority. However, you can use the CSR to purchase an SSL certificate from another provider if you want.
To do this, follow these steps:
1. Log in to the [Hosting Panel](https://my.hosting.com).
> 📘 Note
>
> If you do not know how to log in to the Hosting Panel, please see [this article](/docs/accessing-the-hosting-panel).
2. Click **Place new order**.
3. On the hosting.com home page, click **Domains** and then click **SSL Certificates**.
4. Select the SSL certificate you want.
5. Review the order, and then click **Checkout** to complete the order process.
6. After you order the SSL certificate, you receive an e-mail message with the subject line **SSL Certificate Configuration Required**. Click the link inside the message to open it in your web browser.
7. From the SSL certificate configuration page, in the **Web Server Type** list box, select **Microsoft IIS 5.x and later**.
8. In the **CSR** text box, paste the CSR text you copied in the previous procedure.
9. Fill in the administrative contact information, and then click **Click to Continue**.
10. Select the e-mail address where you want to receive the approval message and SSL certificate, and then click **Finish**.
> 🚧 Important
>
> If the domain you are associating with this SSL certificate has WHOIS Protection (also called ID Protection or Privacy Protection) enabled, the default e-mail address may not be appropriate. You must use a valid e-mail address that is functioning and accessible. If none of the listed e-mail addresses have an associated account on your domain, you must create one. For information about how to create an e-mail account, please see [this article](/docs/e-mail-accounts).
11. To confirm the request, click the link in the approval message. After you confirm the request, the signing authority sends the SSL certificate by e-mail to the address that you specified.
## Installing the SSL certificate in Plesk
After you order and receive your SSL certificate, you are ready to install it in Plesk. To do this, follow these steps:
1. Log in to Plesk.
> 📘 Note
>
> If you do not know how to log in to your Plesk account, please see [this article](/docs/logging-in-and-out-of-plesk).
2. In the left sidebar, click **Websites & Domains**:\

3. Click **SSL Certificates**:\

4. The **SSL Certificates** page for the domain appears. Click the certificate name:\

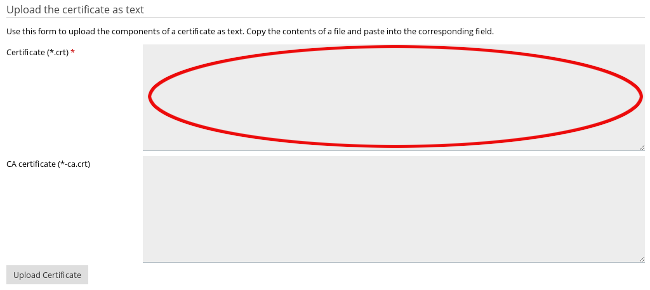
5. Scroll down to the **Upload the certificate as text** section, and then in the **Certificate (\*.crt)** text box, paste all of the certificate text, including the **BEGIN CERTIFICATE** and **END CERTIFICATE** headers:\
**Important**
If Plesk does not fill in the **CA certificate (\*-ca.crt)** text box automatically, you must copy the Intermediate Bundle
6. Click **Upload Certificate**. Plesk installs the certificate.
## Configuring the domain to use SSL
After you install the SSL certificate, you must enable SSL support for the domain in Plesk. To do this, follow these steps:
1. Log in to Plesk.
> 📘 Note
>
> If you do not know how to log in to your Plesk account, please see [this article](/docs/logging-in-and-out-of-plesk).
2. In the left sidebar, click **Websites & Domains**:\

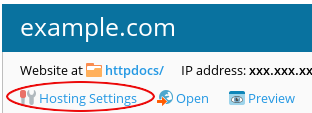
3. Click **Hosting Settings**:\
4. Under **Security**, select the **SSL support** check box:\
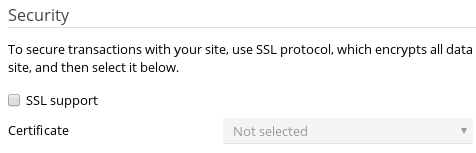
5. In the **Certificate** list box, select the SSL certificate you installed in the previous procedure.
6. Click **OK**.
## More information
For more information about Plesk, please visit [https://www.plesk.com](https://www.plesk.com).
## Related articles
* [Generating and renewing Let’s Encrypt SSL certificates in Plesk](/docs/generating-and-renewing-lets-encrypt-ssl-certificates-in-plesk)