> ## Documentation Index
> Fetch the complete documentation index at: https://kb.hosting.com/llms.txt
> Use this file to discover all available pages before exploring further.
# How to use SFTP on hosting.com Managed WordPress
> Learn how to use SFTP (Secure File Transfer Protocol) on hosting.com Managed WordPress. This article demonstrates how to configure FileZilla to use SFTP.
For SFTP access on hosting.com Managed WordPress, you must use key-based authentication. This method ensures strong encryption and a safer way to manage your site files versus using regular FTP.
The following procedures demonstrate how to generate an SSH key pair, add the public key in the hosting.com Dashboard, and configure the FileZilla application to connect to your account.
## Step 1: Generate an SSH key pair
To connect securely, you first generate an SSH key pair on your local device. (SFTP uses Secure Shell as the underlying protocol for authentication and encryption.) To do this, follow these steps:
1. Open your system’s terminal or command-line tool:
* Microsoft Windows: Use **Command Prompt** or **PowerShell**.
* Apple macOS and Linux: Use **Terminal**.
2. At the command prompt, type the following command:
```text theme={null}
ssh-keygen -t rsa
```
3. When you are prompted:
i. Press **Enter** to accept the default location (usually *\~/.ssh/id\_rsa* or similar).
ii. Leave the passphrase empty.
4. After the key pair is generated, to view and copy your **public key** type the following command:
```text theme={null}
more .ssh/id_rsa.pub
```
You will need the public key in the next procedure.
## Step 2: Add the public key in the hosting.com Dashboard
To add your public key in the hosting.com Dashboard, follow these steps:
1. Log in to the Hosting Panel at [https://my.hosting.com](https://my.hosting.com).
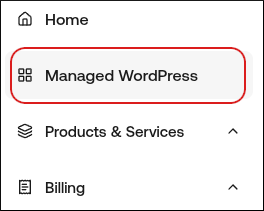
2. In the left sidebar, click **Managed WordPress**:
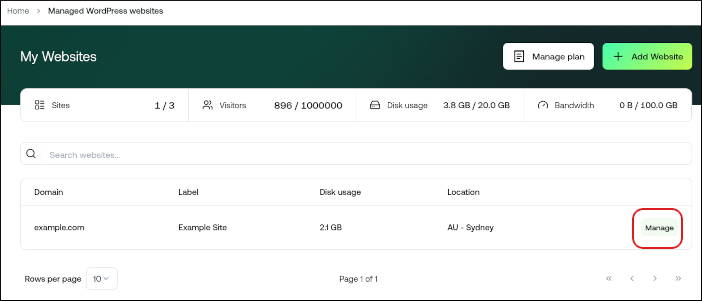
3. On the **My Websites** page, locate the site for which you want to enable SSH, and then click **Manage**:
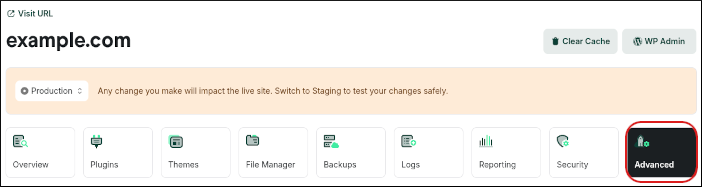
4. On the hosting.com dashboard, click the **Advanced** icon:
5. In the **Advanced Settings** section, click the **SSH Access** slider (if it is not already enabled):

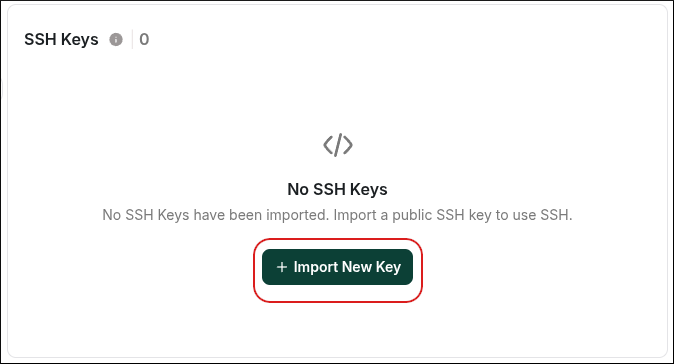
6. Click **Import New Key**:
7. In the **Import New Key** dialog box, in the **Key Name** text box, type a descriptive name for the key.
8. Leave the **Key Passphrase** text box blank.
9. In the **Key** text box, paste the public key.
10. Click **Import**.
11. After you import the key, authorize it by clicking the three-dots menu next to the key and selecting **Authorize**.
## Step 3: Set up your SFTP client (FileZilla)
Now that your public key is configured in the hosting.com Dashboard, it’s time to connect using an SFTP client. The following procedure demonstrates how to configure FileZilla:
1. Start FileZilla.
2. On the **Edit** menu, click **Settings**.
3. In the **Settings** dialog box, in the left sidebar, click **SFTP**:
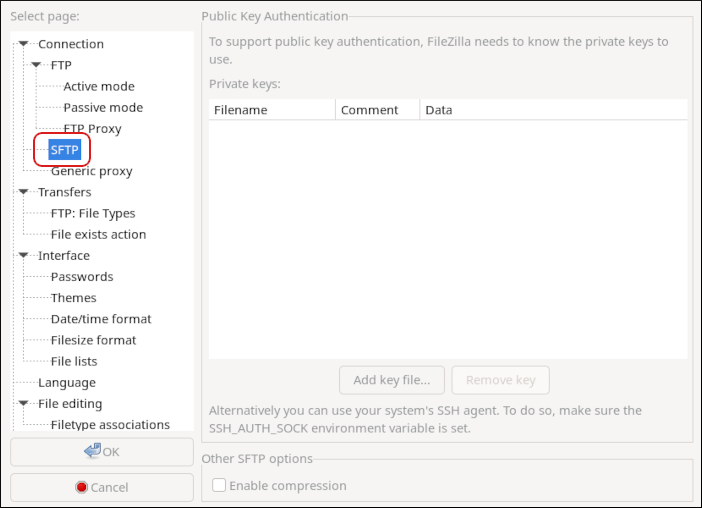
4. Click **Add key file**.
5. Select the **private key** file (*id\_rsa* or the file you generated earlier).
> 📘 Note
>
> If you are using FileZilla on Windows, you may need to convert the key to *.ppk* format using **PuTTYgen**.
6. Close the **Settings** dialog box.
7. On the **File** menu, click **Site Manager**. The **Site Manager** dialog appears.
8. Click **New Site**, type a name for the site, and then press Enter.
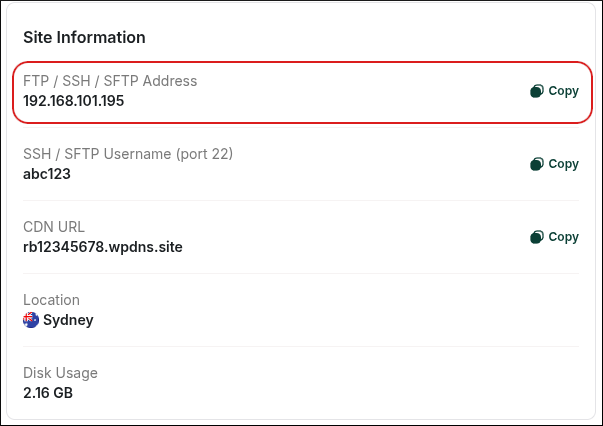
9. In the **Host** text box, type your server IP address.
> 👍 Tip
>
> You can find the server IP address on the **General** tab in the **Site Information** section, just above the **FTP Accounts** section:
>
> 
10. In the **Port** text box, type `22`.
11. In the **Protocol** list box, select **SFTP - SSH File Transfer Protocol**.
12. In the **Logon Type** list box, select **Normal**.
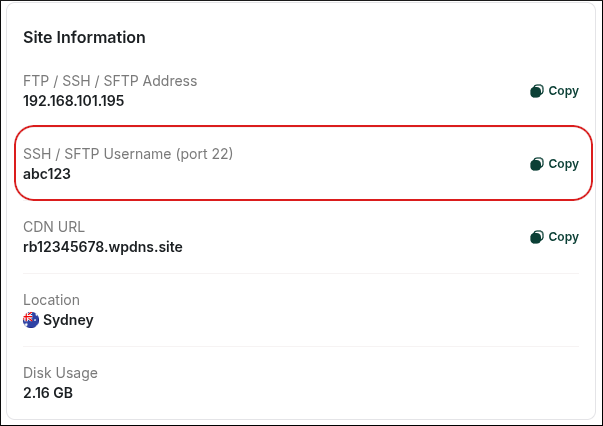
13. In the **User** text box, type your SFTP username.
> 👍 Tip
>
> You can find the SFTP username on the **General** tab in the **Site Information** section, just above the **FTP Accounts** section:
>
> 
14. Leave the **Password** text box blank.
15. Click **Connect**. After a few seconds, FileZilla establishes the connection.