> ## Documentation Index
> Fetch the complete documentation index at: https://kb.hosting.com/llms.txt
> Use this file to discover all available pages before exploring further.
# Implementing Google Authentication for WordPress
> Stop brute force attacks with Google Authenticator's time-limited codes. Learn to install it on WordPress for two-factor authentication.
Another way to prevent brute force login is to use a time-limited random security code provided by apps such as the Google authenticator, which acts as an additional layer of security to confirm a legitimate user. The Google Authenticator plugin for WordPress allows you to use the Google Authenticator app for Android/iPhone/Blackberry to perform two-factor authentication. This article explains how to install and configure the Google Authenticator plugin for [WordPress](https://hosting.com/hosting/platforms/wordpress-hosting/managed-wordpress-hosting/) as a two-factor authentication method.
## Installing Google Authenticator plugin
To install and configure Google Authenticator plugin, follow these steps:
1. Log in to your WordPress site with an administrator account.
2. On the **Dashboard** in the left sidebar, click **Plugins**, and then click **Add New**:\ 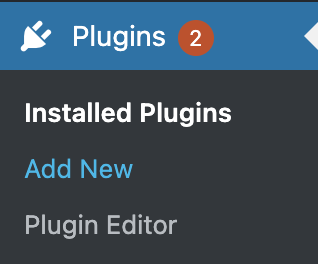 3. Search for "**Google Authentication**" click I **nstall**, and then click **Activate** to activate the plugin:\
 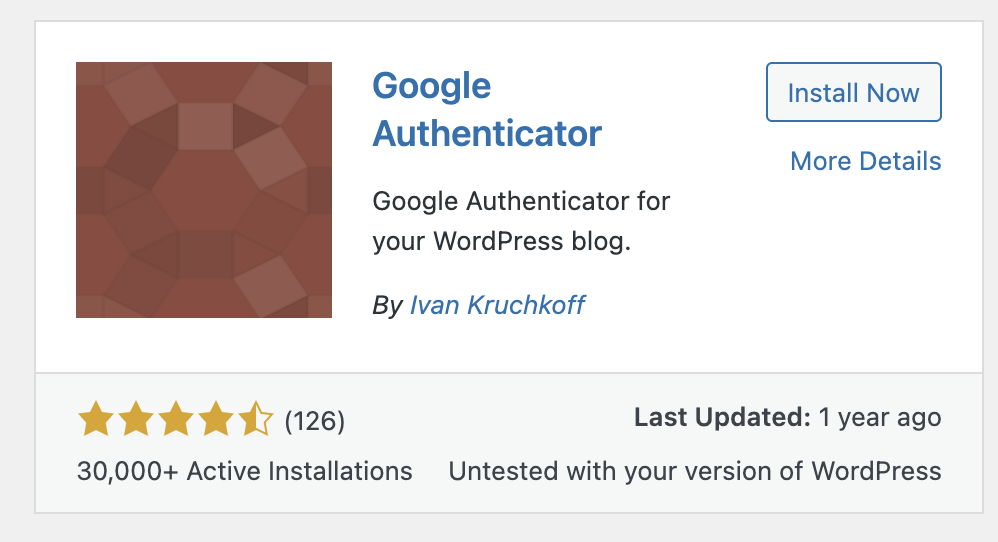 4. On the **Dashboard** in the left sidebar, on the admin user profile click **Edit** to set up the **Google Authentication** for the site:\
 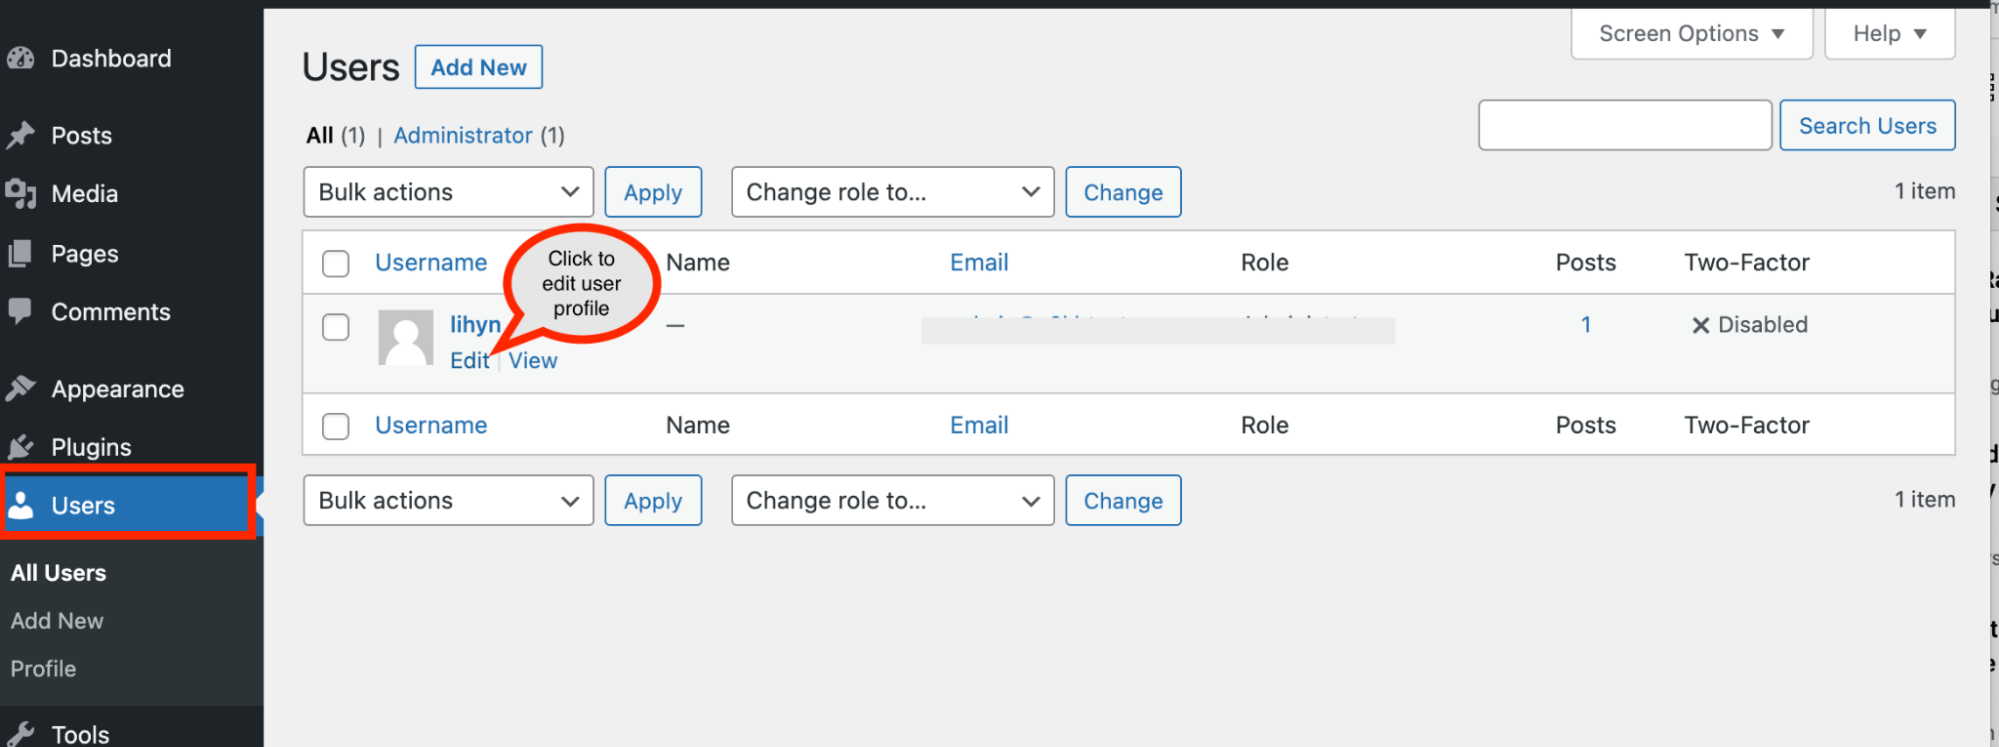 5. Scroll down to the **Google Authenticator Settings** on the profile page:\
 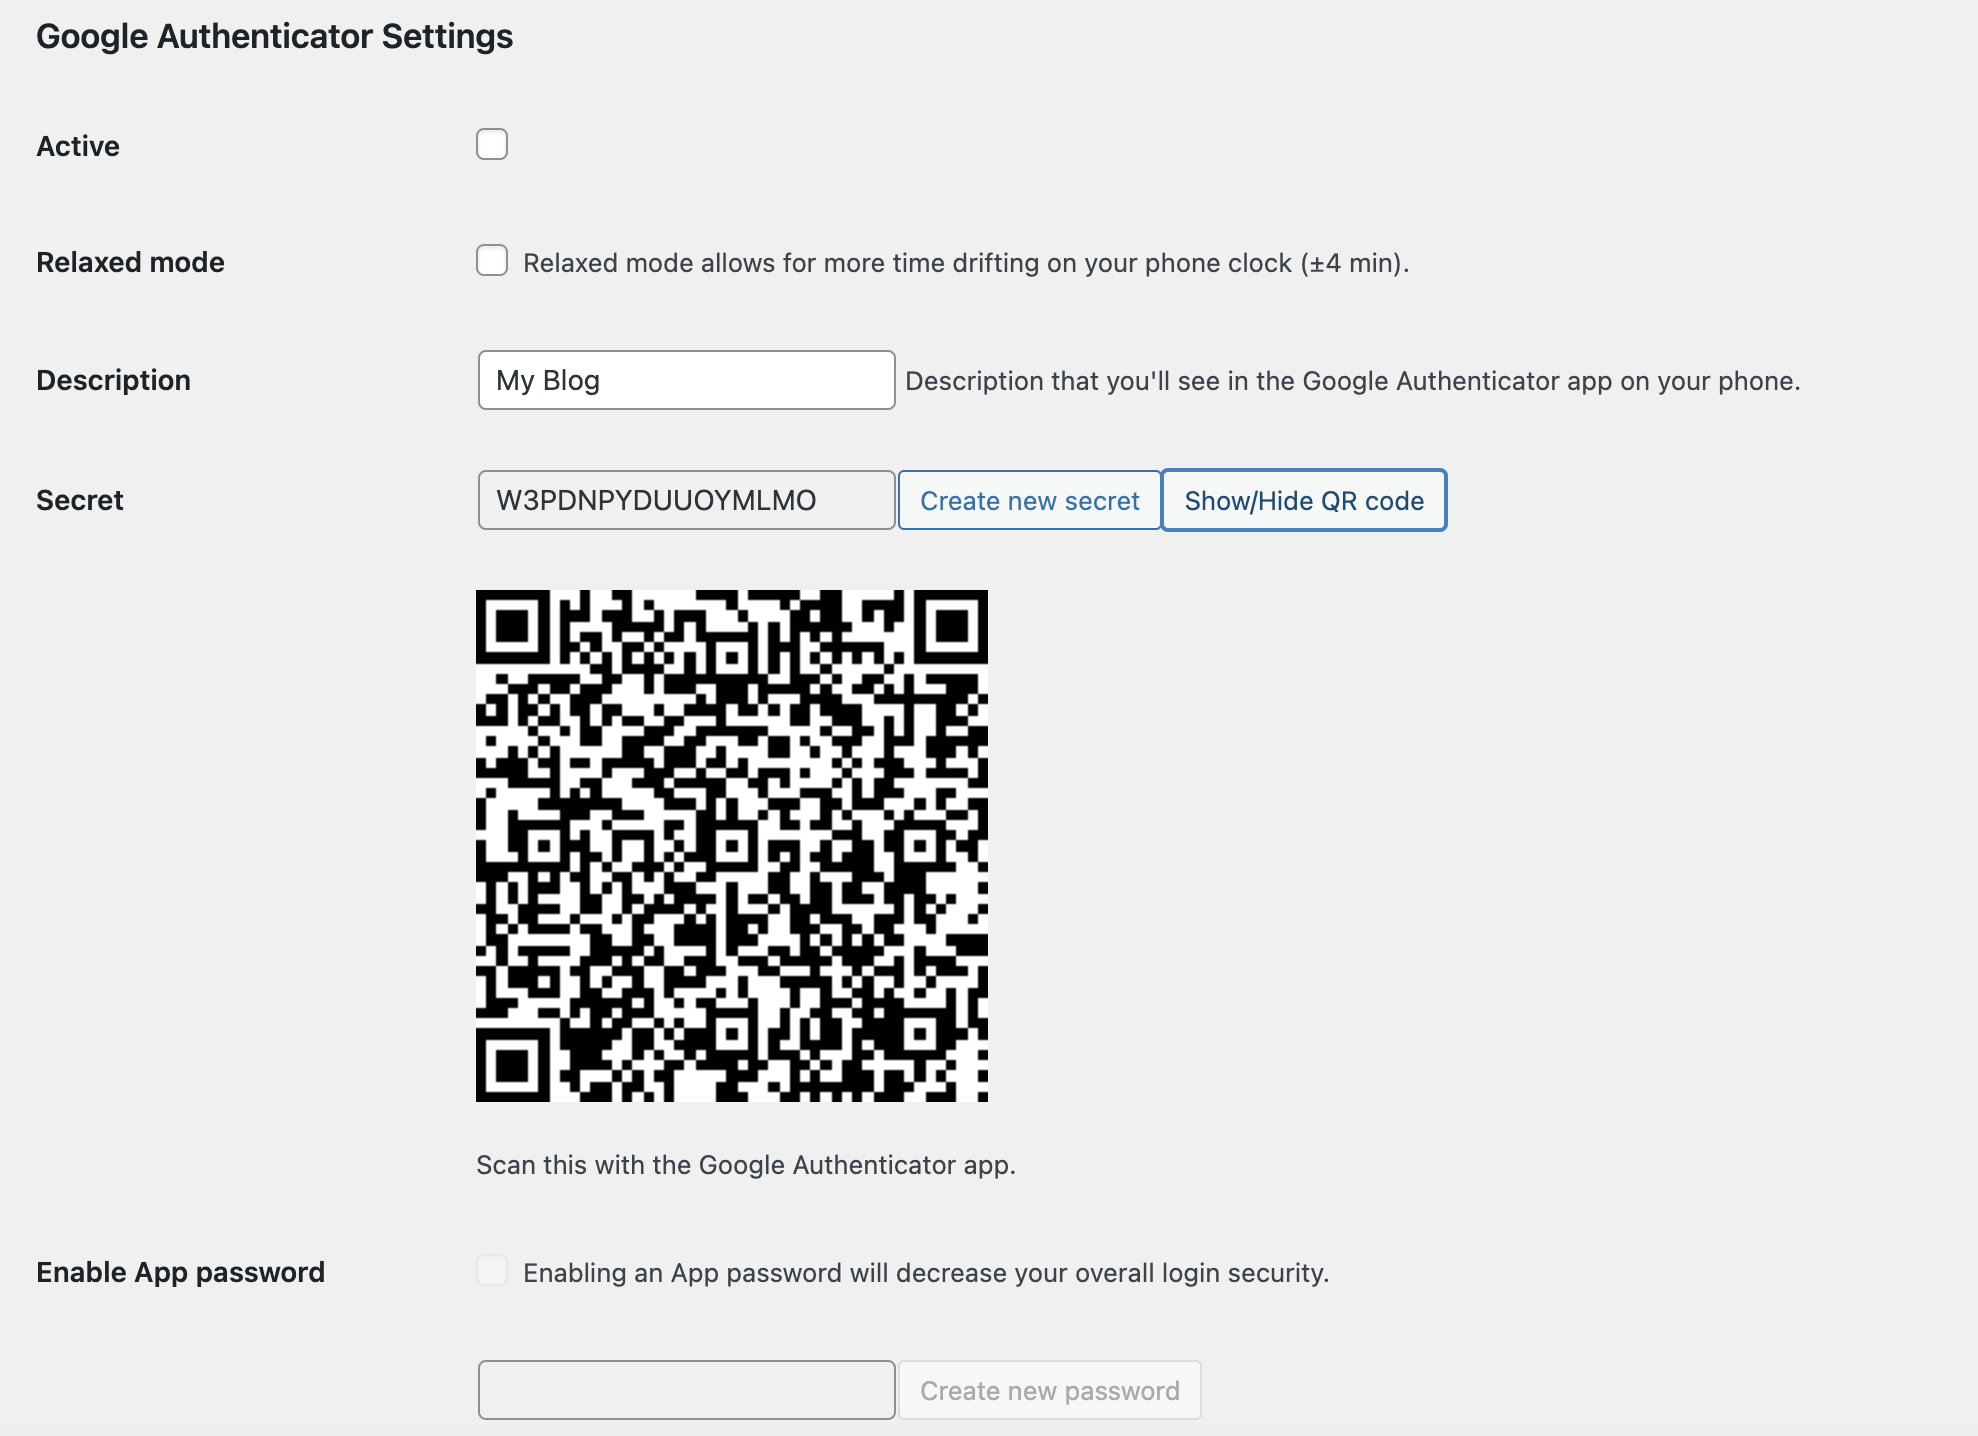 * Active – Check this box after the entire setup, this will activate the Google Authenticator for your site.
* Relaxed Mode – Google authenticator code expires every minute, using the relaxed mode will allow you to use one code for up to 4 minutes.
* Description and Secret Key – The description refers to the account name in the Google Authenticator app. The secret key is needed if the QR code is not used. Note: iPhone does not accept space for description.
* Enable App Password – Only use this option if the WordPress site uses XML-RPC (remote publishing).
6. Check the **Active** option, fill in the description and then click **Update User** to save the settings.
## Configuring a new account on iPhone App Google Authenticator
1. Click on the **Google Authenticator** app icon and then click on the **+ icon** to add a new account.
2. Scan the QR code or enter the secret key from the **Google Authenticator Settings** from the WordPress admin profile page:\
* Active – Check this box after the entire setup, this will activate the Google Authenticator for your site.
* Relaxed Mode – Google authenticator code expires every minute, using the relaxed mode will allow you to use one code for up to 4 minutes.
* Description and Secret Key – The description refers to the account name in the Google Authenticator app. The secret key is needed if the QR code is not used. Note: iPhone does not accept space for description.
* Enable App Password – Only use this option if the WordPress site uses XML-RPC (remote publishing).
6. Check the **Active** option, fill in the description and then click **Update User** to save the settings.
## Configuring a new account on iPhone App Google Authenticator
1. Click on the **Google Authenticator** app icon and then click on the **+ icon** to add a new account.
2. Scan the QR code or enter the secret key from the **Google Authenticator Settings** from the WordPress admin profile page:\ 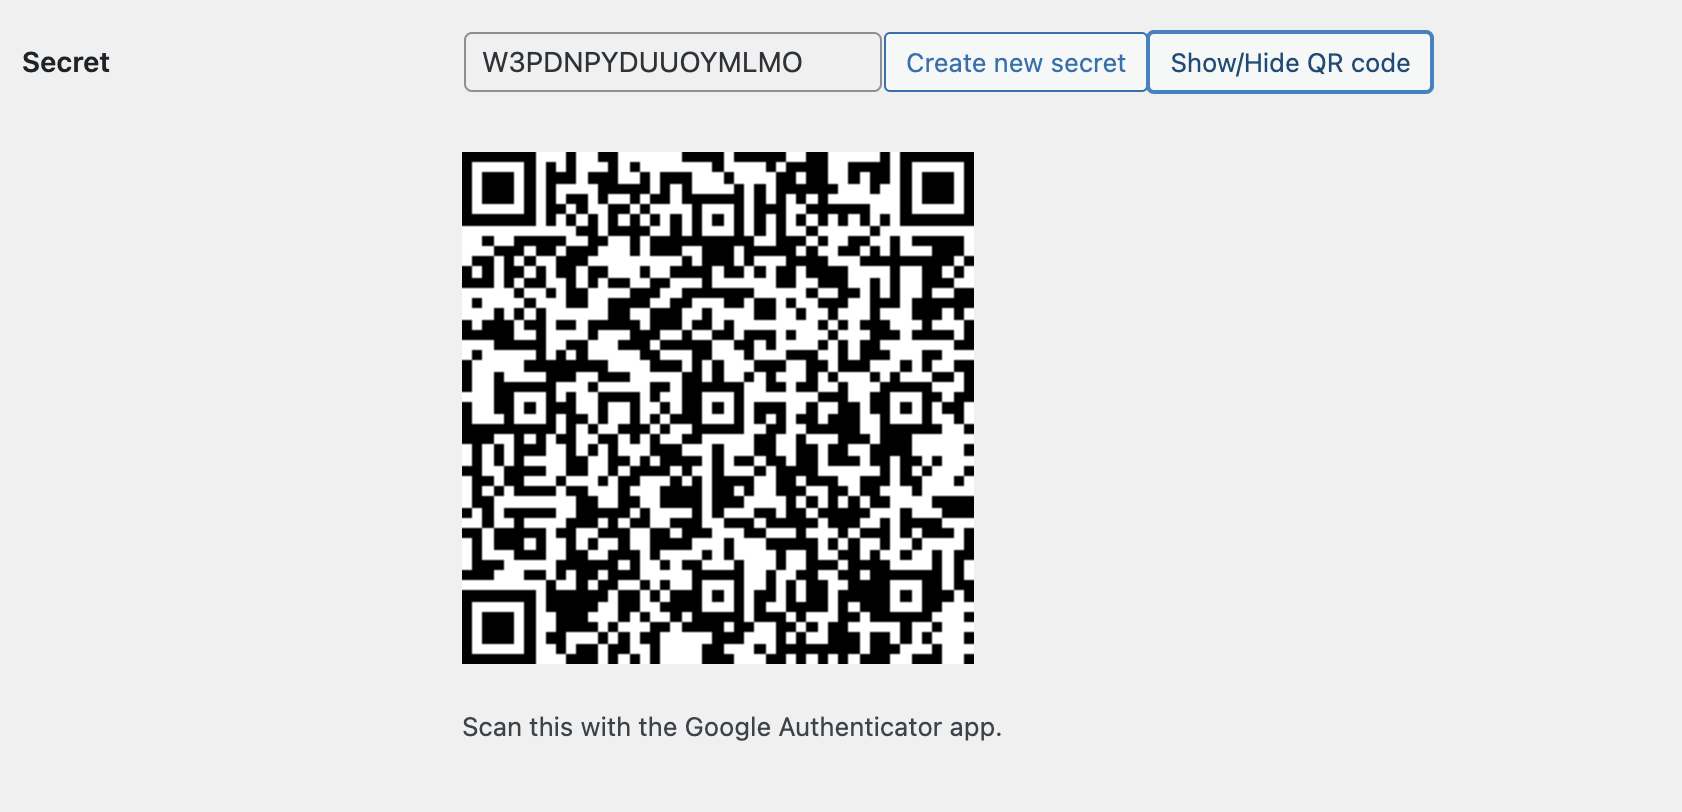 If you do not see the QR code, click\
**Click Show QR code** in WordPress to see the QR code.
3. The WordPress description will appear in the Google Authenticator once the secret code or barcode is provided. A random string of 6 digits will be displayed with a 1 minute counter next to it.
4. A two-step verification field will be displayed on the login screen that asks for Google Authenticator code upon successful configuration.
## More information
For more information about the Google Authenticator, please visit: [https://wordpress.org/plugins/google-authenticator/](https://wordpress.org/plugins/google-authenticator/)
## Related articles
* [Generating Google reCAPTCHA keys for site security](/docs/obtaining-google-recaptcha-site-key-and-secret-key)
* [WordPress security](/docs/wordpress-security)
* [Installing the Wordfence Security plugin](/docs/optimizing-the-wordfence-security-plugin)
If you do not see the QR code, click\
**Click Show QR code** in WordPress to see the QR code.
3. The WordPress description will appear in the Google Authenticator once the secret code or barcode is provided. A random string of 6 digits will be displayed with a 1 minute counter next to it.
4. A two-step verification field will be displayed on the login screen that asks for Google Authenticator code upon successful configuration.
## More information
For more information about the Google Authenticator, please visit: [https://wordpress.org/plugins/google-authenticator/](https://wordpress.org/plugins/google-authenticator/)
## Related articles
* [Generating Google reCAPTCHA keys for site security](/docs/obtaining-google-recaptcha-site-key-and-secret-key)
* [WordPress security](/docs/wordpress-security)
* [Installing the Wordfence Security plugin](/docs/optimizing-the-wordfence-security-plugin)