> ## Documentation Index
> Fetch the complete documentation index at: https://kb.hosting.com/llms.txt
> Use this file to discover all available pages before exploring further.
# Managing mailing lists in cPanel
> Learn how to manage mailing lists in cPanel with this helpful guide featuring step-by-step instructions on how to create, modify, manage, and delete them.
This article describes how to add, modify, and delete mailing lists in cPanel.
## About mailing lists
You can use cPanel to create, modify, and delete mailing lists for your web site. Using a mailing list, you can send one message to many recipients at the same time. For example, you might create a [customers@example.com](mailto:customers@example.com) mailing list that you use to send a message to all of your customers at once.
There are many configuration options available for mailing lists. You can specify the e-mail addresses in a list, define welcome messages for new subscribers, and more. cPanel uses the [Mailman](http://www.list.org/) list manager to provide this functionality.
Before you set up a mailing list, you should familiarize yourself with the definition of unsolicited e-mail (spam). For more information, please visit [http://en.wikipedia.org/wiki/Spam\_(electronic)](https://en.wikipedia.org/wiki/Spam_\(electronic\)) and [https://www.fcc.gov/guides/spam-unwanted-text-messages-and-email](https://www.fcc.gov/guides/spam-unwanted-text-messages-and-email).
## Creating a mailing list
To create a mailing list in cPanel, follow these steps:
1. Log in to cPanel.
> 📘 Note
>
> If you do not know how to log in to your cPanel account, please see [this article](/docs/accessing-cpanel).
2. On the **Tools** page, in the **Email** section, click **Mailing Lists**:\
3. Under **Create a Mailing List**, in the **List Name** text box, type the mailing list name that you want.
4. In the **Domain** list box, select the domain for the mailing list.
5. In the **Password** text box, type the mailing list password that you want.
6. In the **Password (Again)** text box, retype the mailing list password.
> 👍 Tip
>
> Alternatively, you can click **Password Generator** and cPanel generates a random, strong password for you.
7. Under **Access Type**, select **Public** or **Private**:
* *Public* mailing lists have public archives, anyone can subscribe, and the list is advertised on the Mailman page.
* *Private* mailing lists have private archives, an administrator must approve new subscribers, and the list is not advertised on the Mailman page.
> 📘 Note
>
> Most mailing lists are private, not public.
8. Click **Add**. cPanel creates the mailing list.
## Managing a mailing list
After you create a mailing list, you can manage it. To do this, follow these steps:
1. Log in to cPanel.
> 📘 Note
>
> If you do not know how to log in to your cPanel account, please see [this article](/docs/accessing-cpanel).
2. On the **Tools** page, in the **Email** section, click **Mailing Lists**:\

3. Under **Current Lists**, locate the mailing list that you want to manage, and then click one of the following options:
* **Change Password**: Select this option to change the mailing list password.
* **Manage**: Select this option to access the Mailman administration page.
> 📘 Note
>
> * There are many configuration options available for mailing lists. For more information, please see the Mailman documentation at [http://www.list.org/docs.html](http://www.list.org/docs.html).
>
> * To reference another mailing list in the Mailman administration interface, use the full e-mail address (including the domain name), and replace the ' **@** ' character with an underscore character ( **\_** ) instead. For example, to specify the [*all@example.com*](mailto:_all@example.com_) address in the **accept\_these\_nonmembers** filter, type `all_example.com`. This special syntax is necessary because in a shared hosting environment, multiple accounts on the server may use the same mailing list name (for example, [*all@example.com*](mailto:_all@example.com_) and [*all@example-2.com*](mailto:_all@example-2.com_) ).
* **Delegation**: Select this option to allow other users to administer the mailing list. Under **Available Users**, double-click the user or users that you want to have administrative privileges for the list to move them to the **List Administrators** field on the right, and then click **Save**. Similarly, to revoke mailing list administrative privileges for a user, under **List Administrators** double-click the user to move them to the **Available Users** field on the left, and then click **Save**.
### Adding members to a mailing list
To add members (subscribers) to a mailing list, follow these steps:
1. Log in to cPanel.
> 📘 Note
>
> If you do not know how to log in to your cPanel account, please see [this article](/docs/accessing-cpanel).
2. On the **Tools** page, in the **Email** section, click **Mailing Lists**:\

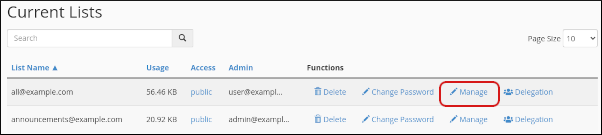
3. Under **Current Lists**, locate the mailing list to which you want to add members, and then click **Manage**:\
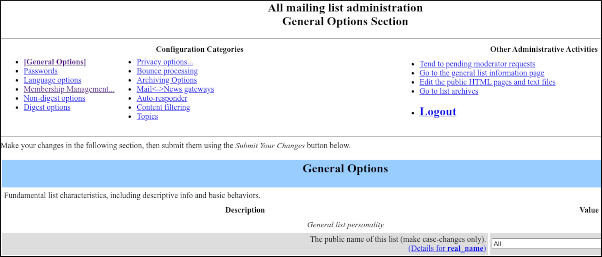
The mailing list administration interface appears:\
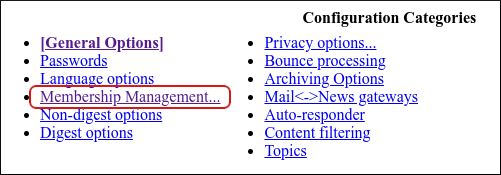
4. Click **Membership Management**:\
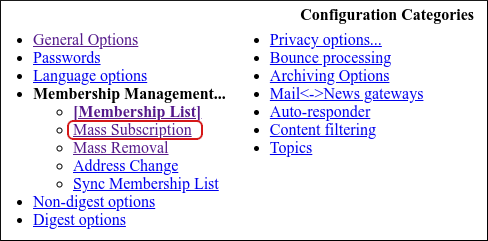
5. Under **Membership Management**, click **Mass Subscription**:\
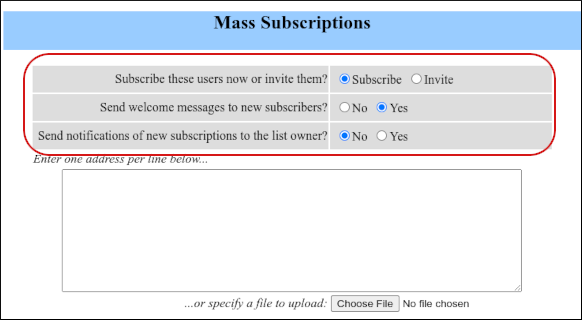
6. Review the subscription options, and change them if you want:\
7. Specify the new subscribers to add:
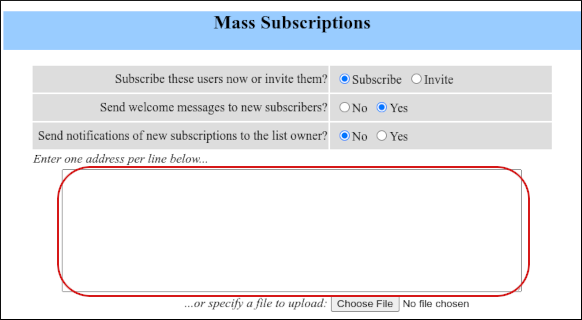
* You can manually type addresses in the text box:\
* Alternatively, you can upload a file in text format that contains a list of the new subscriber email addresses.
> 👍 Tip
>
> This must be a text-only file, with each address separated by a carriage return.
8. Click **Submit Your Changes**.
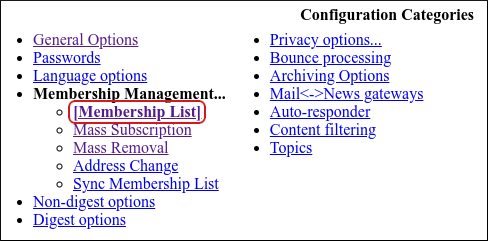
9. Under **Membership Management**, click **Membership List**:\
10. The new subscribers appear in the list:\
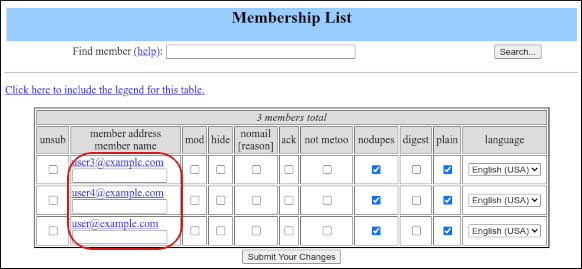
### Removing members from a mailing list
To remove (unsubscribe) members from a mailing list, follow these steps:
1. Log in to cPanel.
> 📘 Note
>
> If you do not know how to log in to your cPanel account, please see [this article](/docs/accessing-cpanel).
2. On the **Tools** page, in the **Email** section, click **Mailing Lists**:\

3. Under **Current Lists**, locate the mailing list from which you want to remove members, and then click **Manage**:\

The mailing list administration interface appears:\

4. Click **Membership Management**:\

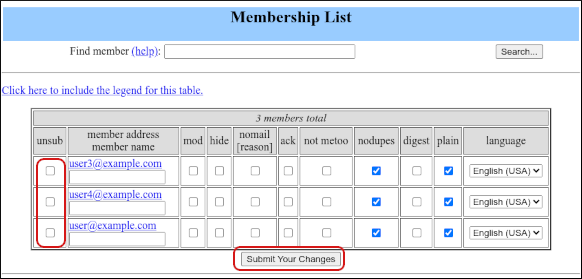
5. The membership list appears. In the **unsub** column, select the check box next to the member (or members) you want to remove, and then click **Submit Your Changes**:\
> 👍 Tip
>
> Alternatively, you can use the mass removal tool to unsubscribe multiple members:
>
> 1. Click **Membership Management**:\
> 
>
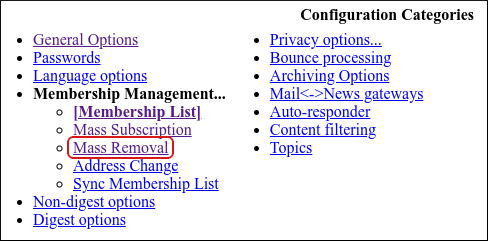
> 2. Under **Membership Management**, click **Mass Removal**:
>
> 
>
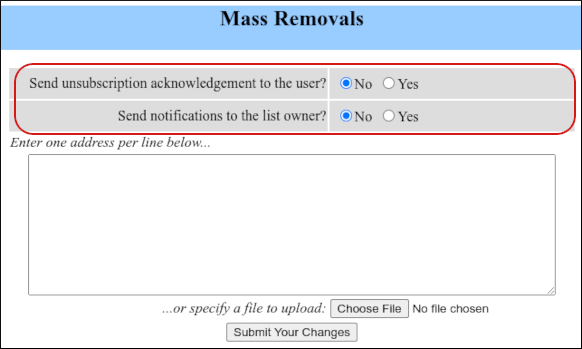
> 3. Review the unsubscribe options, and change them if you want:
>
> 
>
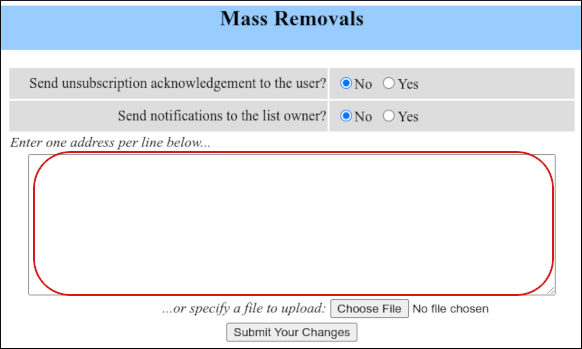
> 4. Specify the subscribers to remove:
>
> * You can manually type addresses in the text box:\
> 
>
> * Alternatively, you can upload a file in text format that contains a list of the subscriber email addresses. This must be a text-only file, with each address separated by a carriage return.
>
> 5. Click **Submit Your Changes**.
6. Under **Membership Management**, click **Membership List**:\

7. The subscribers no longer appear in the list.
## Sending messages to a mailing list
After you create a mailing list, you should send a test message to ensure it is working correctly. To do this, follow these steps:
1. Log in to cPanel.
> 📘 Note
>
> If you do not know how to log in to your cPanel account, please see [this article](/docs/accessing-cpanel).
2. On the **Tools** page, in the **Email** section, click **Email Accounts**:\
3. Locate the account you want to use for the test, and then click **Check Email**.
4. In the webmail interface for the account, compose a message and send it to the mailing list address you created in the **Creating a mailing list** section above.
5. The mailing list members should receive the message.
## Deleting a mailing list
**️ Warning**
When you delete a mailing list, all archives, current e-mail, and member e-mail addresses are also deleted. If you want to retain any of this information, make sure that you download or copy these files **before** you delete a mailing list. After you delete a mailing list, the information is unrecoverable.
To delete a mailing list in cPanel, follow these steps:
1. Log in to cPanel.
> 📘 Note
>
> If you do not know how to log in to your cPanel account, please see [this article](/docs/accessing-cpanel).
2. On the **Tools** page, in the **Email** section, click **Mailing Lists**:\

3. Under **Current Lists**, locate the mailing list that you want to delete, and then click **Delete**.
4. Click **Delete Mailing List** to confirm. cPanel deletes the mailing list.
## Related articles
* [E-mail Accounts](/docs/e-mail-accounts)
* [Import e-mail accounts and forwarders](/docs/import-e-mail-accounts-and-forwarders)
* [Autoresponders](/docs/cpanel-auto-responders)
* [E-mail forwarders](/docs/e-mail-forwarders)
* [Unwanted email (spam)](/docs/unwanted-e-mail-spam)