> ## Documentation Index
> Fetch the complete documentation index at: https://kb.hosting.com/llms.txt
> Use this file to discover all available pages before exploring further.
# Managing DNS zones in Plesk
> Learn to manage DNS zones in Plesk with our video guide, step-by-step instructions, and tips on adding DNS records.
This article describes how to manage DNS zones for a domain in Plesk.
Plesk is no longer included with new hosting.com plans, but it is still available on legacy Managed WordPress accounts. You can install Plesk manually on unmanaged VPS and Dedicated servers.
## Managing DNS zones
To watch a video that demonstrates the following procedure, please click below:
To manage the DNS zone for a domain, follow these steps:
1. Log in to Plesk.
> 📘 Note
>
> If you do not know how to log in to your Plesk account, please see [this article](/docs/logging-in-and-out-of-plesk).
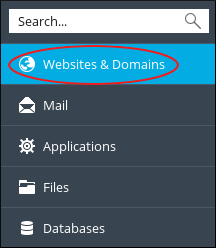
2. In the left sidebar, click **Websites & Domains**:\
3. Click **DNS Settings**:\

4. On the **DNS** tab several settings are available:
* To turn off DNS entirely, click **Disable**.
* To switch between using the Plesk DNS server as a master or slave, click **Master/Slave**.
> 📘 Note
>
> If you want to use an external DNS zone for the domain, make sure you set the Plesk DNS server to act as a slave.
* To restore the default DNS settings, click **Reset to Default**.
### Adding DNS records
You can add many different types of records to the DNS zone for a domain (for example, *CNAME*, *MX*, *PTR*, and more). The following procedure demonstrates how to add an **A** record to the DNS zone. An **A** record enables you to point a subdomain to an IP address:
1. Log in to Plesk.
> 📘 Note
>
> If you do not know how to log in to your Plesk account, please see [this article](/docs/logging-in-and-out-of-plesk).
2. In the left sidebar, click **Websites & Domains**:\

3. Click **DNS Settings**:\

4. Click **Add Record**.
5. In the **Record type** list box, select the type of record you want to create. In this example, select **A**.
6. In the **Domain name** text box, type the name of the subdomain.
7. In the **IP address** text box, type the IP address of the server.
8. Click **OK**. Plesk creates the DNS record, but does not activate it.
9. Click **Update**. Plesk activates the new record.
If you change your mind and decide that you do not want to enable the new record, click **Revert** .
### Deleting DNS records
To delete a DNS record for a domain, follow these steps:
1. Log in to Plesk.
> 📘 Note
>
> If you do not know how to log in to your Plesk account, please see [this article](/docs/logging-in-and-out-of-plesk).
2. In the left sidebar, click **Websites & Domains**:\

3. Click **DNS Settings**:\

4. In the list of records, select the check box next to the record that you want to delete.
5. Click **Remove**.
6. To confirm the record deletion, click **Yes**. Plesk deletes the DNS record.
## More information
For more information about Plesk, please visit [https://www.plesk.com](https://www.plesk.com).
## Related articles
* [Getting started with Plesk](/docs/getting-started-with-plesk)