> ## Documentation Index
> Fetch the complete documentation index at: https://kb.hosting.com/llms.txt
> Use this file to discover all available pages before exploring further.
# Managing WordPress using the cPanel WP Toolkit
> Effortlessly manage your WordPress site with cPanel's WP Toolkit: handle updates, security, backups, and more.
This article describes how to quickly and easily manage your WordPress site using the WP Toolkit in cPanel. The WP Toolkit provides a convenient, easy-to-use interface directly within cPanel that you can use to configure and manage WordPress websites.
This article assumes that you have already installed a WordPress site using the WP Toolkit. If you have not installed WordPress yet, please see [this article](/docs/installing-wordpress-with-the-cpanel-wordpress-toolkit) for information about how to do so.
## Managing WordPress sites
To manage an existing WordPress site using the WP Toolkit, follow these steps:
1. Log in to cPanel.
> 📘 Note
>
> If you do not know how to log in to your cPanel account, please see [this article](/docs/accessing-cpanel).
2. On the **Tools** page, in the **Domains** section, click **WP Toolkit**:\

3. The WP Toolkit page appears with a list of installed WordPress sites:\
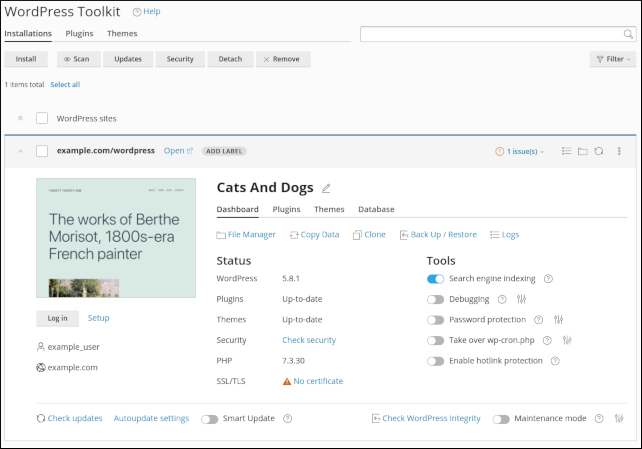
4. There are several options available for installed sites:
* To view the site, click **Open**.
* To log in to the site, click **Log in**.
* To change various site settings, such as the login URL, login password, administrator's e-mail address, and site language, click **Setup**.
* To view and manage the files for your site in the cPanel File Manager, click **File Manager**.
* To copy files from one WordPress installation to another, click **Copy Data**.
* To view logs for the site, click **Logs**.
* To place the site in maintenance mode, click the **Maintenance mode** slider. To customize maintenance mode settings, such as the maintenance message that appears to site visitors, click the  icon.
* To enable or disable search engine indexing, click the **Search engine indexing** slider.
> 📘 Note
>
> You may want to disable search engine indexing if your site is still under development or otherwise not ready for public viewing.
* To enable or disable WordPress debugging, click the **Debugging** slider.
* To enable or disable password protection, click the **Password protection** slider.
> 📘 Note
>
> When this option is enabled, **all** site visitors must provide a username and password to access the site.
* To enable or disable search engine indexing, click the **Take over wp-cron.php** slider.
> 📘 Note
>
> Use this option to disable the WordPress built-in pseudo-"cron" routine. For more information, please see [this article](/docs/configuring-a-cron-job-for-wordpress).
* To enable or disable hotlink protection, click the **Enable hotlink protection** slider.
> 📘 Note
>
> Hotlink protection prevents other websites from displaying, linking, or embedding your images, and as a result using your bandwidth. For more information, please see [this article](/docs/hotlink-protection).
For information about additional site management options, see the following sections.
### Checking site security
With WP Toolkit, you can check your site's security, and even fix issues, all from one convenient interface. To do this, follow these steps:
1. From the WP Toolkit main page, in a site list entry, under **Status**, click **Check security**. WP Toolkit begins scanning your site.
2. When the scan is complete, WP Toolkit displays a list of issues found and suggested improvements:\
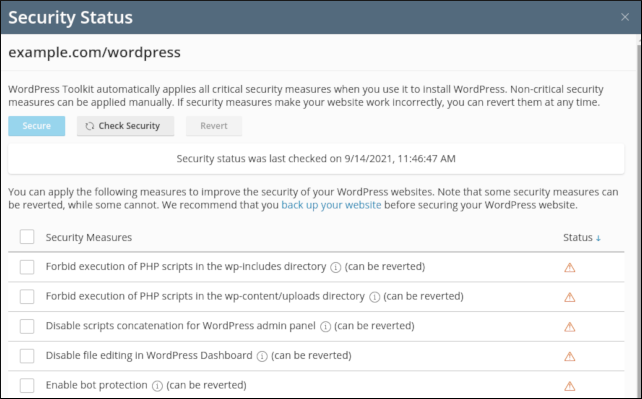
3. To resolve an issue immediately, select the check box next to the issue, and then click **Secure**.
4. You can also check the integrity of WordPress application files. To do this, click **Check WordPress integrity**, and then click **Verify Checksums**. WP Toolkit checks the files on your account against the reference checksums at *wordpress.org* to ensure that no files have been tampered with.
### Updating WordPress
WP Toolkit makes updating your site—and keeping it updated—simple. To do this, follow these steps:
1. From the WP Toolkit main page, in a site list entry, click **Autoupdate settings**. Select how you want to handle updates for WordPress core, plugins, and themes, and then click **OK**.
2. Click **Check updates**. WP Toolkit checks for available updates:\
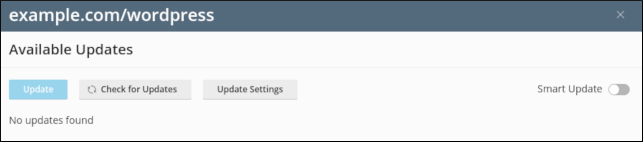
3. If WP Toolkit finds any available updates, review and select them, and then click **Update**.
4. To enable Smart Update, click the **Smart Update** slider.
Smart Update enables you to test an update without actually affecting the site. Smart Update does this by creating a full clone of the website, running a number of preliminary checks, updating the cloned website, and running the checks again to see if the update breaks anything. The results include before-and-after screenshots that you can compare to make an informed decision about whether or not to proceed with the update on your "live" site.
### Cloning WordPress
You can clone (create an exact copy of) an existing WordPress installation. This can be helpful during development, or for testing out a new theme, plugin, or site design.
To clone a site, follow these steps:
1. From the WP Toolkit main page, in a site list entry, click **Clone**.
2. You can clone a site to a new subdomain, or use an existing domain or subdomain.
3. To change the database name, type the new name in the **Name** text box.
4. Click **Start**. WP Toolkit begins cloning the site.
5. When cloning is complete, click **Close**. You now have an exact copy of your site.
### Backing up and restoring WordPress
WP Toolkit makes backup and restore management easy. To back up and restore your site, follow these steps:
1. From the WP Toolkit main page, in a site list entry, click **Back Up / Restore**.
2. To generate a backup, click **Back Up**:\
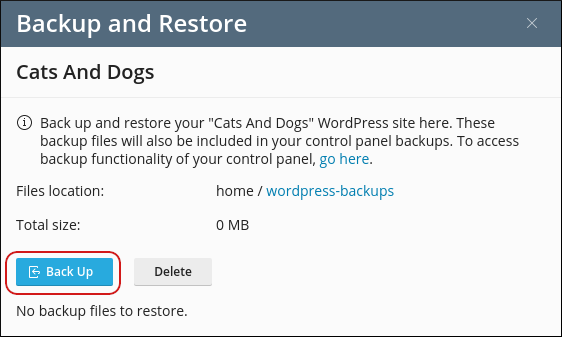
3. After you have created at least one backup, you can restore, download, or delete it:
* To restore a backup, click the restore icon:\

* To download a backup, click the download icon:\

* To delete a backup, click the delete icon:\

### Detaching WordPress
You may want to remove (detach) a WordPress installation from WP Toolkit. When you do this, you can no longer use WP Toolkit to manage the installation. To do this, follow these steps:
1. From the WP Toolkit main page, in a site list entry, click the  icon, and then click **Detach**:\
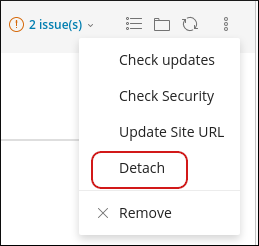
2. In the **Detaching WordPress Websites** dialog box, click **Detach** to confirm. WP Toolkit detaches the installation.
### Deleting WordPress
You may want to delete a WordPress installation altogether. To do this, follow these steps:
1. From the WP Toolkit main page, in a site list entry, click the  icon, and then click **Remove**:\
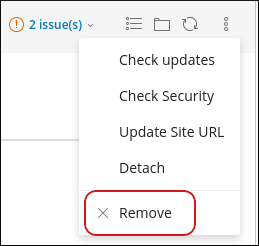
2. Select the components you want to remove, and then click **Yes**. WP Toolkit deletes the items you specified.
## More information
* For more information about WP Toolkit, please visit [https://www.cpanel.net/wp-toolkit](https://www.cpanel.net/wp-toolkit).
* For more information about WordPress, please visit [https://wordpress.org](https://wordpress.org).
## Related articles
* [Managing plugins with the cPanel WP Toolkit](/docs/managing-plugins-with-the-cpanel-wordpress-toolkit)
* [Managing themes with the cPanel WP Toolkit](/docs/managing-themes-with-the-cpanel-wordpress-toolkit)
* [Installing WordPress with the cPanel WP Toolkit](/docs/installing-wordpress-with-the-cpanel-wordpress-toolkit)
* [Updating WordPress](/docs/updating-wordpress)
* [Staging WordPress with the cPanel WP Toolkit](/docs/staging-wordpress-with-the-cpanel-wordpress-toolkit)