> ## Documentation Index
> Fetch the complete documentation index at: https://kb.hosting.com/llms.txt
> Use this file to discover all available pages before exploring further.
# Publishing your website with WebSite X5
> Publish your Website X5 site effortlessly with our step-by-step guide.
This article describes how to publish your web site developed with WebSite X5 to a hosting.com server.
This article assumes that you have already created a web site using WebSite X5, and you are ready to publish it to a hosting.com web server. For general information about how to use WebSite X5 to create a web site, please visit [http://www.websitex5.com/](http://www.websitex5.com/).
## Publishing a WebSite X5 web site to a hosting.com server
After you create a web site in WebSite X5, you can publish it to the hosting.com server associated with your account. For information about how to do this, please watch the following video:
For step-by-step instructions about how publish a WebSite X5 site to a hosting.com server, follow these steps:
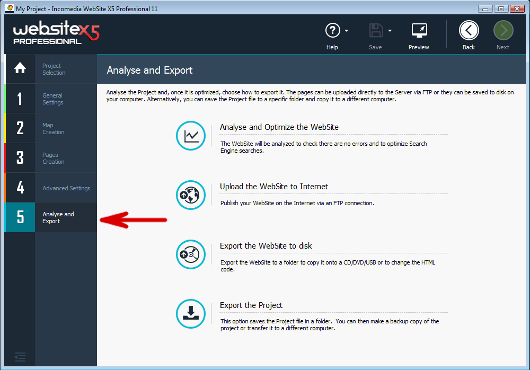
1. In WebSite X5, click **Analyse and Export**:\
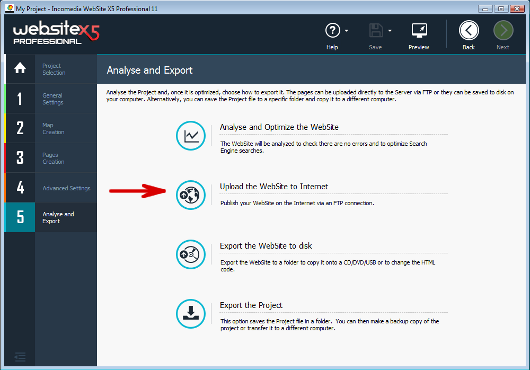
2. Click **Upload the WebSite to Internet**:\
3. The **Website Export to Internet** page appears:\
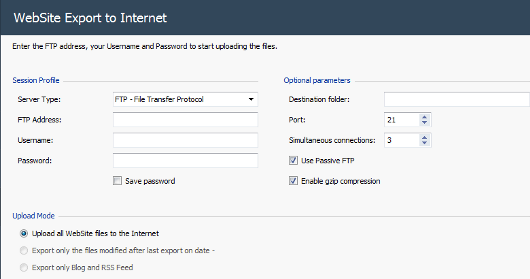
4. Under **Session Profile**, in the **Server Type** list box, select **SFTP - SSH File Transfer Protocol**.
5. In the **FTP Address** text box, type the name of the hosting.com server where your account is located.
For information about how to determine your account's server name, please see [this article](/docs/determining-your-accounts-server-name).
6. In the **Username** text box, type your hosting.com account (cPanel) username.
7. In the **Password** text box, type your hosting.com account (cPanel) password.
If you do not know your cPanel username or password, you can use the hosting.com Hosting Panel to view it. For more information, please see [this article](/docs/viewing-and-changing-login-settings-for-shared-hosting-accounts).
8. If you want WebSite X5 to remember your password, select the **Save password** check box.
9. Under **Optional parameters**, in the **Destination folder** text box, type `public_html`.
10. In the **Port** text box, type `22`.
**Important**
Make sure you use the correct SSH port number for your account. For example, some hosting accounts use a different port for SSH, such as 7822.
11. Under **Upload Mode**, confirm that **Upload all WebSite files to the Internet** is selected.
12. Click **Next**. WebSite X5 connects to your account.
13. On the **WebSite Export to Internet** page, confirm that the **Path** is set to **public\_html**:\
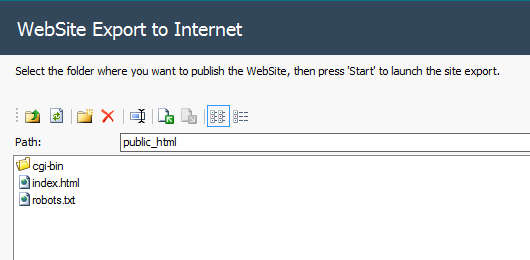
14. Click **Start**. WebSite X5 begins uploading your files to the web server.
If you receive a message about overwriting files, click **Yes**.
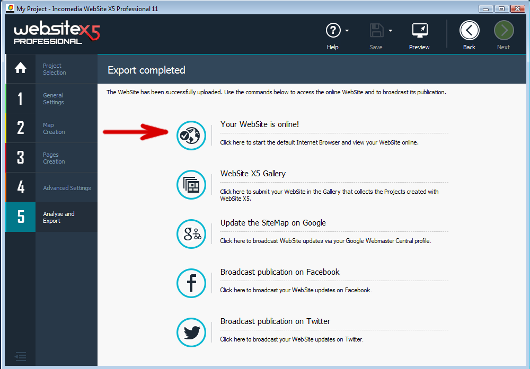
15. When WebSite X5 finishes publishing your web site to the hosting.com server, visitors on the Internet can view it in their web browsers. To view your live website, click **Your Website is online!**\
## More information
For more information about WebSite X5, please visit [http://www.websitex5.com](http://www.websitex5.com/).