> ## Documentation Index
> Fetch the complete documentation index at: https://kb.hosting.com/llms.txt
> Use this file to discover all available pages before exploring further.
# Installing and configuring Really Simple SSL WordPress plugin
> Learn how to configure a Really Simple SSL plugin in WordPress.
HTTPS transfer protocol became an important part of websites because it helped keep your site and your users' data safe. Since 2018, major search engines have given higher rankings to secure sites. Without HTTPS, you are sending any request insecurely with every post edit or plugin settings change. This article will show you how to easily activate SSL on your [WordPress](https://hosting.com/hosting/platforms/wordpress-hosting/managed-wordpress-hosting/) site using the Really Simple SSL plugin.
## Configuring Really Simple SSL plugin in WordPress
To use the Really Simple SSL in your WordPress website, follow these steps:
1. Log in to your **WordPress** site with an administrator account.
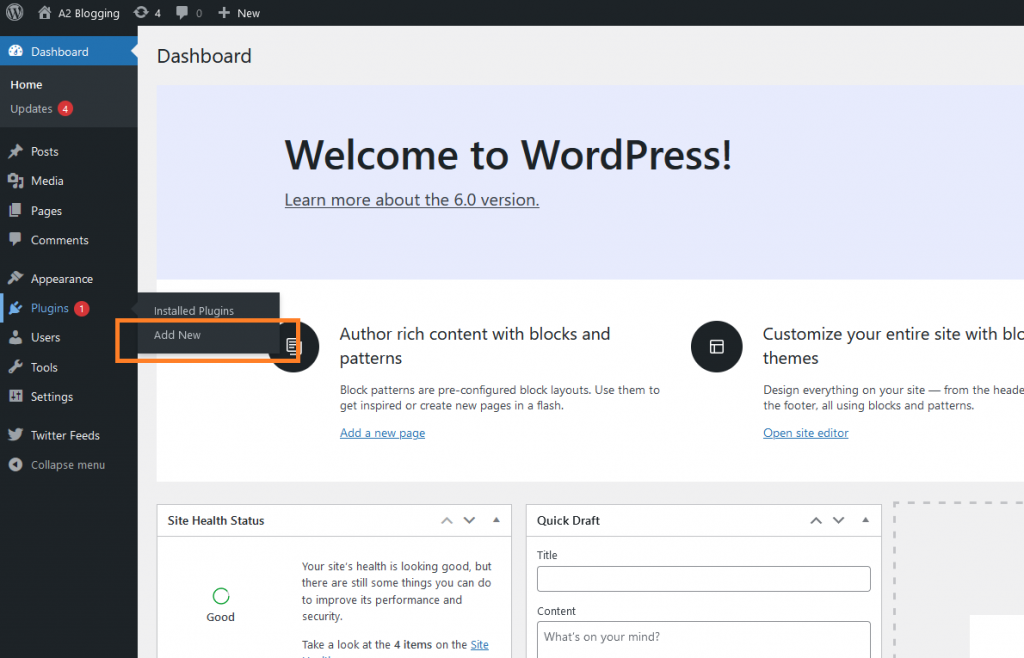
2. On the **Dashboard** in the left sidebar, click **Plugins**, and then click **Add New**:\
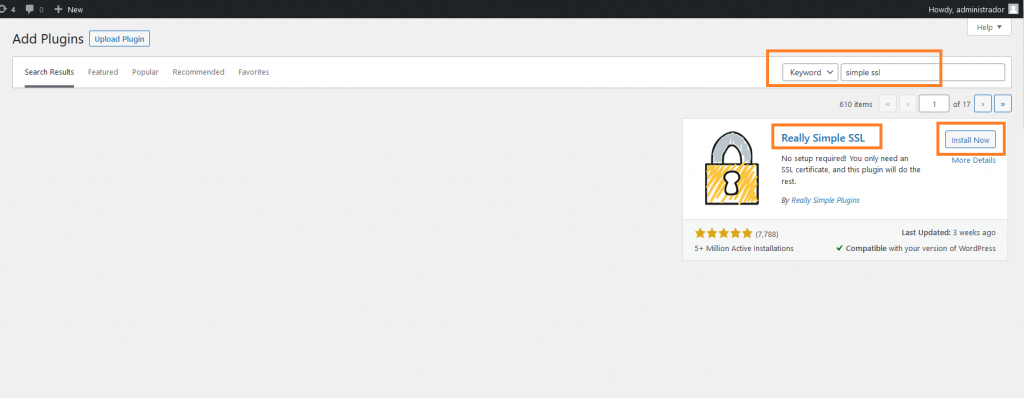
3. Search for "**Simple SSL**". **Install** and **Activate** the plugin:\
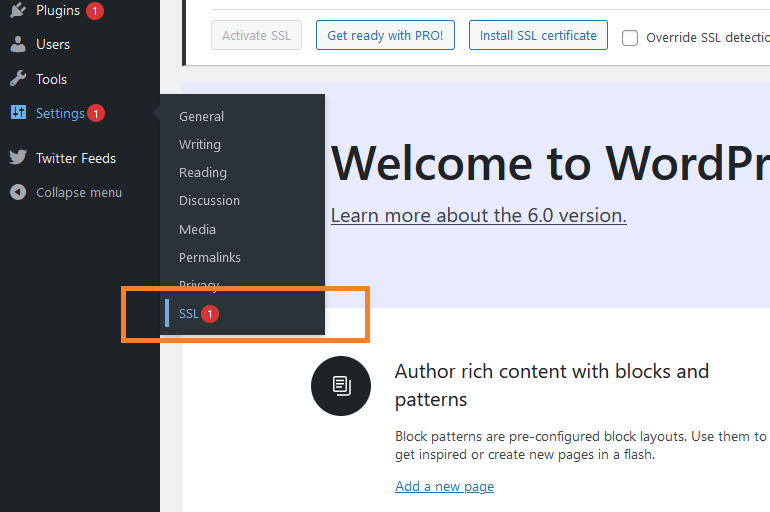
4. In the left sidebar, locate the **Settings** menu and click on **SSL**:\
5. Click on the **Install SSL Certificate** button, if an SSL certificate has not been installed in your site,. Otherwise skip to step 8:\
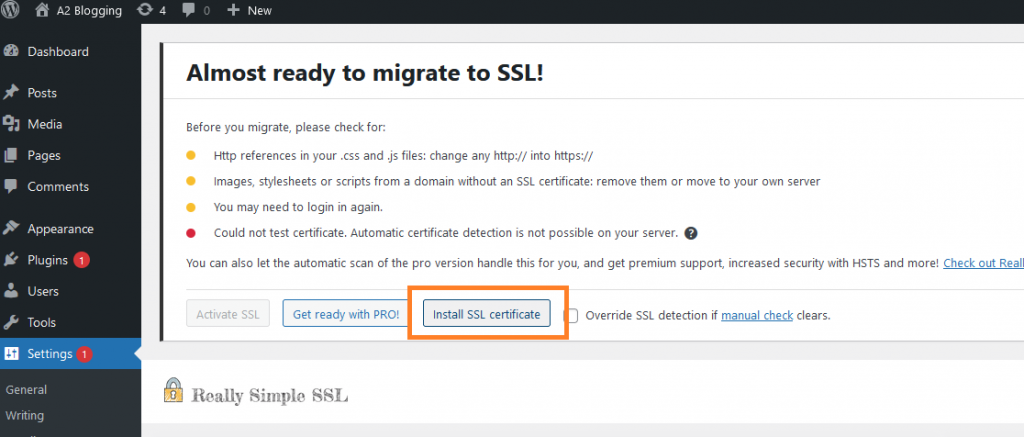
If an SSL certificate is present, the Really Simple SSL plugin will automatically detect it.
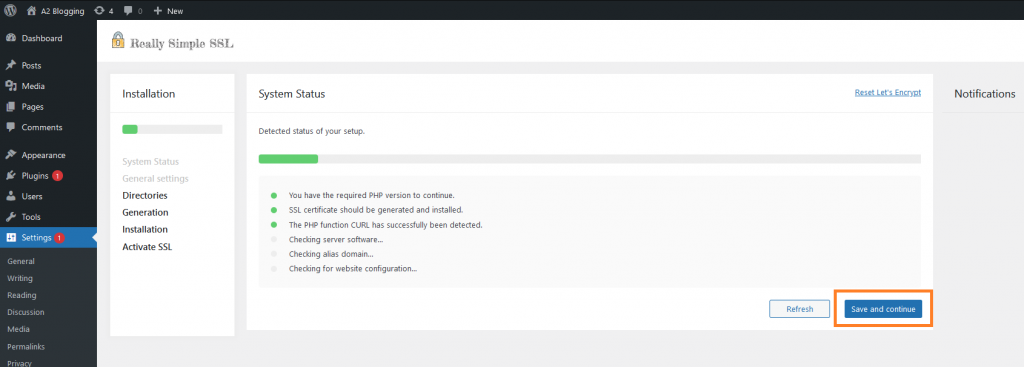
6. The SSL wizard will detect the system settings, and attempt to install a certificate from Let's Encrypt. Wait for the process to finish and click on the **Save and Continue** button:\
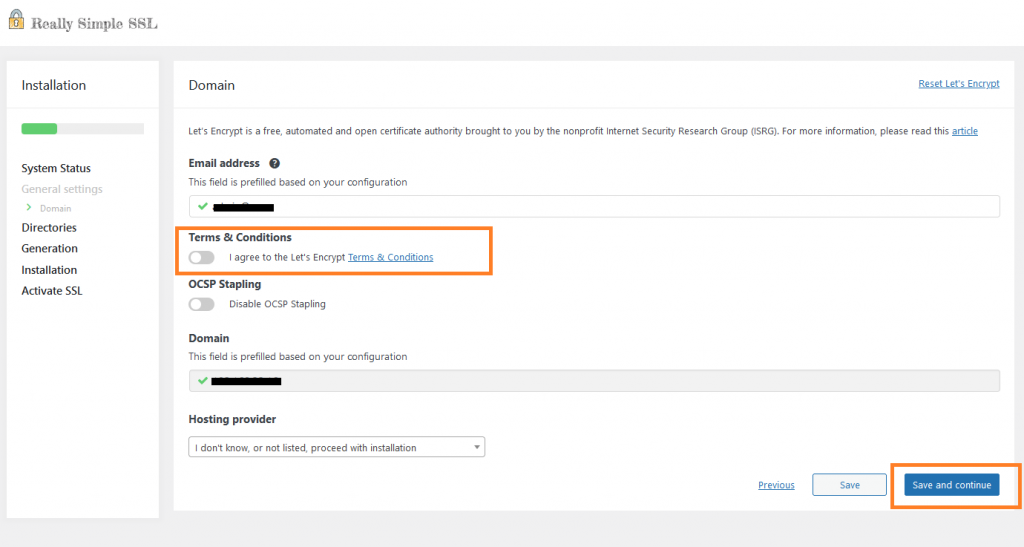
7. Enter the site's email address, accept the **Terms and Conditions of Let's Encrypt**, and save and continue. The wizard will automatically install and activate newly created SSL certificate:\
8. If a SSL certificate is already installed in your site, just click on the "**Activate SSL**" button:\
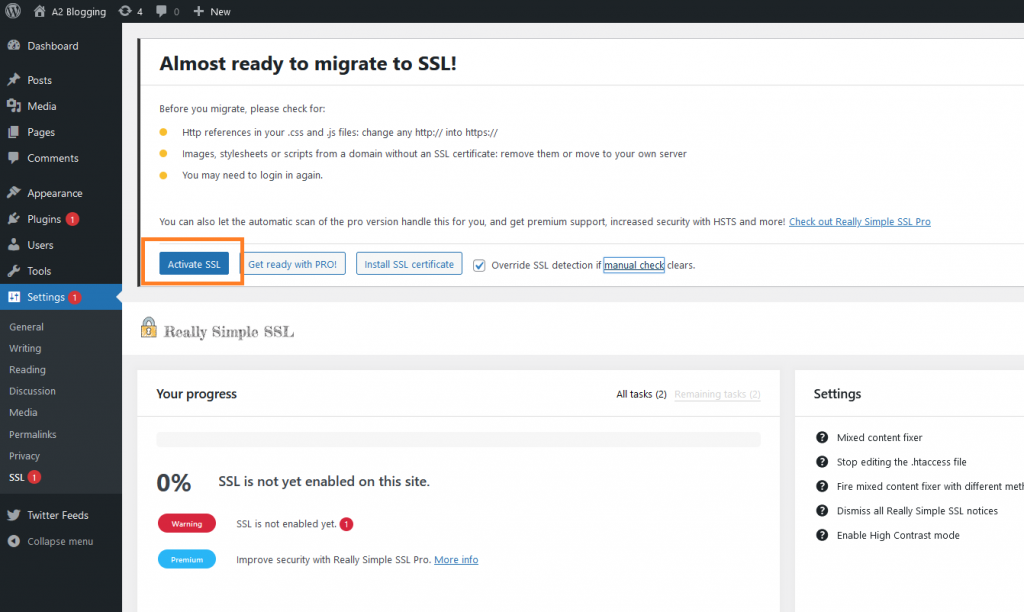
**Important**
You may be logged out after the process is completed.
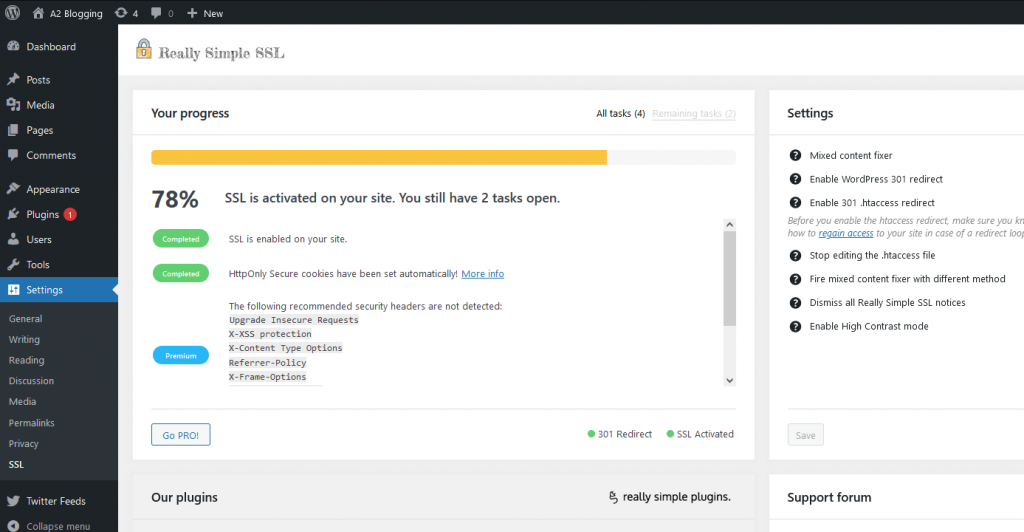
9. The site is under HTTPS:\
## More information
For more information about SSL Certificates, please see [this article](/docs/introduction-to-ssl).
## Related articles
* [Using www and non-www domains with an SSL certificate](/docs/using-www-and-non-www-domains-with-an-ssl-certificate)
* [Using SSL with Cloudflare](/docs/using-ssl-with-cloudflare)