> ## Documentation Index
> Fetch the complete documentation index at: https://kb.hosting.com/llms.txt
> Use this file to discover all available pages before exploring further.
# Setting up Gmail as the e-mail provider in Plesk
> Learn how to configure your G Suite domain to use Gmail as your email provider with this Plesk guide.
This article describes how to set up Gmail as the e-mail provider for G Suite customers. To do this, you modify your domain's DNS Mail Exchanger (MX) records in Plesk to point to Google's mail servers.
Plesk is no longer included with new hosting.com plans, but it is still available on legacy Managed WordPress accounts. You can install Plesk manually on unmanaged VPS and Dedicated servers.
🚧 Important
* Before you can use Gmail as the e-mail provider for your domain, you must verify your domain with G Suite. For information about how to do this, please visit [https://support.google.com/a/answer/60216](https://support.google.com/a/answer/60216).
* If you have users that already have e-mail accounts on your domain, you must create accounts for them in G Suite **before** you change the MX records. Otherwise, they will be unable to send or receive messages in Gmail. For information about how to create accounts in G Suite, please visit [https://support.google.com/a/topic/14586](https://support.google.com/a/topic/14586).
## Setting up Gmail as the e-mail provider in Plesk
To set up Gmail as the e-mail provider for your domain in Plesk, you delete the existing e-mail DNS records and then add new MX records that point to Google's servers. To do this, follow these steps:
1. Log in to Plesk.
> 📘 Note
>
> If you do not know how to log in to your Plesk account, please see [this article](/docs/logging-in-and-out-of-plesk).
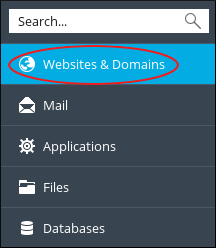
2. In the left sidebar, click **Websites & Domains**:\
3. Click **DNS Settings**:\

4. In the list of DNS records, select the check boxes for the following records. Replace ***example.com*** with your own domain name:
* ***example.com*** (MX 10 record)
* mail. ***example.com*** (A record)
* webmail. ***example.com*** (A record)
5. Click **Remove**, click **Yes** to confirm the deletion, and then click **Update**. Plesk removes the selected records.
6. Click **Add Record**.
7. In the **Record type** list box, select **MX**.
8. Leave the **Mail domain** text box blank.
9. In the **Mail exchange server** text box, type `ASPMX.L.GOOGLE.COM`.
10. In the **Specify the priority of the mail exchange server** list box, select **very high (0)**.
11. Click **OK**. Plesk creates the DNS record, but does not activate it.
12. Repeat steps 6 to 11 for the following mail servers. Each time, use the table to specify the next mail exchange server and its corresponding priority:
| Mail exchange server | Priority |
| ----------------------- | -------- |
| ALT1.ASPMX.L.GOOGLE.COM | 5 |
| ALT2.ASPMX.L.GOOGLE.COM | 5 |
| ALT3.ASPMX.L.GOOGLE.COM | 10 |
| ALT4.ASPMX.L.GOOGLE.COM | 10 |
13. Click **Update**. Plesk activates the new records.
14. In G Suite, activate Gmail:
* Log in to your G Suite account.
* Open the setup tool in the Admin console.
* In the Gmail section, click **ACTIVATE**, and then click **CONTINUE**.
* Scroll to the bottom of the page, and then click **ACTIVATE GMAIL**.
It can take several hours for the switchover to Gmail to complete. During this transition period, you continue to receive messages at your existing e-mail accounts in Plesk.
For more information about G Suite, please visit [https://gsuite.google.com](https://gsuite.google.com).
## Related articles
* [Managing DNS zones in Plesk](/docs/managing-dns-zones-in-plesk)