.jpg?fit=max&auto=format&n=E2LlsT5gBITvo732&q=85&s=ec11e1673894bdf46663a5d73602eb87)

DNS records in Cloudflare
When you add a domain to Cloudflare, in most cases it automatically scans and imports your domain’s DNS records. You do not need to take any further action. There may be occasions however, when you must manually add records to Cloudflare to ensure your email continues to function correctly. For example, if a domain’s TXT record for SPF is deleted or updated with the domain registrar, Cloudflare may not detect this change. In this case, you would need to manually add the TXT record in Cloudflare.Adding DNS records to Cloudflare
There are three primary DNS records related to email:- MX (Mail Exchanger) record: Most domains have multiple MX records.
- SPF (Sender Policy Framework) record: This is a TXT record.
- DKIM (DomainKeys Identified Mail) record: This is a TXT record.
-
Get the current values of the DNS records in cPanel:
-
Log in to cPanel.
📘 Note If you do not know how to log in to your cPanel account, please see this article.
-
On the Tools page, in the Domains section, click Zone Editor:

- Under Domains, locate the domain for which you want to add a record, and then click Manage.
- Note the values for the MX, SPF, and DKIM records.
-
Log in to cPanel.
- Go to https://dash.cloudflare.com/login and log in to your Cloudflare account.
-
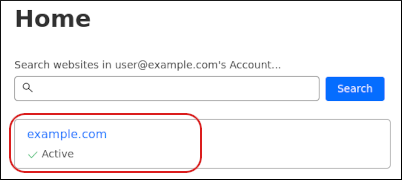
On the Home page, click the domain:
-
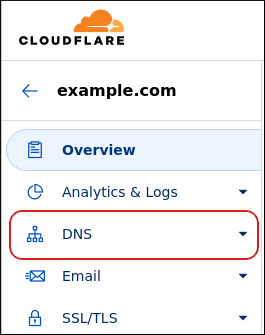
In the left sidebar, click DNS:
-
Add the MX record:
-
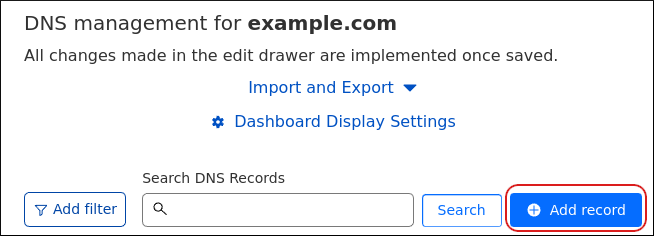
In the DNS management section, click Add record:
-
In the Type list box, select MX:

- In the Name text box, type the value from the Name column for the MX record in cPanel.
- In the Mail server text box, type the destination from the Record column of the MX record in cPanel.
- In the TTL list box, select Auto.
- In the Priority text box, type the priority from the Record column of the MX record in cPanel.
- Click Save. Cloudflare saves the MX record.
📘 Note If your domain has multiple MX records, repeat these steps for the other MX records.
-
In the DNS management section, click Add record:
-
Add the SPF record:
-
In the DNS management section, click Add record:
-
In the Type list box, select TXT:
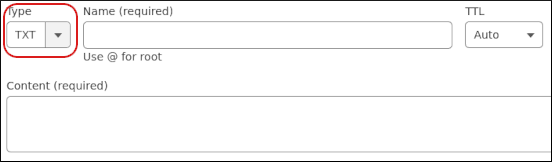
- In the Name text box, type the value from the Name column for the SPF record in cPanel.
- In the TTL list box, select Auto.
- In the Content text box, type the value from the Record column for the SPF record in cPanel.
- Click Save. Cloudflare saves the SPF record.
-
In the DNS management section, click Add record:
-
If your domain uses DKIM, you should add that record as well. To do this:
-
In the DNS management section, click Add record:
-
In the Type list box, select TXT:
- In the Name text box, type the value from the Name column for the DKIM record in cPanel.
- In the TTL list box, select Auto.
- In the Content text box, type the value from the Record column for the DKIM record in cPanel.
- Click Save. Cloudflare saves the DKIM record.
-
In the DNS management section, click Add record:
- Cloudflare is now configured to use your domain’s email settings.