Staging WordPress with the cPanel WP Toolkit
In this article, learn how to stage a WordPress site using the WP Toolkit in cPanel. With the WP Toolkit, you can easily set up a staging site for development and testing purposes.
This article describes how to stage a WordPress site using the WP Toolkit in cPanel.
It is important to test a site's code and content before you publish it and make it available to the public. A staging site is a copy of your website where you can make and test changes before taking them live on your main website. With the WP Toolkit, WordPress staging is quick and easy.
NoteTo stage a website in WP Toolkit, you clone a site.
Staging WordPress sites
To stage a WordPress site using the WP Toolkit, follow these steps:
-
Log in to cPanel.
NoteIf you do not know how to log in to your cPanel account, please see this article.
-
On the Tools page, in the Domains section, click WP Toolkit:

-
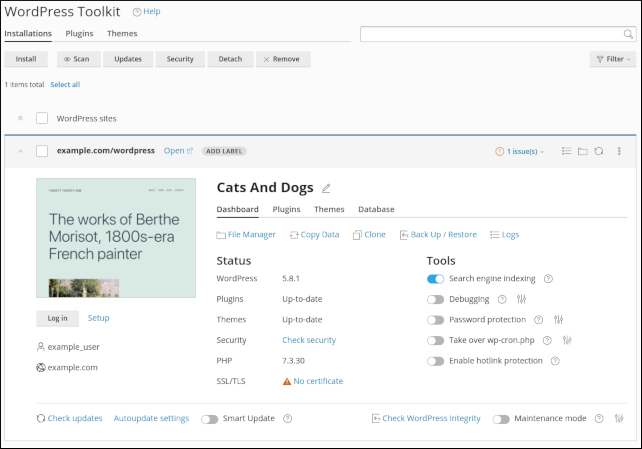
The WP Toolkit page appears with a list of installed WordPress sites:
 Note
NoteThis article assumes that you have already installed a WordPress site using the WP Toolkit. If you have not installed WordPress yet, please see this article for information about how to do so.
-
Locate the site for which you want to create a staging site, and then click Clone.
-
You can clone a site to a new subdomain, or use an existing domain or subdomain.
-
To change the database name, type the new name in the Name text box.
-
Click Start. WP Toolkit begins cloning the site.
-
When cloning is complete, click Close. You now have an exact copy of your site you can use for testing and development.
-
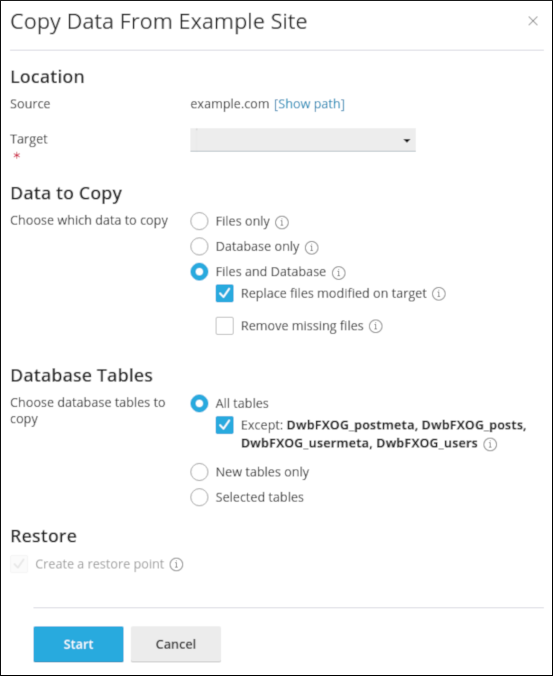
As you test and develop the staging site, its data changes and becomes out of sync with the original site. To synchronize data between the original site and the cloned site, locate the source site, and then click Copy Data. The Copy Data dialog box appears:
-
Under Location, select the destination site. This could be the cloned site (if you are still developing and testing), or it could be the original site (if you want to push the staging changes to the original site).
-
Under Data to Copy, select whether you want to copy files, the database, or both.
-
Under Database Tables, select whether you want to copy specific tables, new tables, or all tables.
-
Optionally, under Restore, select the Create a restore point check box to create a restore point. A restore point enables you to revert the copied data if the site does not work correctly.
-
Click Start. WP Toolkit copies the data you specified.
More information
-
For more information about WP Toolkit, please visit https://www.cpanel.net/wp-toolkit.
-
For more information about WordPress, please visit https://wordpress.org.