Using the WP Toolkit in Plesk
Find a high-level overview on how to use the WP Toolkit in Plesk, complete with a detailed video breakdown and step-by-step instructions to ensure success.
This article provides an overview on how to use the WP Toolkit in Plesk. The WP Toolkit enables you to easily install, configure, and manage multiple WordPress installations from one convenient interface.
NotePlesk is no longer included with new hosting.com plans, but it is still available on legacy Managed WordPress accounts. You can install Plesk manually on unmanaged VPS and Dedicated servers.
Using the WP Toolkit
Quick access
To quickly access frequently-used WP Toolkit features, follow these steps:
-
Log in to Plesk.
NoteIf you do not know how to log in to your Plesk account, please see this article.
-
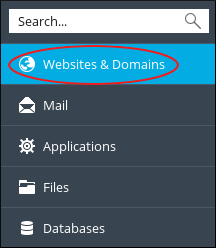
In the left sidebar, click Websites & Domains:
-
Scroll to the management area for the domain where WordPress is installed.
-
Click any of the following options in the toolbar:

-
To log in to WordPress, click Log In.
-
To run a security check on the WordPress installation, click Check Security.
-
To manage plugins for the WordPress installation, click Plugins.
-
To manage themes for the WordPress installation, click Themes.
-
To clone the WordPress installation, click Clone.
-
To synchronize a WordPress instance with another instance, click Sync.
-
Complete access
To access the complete WP Toolkit, follow these steps:
-
Log in to Plesk.
NoteIf you do not know how to log in to your Plesk account, please see this article.
-
In the left sidebar, click WordPress. The WP Toolkit page appears.
-
On the Instances tab you can manage your WordPress installations:
-
To install a new instance of WordPress, click Install, and then click Install (Quick) or click Install (Custom).
-
To locate all WordPress instances on your account, click Scan.
-
To check for WordPress updates, click Updates.
-
To manage security for your WordPress instances, click Security.
-
There are many additional options for each WordPress instance listed.
-
-
On the Plugins tab you can manage WordPress plugins:
-
To install a plugin, click Install.
-
To upload a plugin, click Upload plugin.
-
To activate a plugin, click Activate.
-
To deactivate a plugin, click Deactivate.
-
To uninstall a plugin, click Uninstall.
-
To update a plugin, click Update.
-
-
On the Themes tab you can manage WordPress themes:
-
To install a theme, click Install.
-
To upload a theme, click Upload theme.
-
To uninstall a theme, click Uninstall.
-
To update a theme, click Update.
-
More information
For more information about Plesk, please visit https://www.plesk.com.