Migrating multiple domains from cPanel to the new Hosting Panel
Learn about some issues that can arise after you migrate multiple domains from a cPanel-based hosting account to a hosting account that uses the Hosting Panel administration interface.
Some newer web hosting accounts use an administration interface directly within the hosting.com Hosting Panel. Unlike cPanel or Plesk, there is no separate login — you just log in to your hosting.com account at https://my.hosting.com and control your web site, email, and WordPress from one unified interface.
When you migrate a hosting account from cPanel to this administration interface, any subdomains, addon domains, and aliases are grouped under the primary domain as mapped domains. However, you can only clone and stage sites on the primary domain — you cannot create staging or cloned sites on mapped domains.
To resolve this issue, you can split the mapped domains into separate websites. Then each site has its own file manager, database, staging and cloning options, and so on.
ImportantThe control panel may indicate you are using only 1 of 10 websites, but every imported site (including mapped domains) still counts towards the total site limit. To avoid exceeding the site limit sooner than you expect, you should separate the mapped domains into separate websites.
Separating domains into individual sites
To separate your grouped domains into individual sites, follow these steps:
-
Create a backup of each site. For example, if this is a WordPress site, you can use a plugin like UpdraftPlus or Duplicator, and then download the backup files to your local computer.
-
Remove the mapped domains. To do this, follow these steps:
-
Log in to your account as described in Managing your website and email in the Hosting Panel.
-
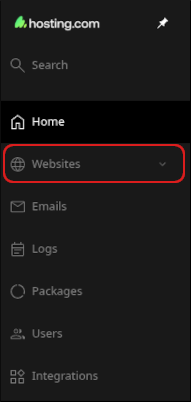
When the control panel appears, in the left sidebar, click Websites:
-
On the Manage websites page, click the primary website.
-
Click the Files tab.
-
Locate the directory for the subdomain or addon domain. Before you delete anything, make sure you note any database names linked to the site.
-
After you are sure that your backups are safely downloaded and you have the database names, you can delete the files and databases for the mapped domain.
-
-
Add each domain as a new, separate website. To do this, follow these steps:
- In the Hosting Panel, click Websites, and then click Add website.
- In the Add website section, click Production website.
- In the Domain text box, type the domain name.
- Click Add. The Hosting Panel adds the domain.
- If this is a WordPress site, click the Apps tab, click Install app, and install a new WordPress site on the domain.
- Repeat the previous steps for any additional domains you have.
-
Restore the backup for each site. For example, if this is a WordPress site, log in to WordPress as an administrator, install the same backup plugin you used in step 1, and then restore the site using the backup file you downloaded to your local computer.
-
Verify DNS and IP address settings. Each new site may have its own IP address. If you are using the default nameservers (nsX.mysecurecloudhost.com or nsX.stableserver.net), no DNS update is necessary. If you are using Cloudflare or another DNS provider, follow these steps:
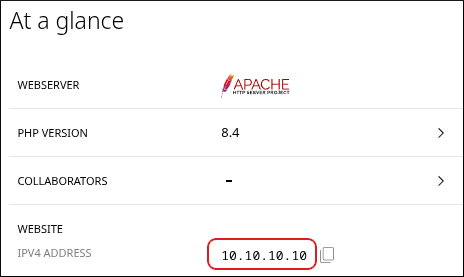
- In the Hosting Panel, click Websites, and then click the new website. In the At a glance section, note the site IP address:
- Update the A record for the site with your DNS provider.
- In the Hosting Panel, click Websites, and then click the new website. In the At a glance section, note the site IP address:
-
Staging and cloning now work for all of the websites.