Backing up and restoring data with WebHost Manager
Learn how to use the backup and restore features included in WebHost Manager (WHM). This article describes how to configure backups, and how to restore data from those backups.
This article describes how to configure and restore backups in WebHost Manager (WHM).
NoteYou must have root access to the server to access the Backup Configuration and Restore Configuration menu options in WebHost Manager. Alternatively, you can open a support ticket on the Hosting Panel at https://my.hosting.com and we can configure backups for you.
Configuring backups
To configure backups in WHM, follow these steps:
-
Log in to WebHost Manager.
NoteIf you do not know how to log in to your WebHost Manager account, please see this article.
-
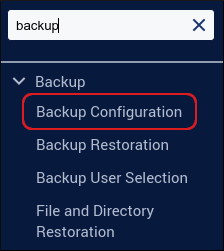
In the search box at the upper left of the WHM screen, start typing backup, and then click Backup Configuration when it appears:
-
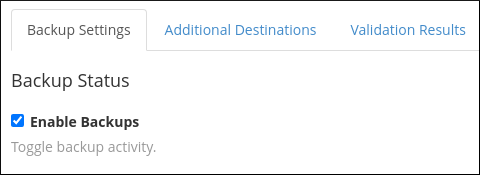
On the Backup Settings tab, under Backup Status, select the Enable Backups check box to enable backups:
-
Under Global Settings, under Backup Type, select the type of backups you want WHM to create:
-
Compressed: Compressed backups take up less disk space, but also take more time to create.
-
Uncompressed: Uncompressed backups take less time to create, but also take up more disk space.
-
Incremental: Incremental backups only save files that have changed since the previous backup.
-
-
To have WHM check for available space before creating a backup, select the Check the Available Disk Space check box.
-
Under Scheduling and Retention, select the backup schedule you want.
-
Under Files, select the files you want to include in the backups:
-
To back up user account files, select the Back up User Accounts check box, and then click Select Users. Select the users you want to include in the backups.
-
To back up system files, select the Back up System Files check box.
-
-
Under Databases, select the MySQL databases you want to include in the backups.
-
Under Configure the Backup Directory, you can change the default backup directory path if you want.
-
Click Save Configuration.
Enabling remote (offsite) backups
The previous procedure configures backups for local storage on your account's server. You can also configure WHM to store backups at a remote location. WHM currently supports the following offsite storage services:
-
Amazon S3
-
Backblaze B2
-
Google Drive
-
FTP, rsync, SFTP, and WebDAV
To enable remote backups, follow these steps:
-
Log in to WebHost Manager.
NoteIf you do not know how to log in to your WebHost Manager account, please see this article.
-
In the search box at the upper left of the WHM screen, start typing backup, and then click Backup Configuration when it appears:
-
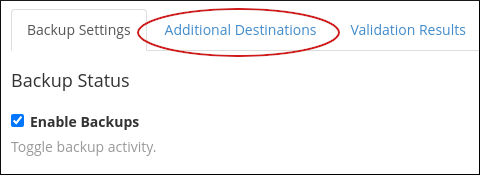
Click the Additional Destinations tab:
-
In the Destination Type list box, select the storage service you want to use, and then click Create New Destination.
-
The configuration options differ based on the service you select. Complete the options with the correct information for your account.
-
Click Save and Validate Destination. After WHM validates the destination, backups are stored with the service you configured.
Restoring data from backups
You can restore data from a specific account, or from a specific date.
Restoring data from a specific account
To restore data from a specific account, follow these steps:
-
Log in to WebHost Manager.
NoteIf you do not know how to log in to your WebHost Manager account, please see this article.
-
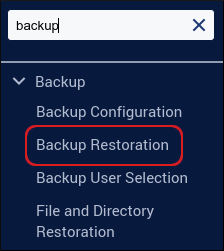
In the search box at the upper left of the WHM screen, start typing backup, and then click Backup Restoration when it appears:
-
On the Backup Restoration page, click the Restore by Account tab.
-
In the Select User box, select the user of the data you want to restore.
-
In the Available Backup Dates calendar, select the date of the backup to restore.
-
Under Options, select if you want to restore subdomains, mail files, and MySQL databases.
-
Click Add Account to Queue, and then click Restore.
-
When the restore is finished, click View Log to view details of the restoration.
Restoring data from a specific date
To restore data from a specific date, follow these steps:
-
Log in to WebHost Manager.
NoteIf you do not know how to log in to your WebHost Manager account, please see this article.
-
In the search box at the upper left of the WHM screen, start typing backup, and then click Backup Restoration when it appears:
-
On the Backup Restoration page, click the Restore by Date tab.
-
In the Available Backup Dates calendar, select the date of the backup to restore.
-
In the Select User box, select the user of the data you want to restore.
-
Under Options, select if you want to restore subdomains, mail files, and MySQL databases.
-
Click Add Account to Queue, and then click Restore.
-
When the restore is finished, click View Log to view details of the restoration.
More information
-
To view the official WHM documentation for backup configuration, please visit https://docs.cpanel.net/whm/backup/backup-configuration.
-
To view the official WHM documentation for backup restoration, please visit https://docs.cpanel.net/whm/backup/backup-restoration.