Before You Start Please note:
- Only the current account owner can initiate a transfer.
- The recipient must approve the transfer before it completes.
- If either account has unresolved billing issues, the transfer cannot proceed.
- Once completed, the original account owner and all users on that account will lose access to the site.
What Transfers With the Site When ownership changes, everything associated with the site remains intact, including:
- WordPress files
- Database
- Site-level settings
- SSH access
- FTP accounts
- Site users
- Installed plugins and themes
- Objects and configurations
How to Initiate a Site Transfer
- Log in to your hosting.comdashboard.
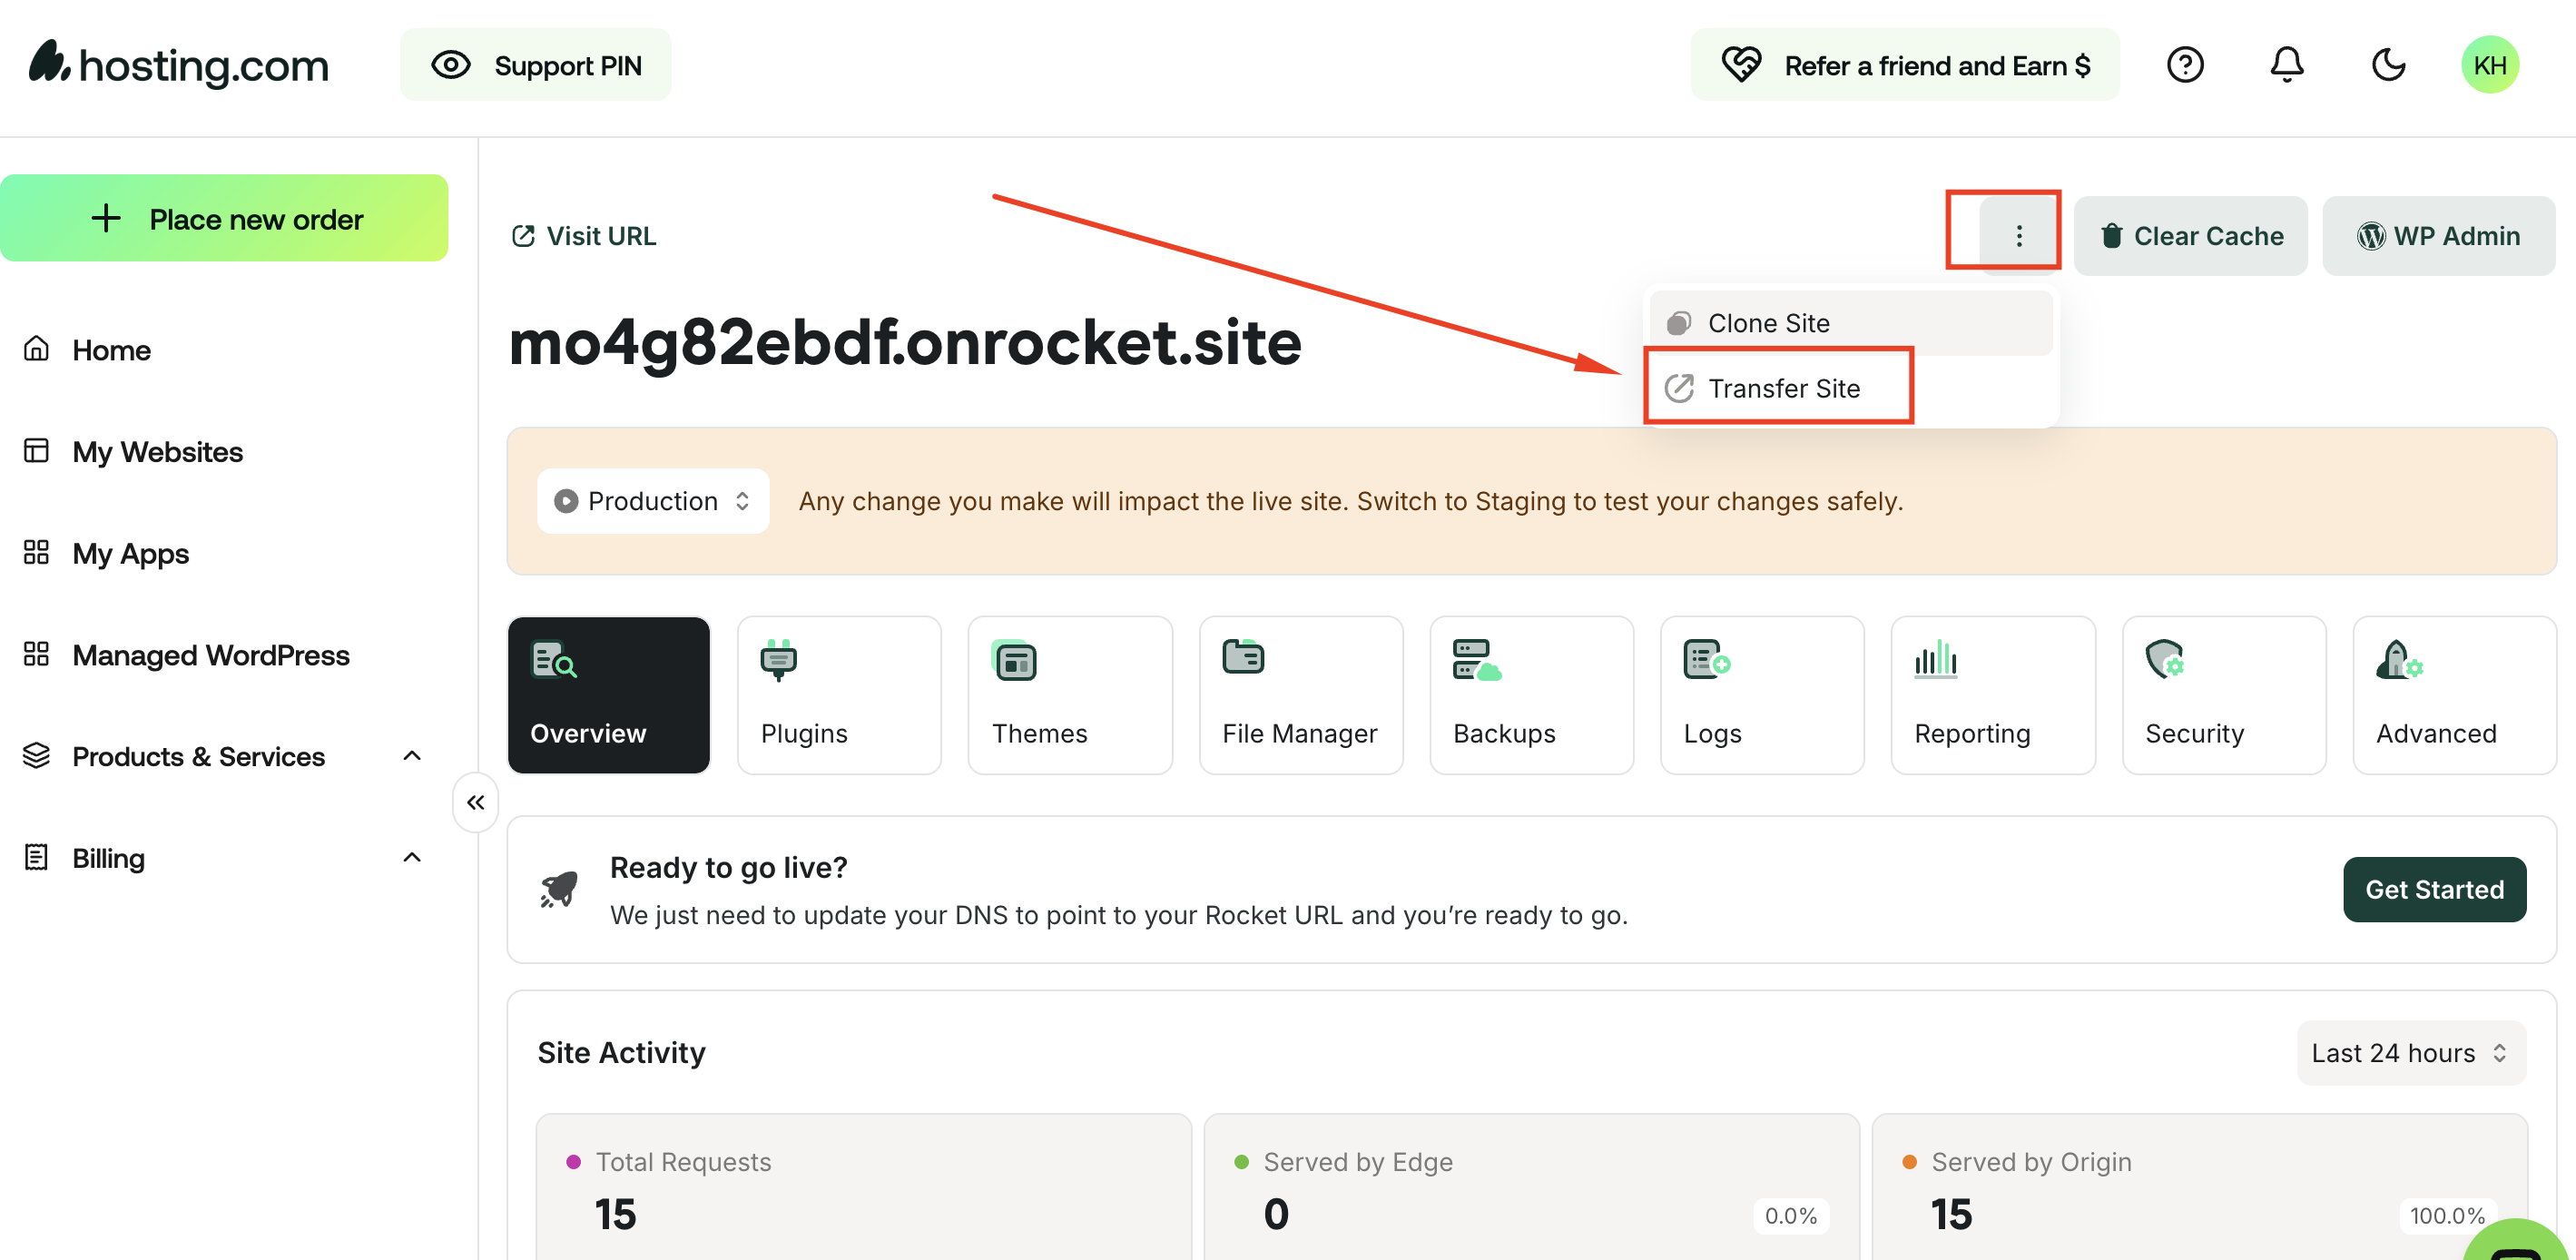
- Open the site you want to transfer.
- Click the three-dot menu next to Clear Cache and WP Admin.
- Select Transfer Site.
- Enter the email address of the new owner.
- Click Request Transfer.
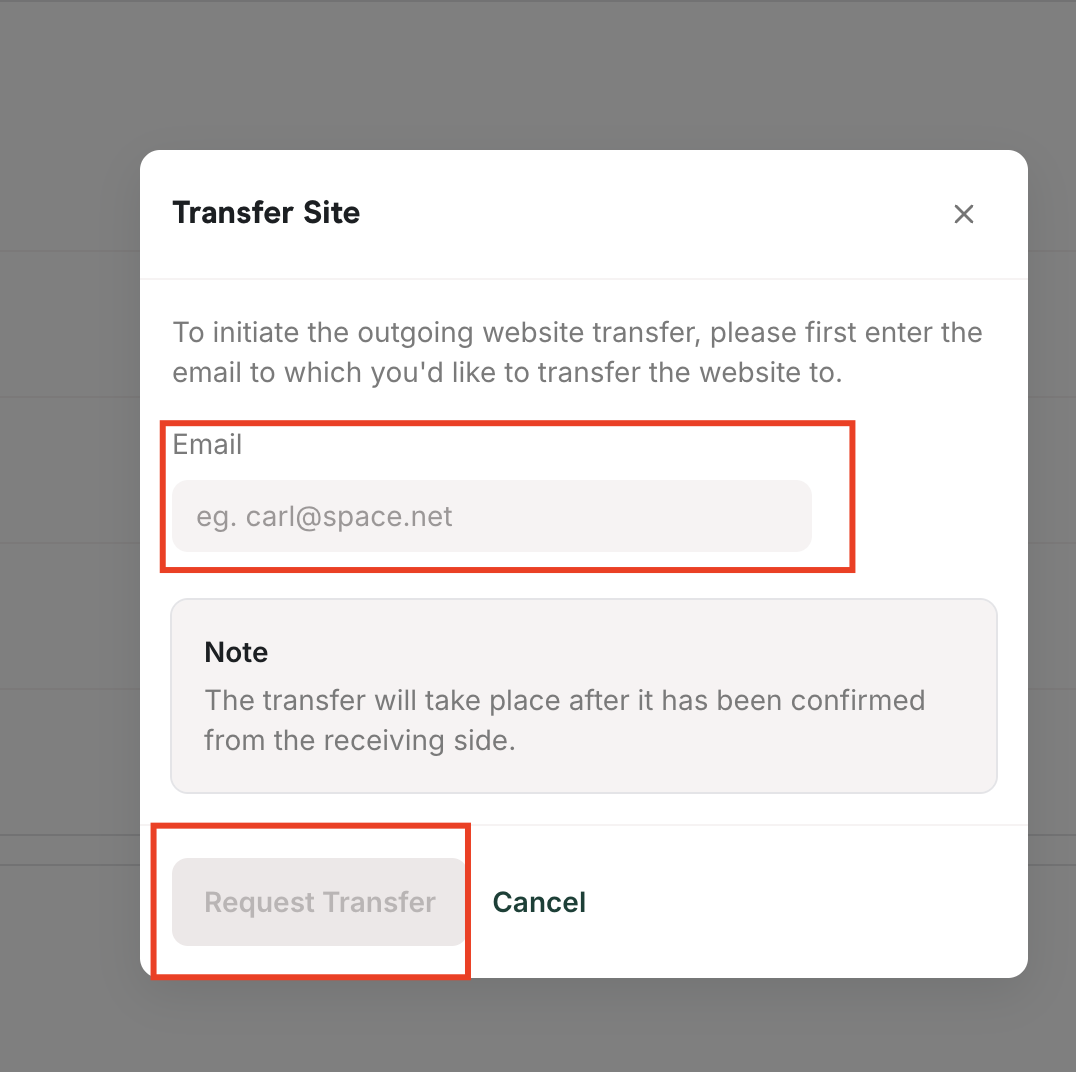 The site will enter a Pending Transfer state while awaiting approval.
What Happens Next The recipient will receive an email prompting them to approve the transfer. They will also see a banner notification in their dashboard. They can choose to:
- Accept the transfer
- Reject the transfer
When the Transfer Is Approved Once the recipient approves:
- Ownership updates in approximately 100 milliseconds.
- The site disappears from the original owner’s dashboard.
- The site appears in the new owner’s dashboard.
- Both parties receive confirmation emails.
- The website remains online and unchanged throughout the process.
- Open the site.
- Click the transfer status indicator.
- Select Cancel Transfer.
Billing Restrictions If either account has unpaid invoices that are past due, the transfer cannot be completed. Please resolve the outstanding billing issues and try again.
After the Transfer: Recommended Audit While the site configuration remains unchanged, account access does change. After accepting a transfer, we recommend the new owner:
- Reviewing SSH keys
- Auditing FTP users
- Confirming site-level user permissions
- Verifying any third-party integrations
Important Access Note After a transfer completes:
- The original account owner loses access.
- All account-level users from the original account lose access.
- The new account owner gains full control of the site.