Creating a custom navigation menu on WordPress
To create a new custom navigation menu on WordPress, follow these steps:- Log in to your WordPress site with an administrator account.
- On the Dashboard in the left sidebar, click Appearance, and then click Menu.
-
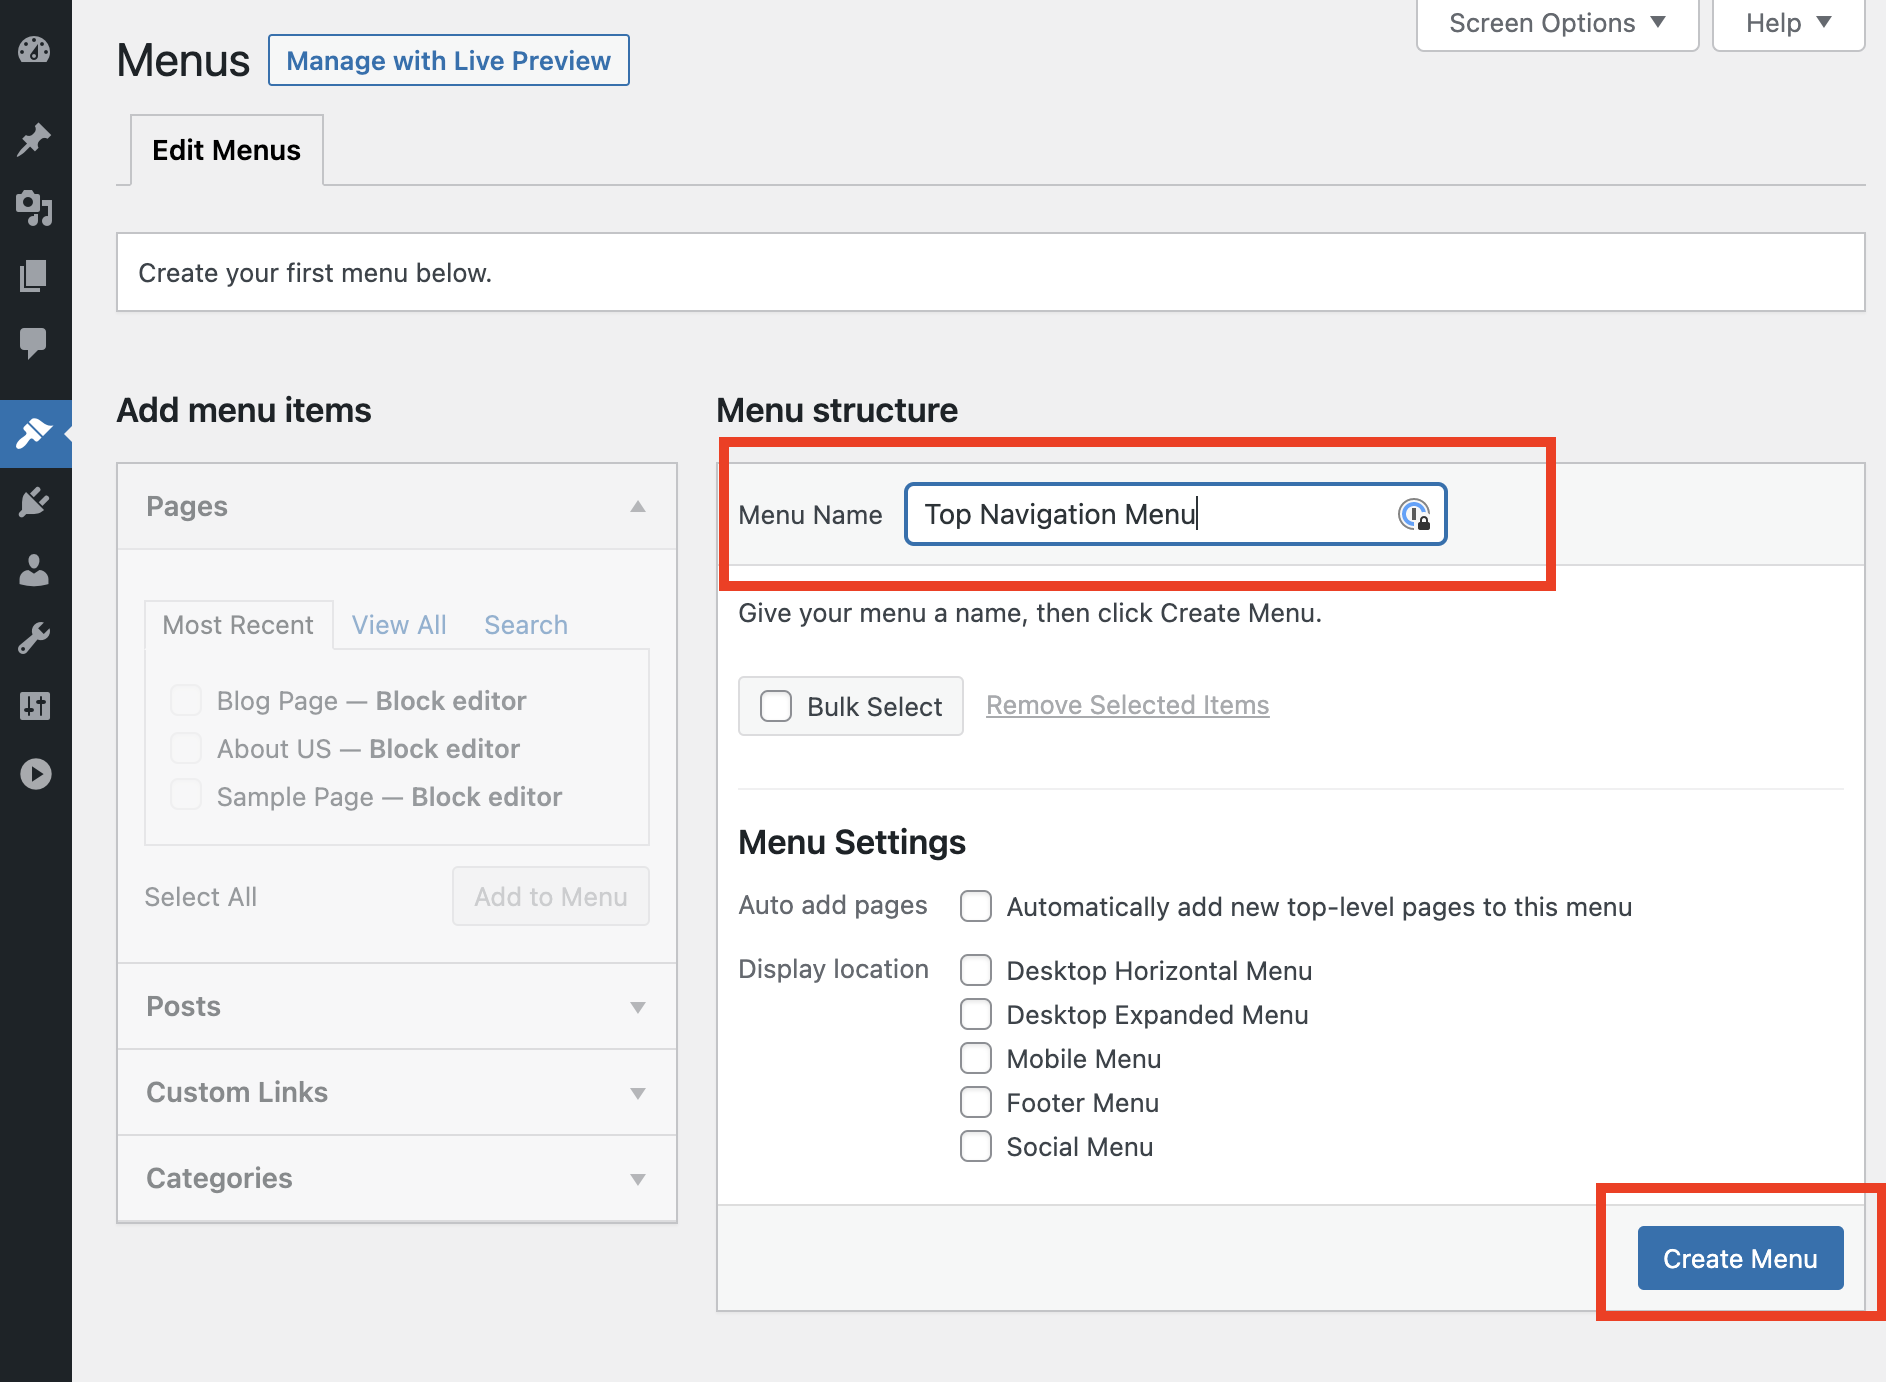
On the Edit Menus tab, enter a name for the menu, and then click the Create Menu button:
-
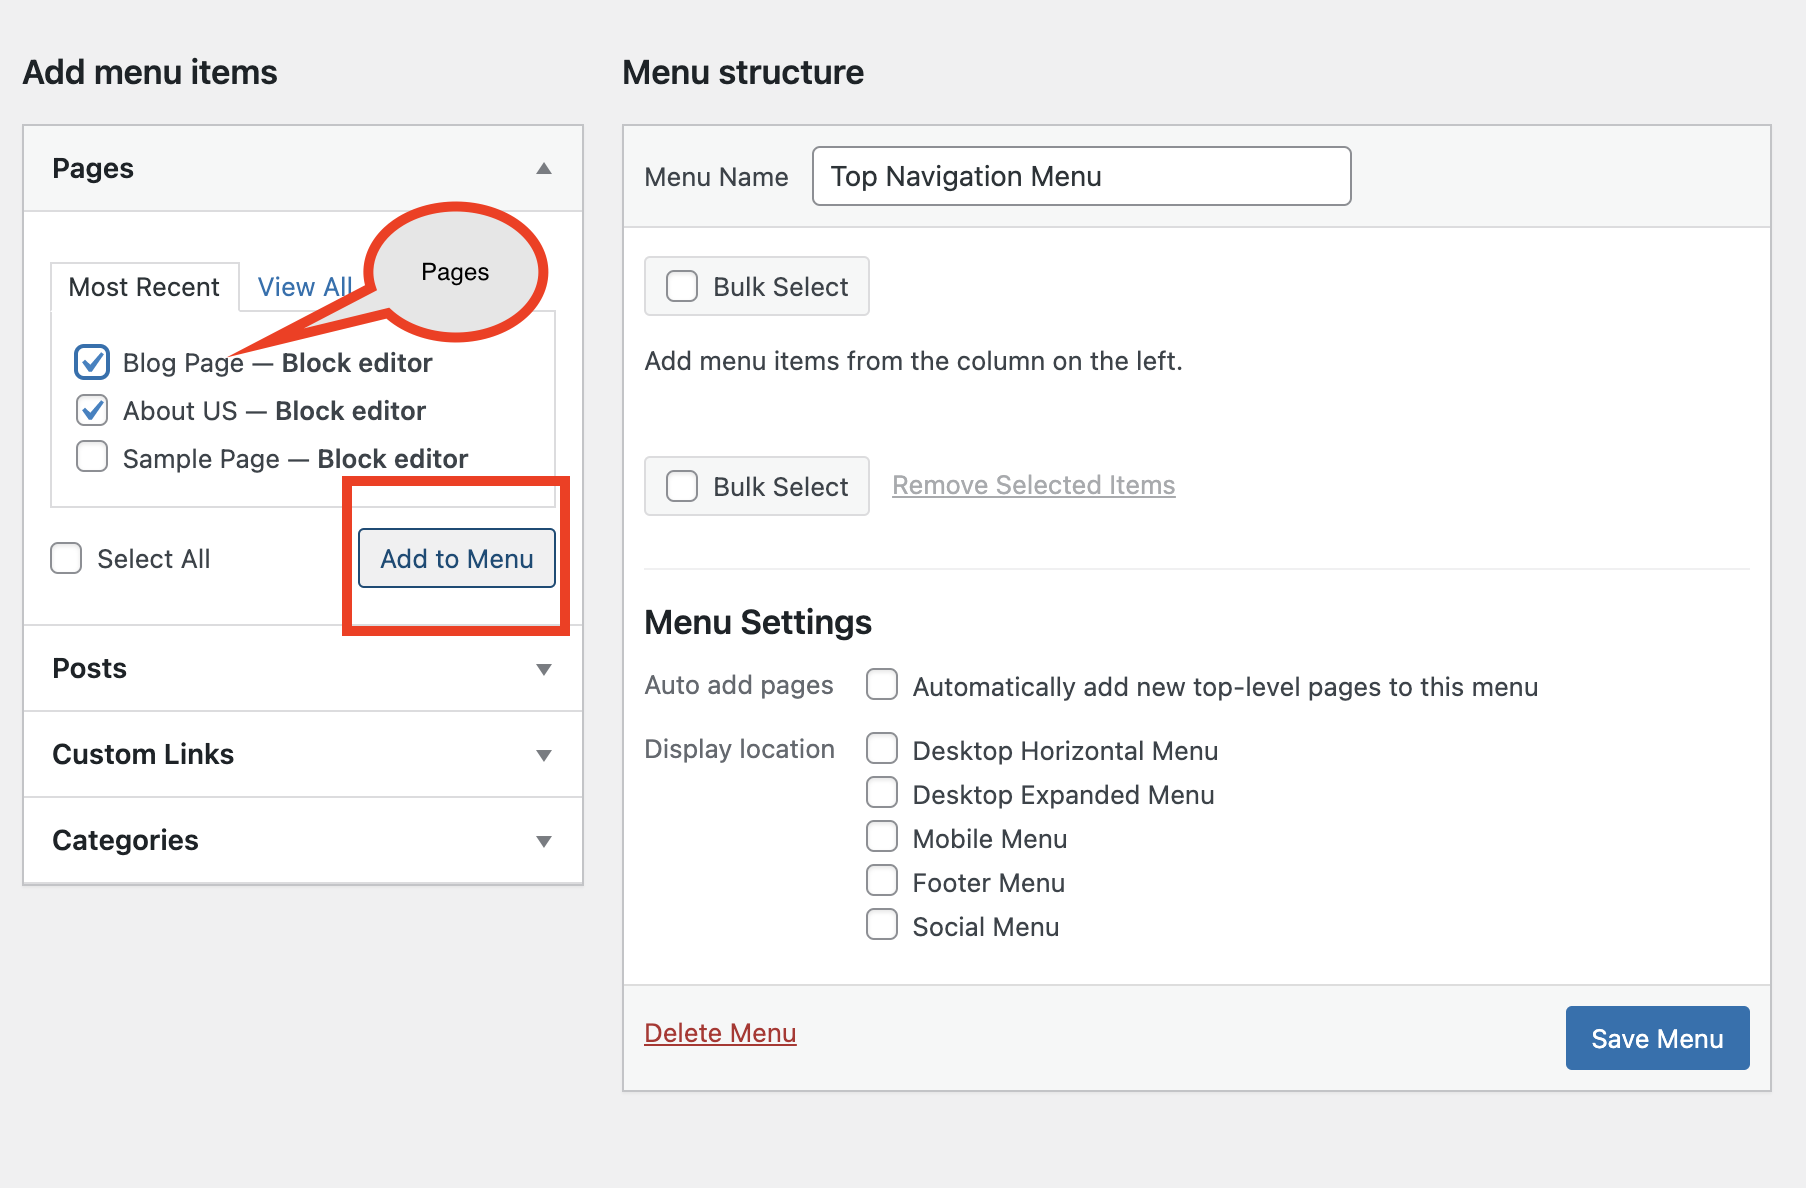
Click on the box next to the pages, and then click on the Add to Menu button:
-
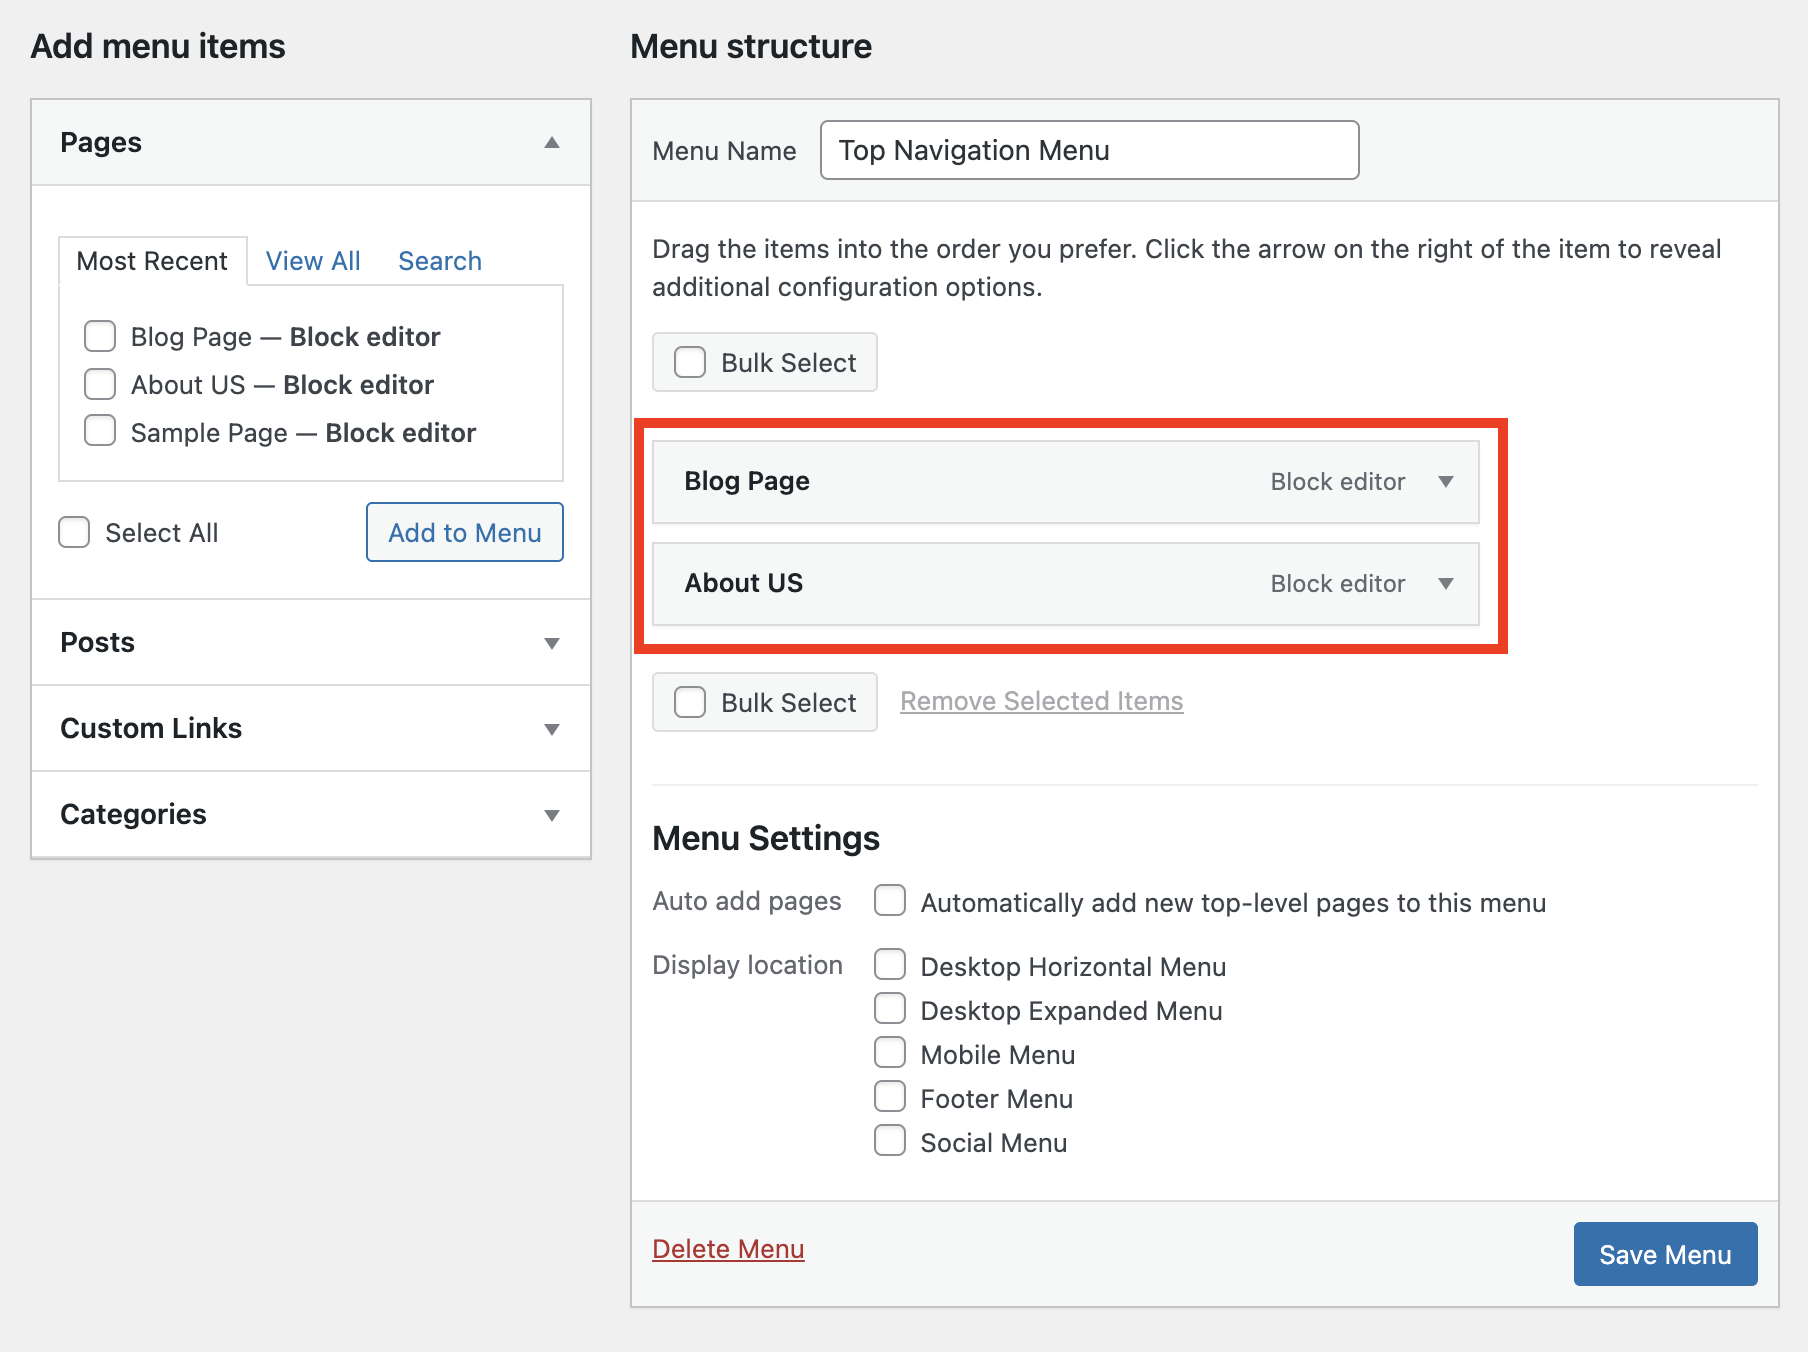
Drag and drop the pages to rearrange the sequence of the pages under the menu:
-
The menu locations depend on the Themes. In this example the 2021 theme has five different locations. Select the location for the menu to be displayed and click on the Save Menu button:
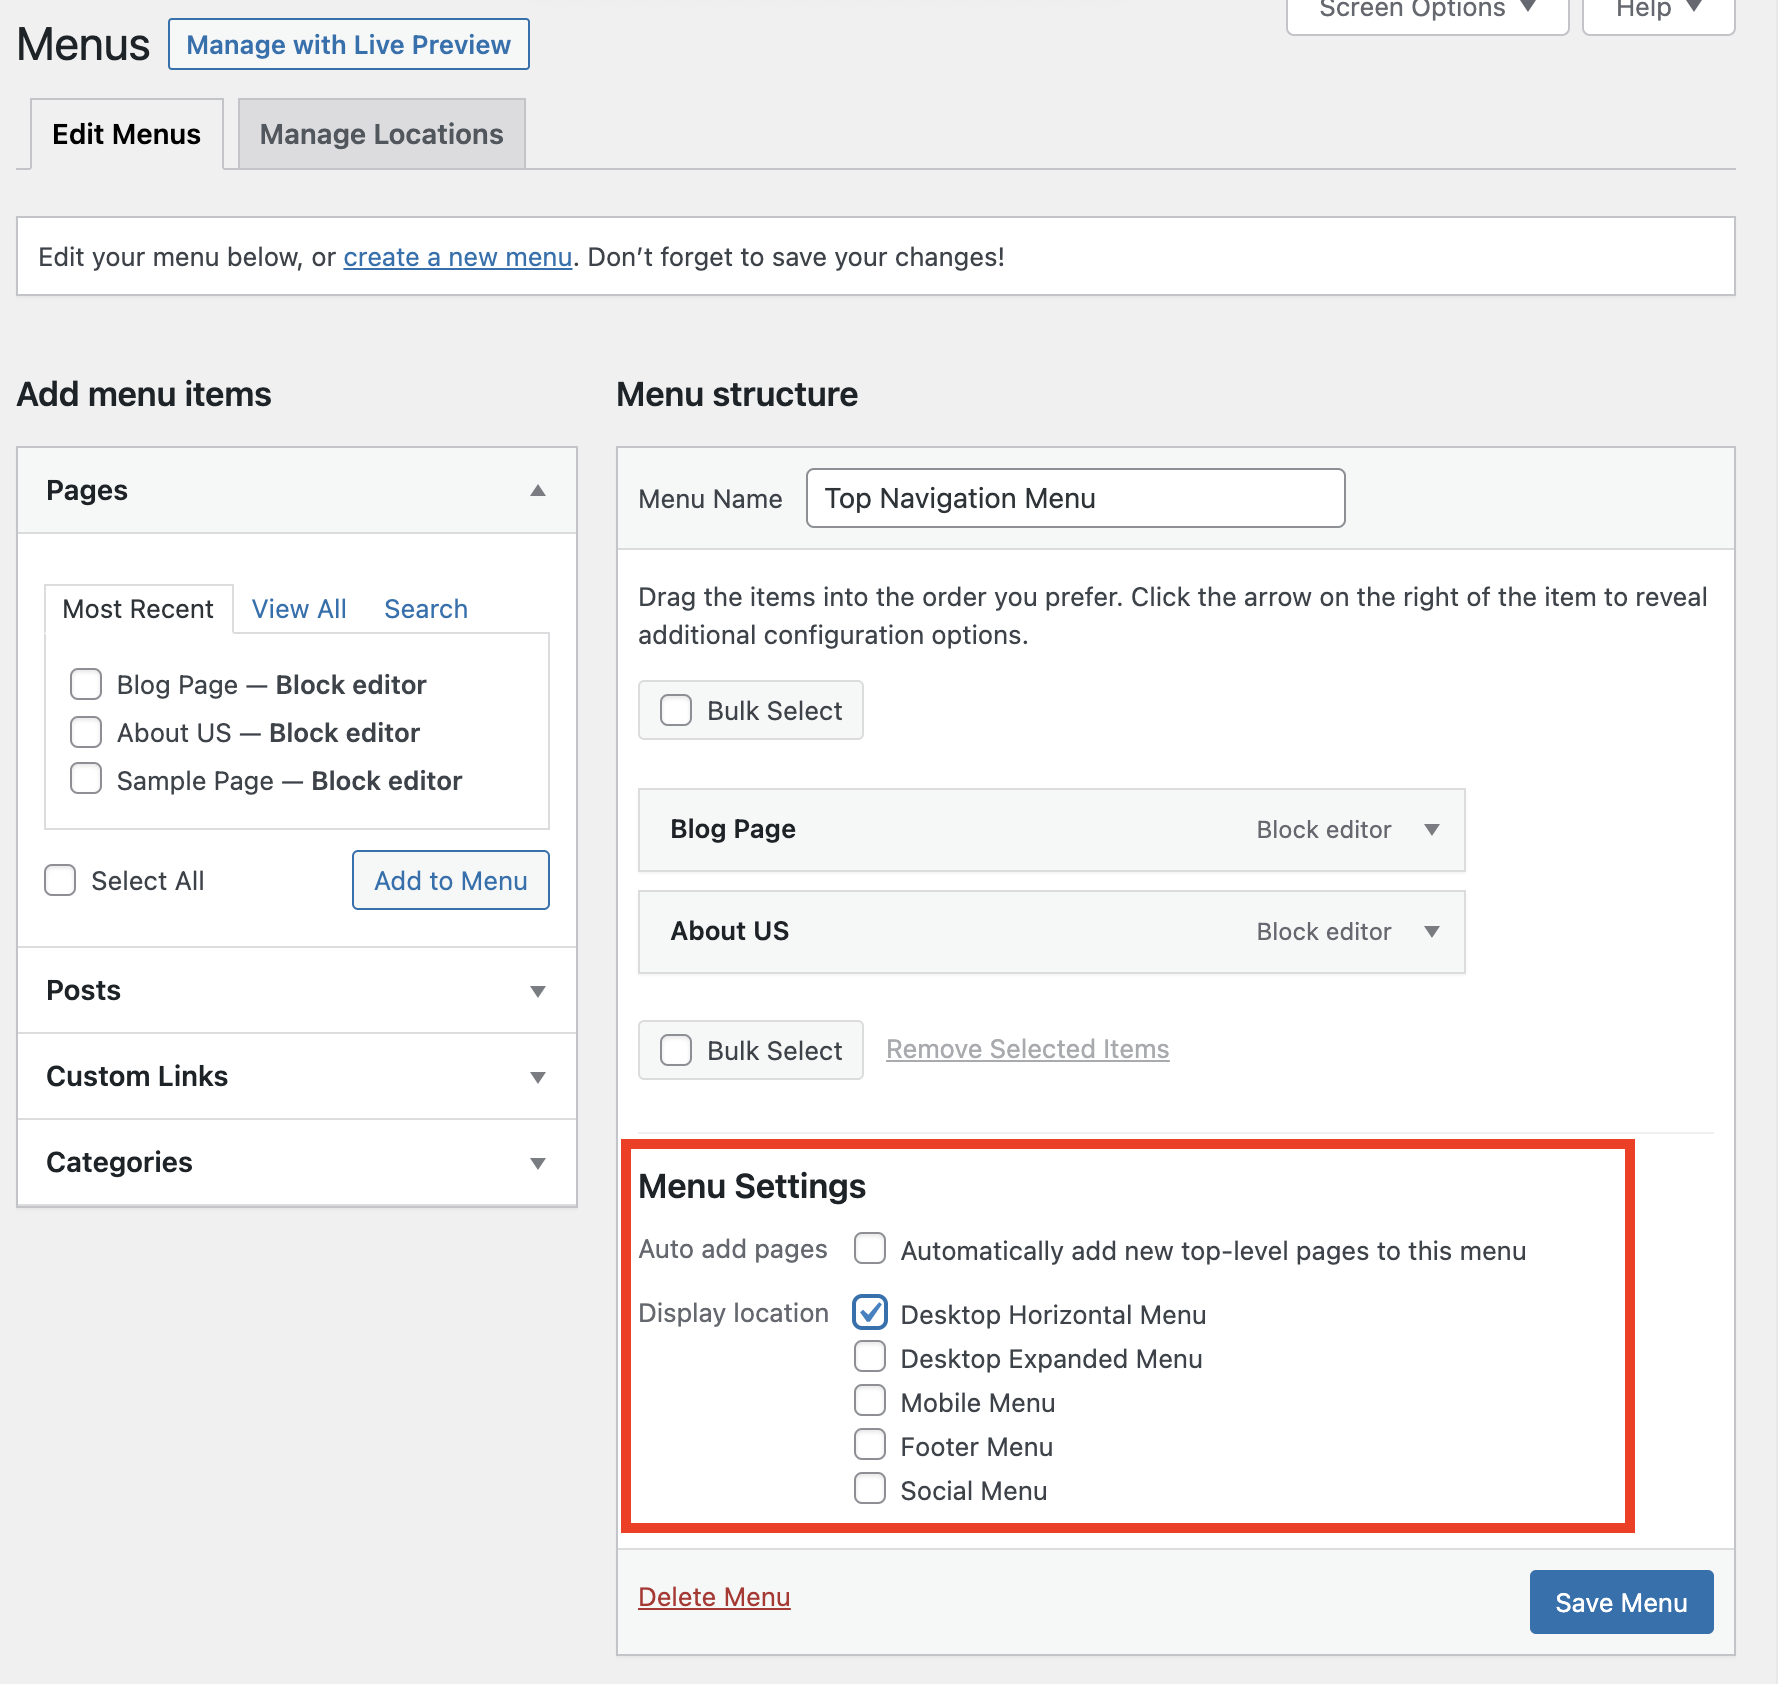
- Tip: To understand the location of the menu, try experimenting with different menu settings.
-
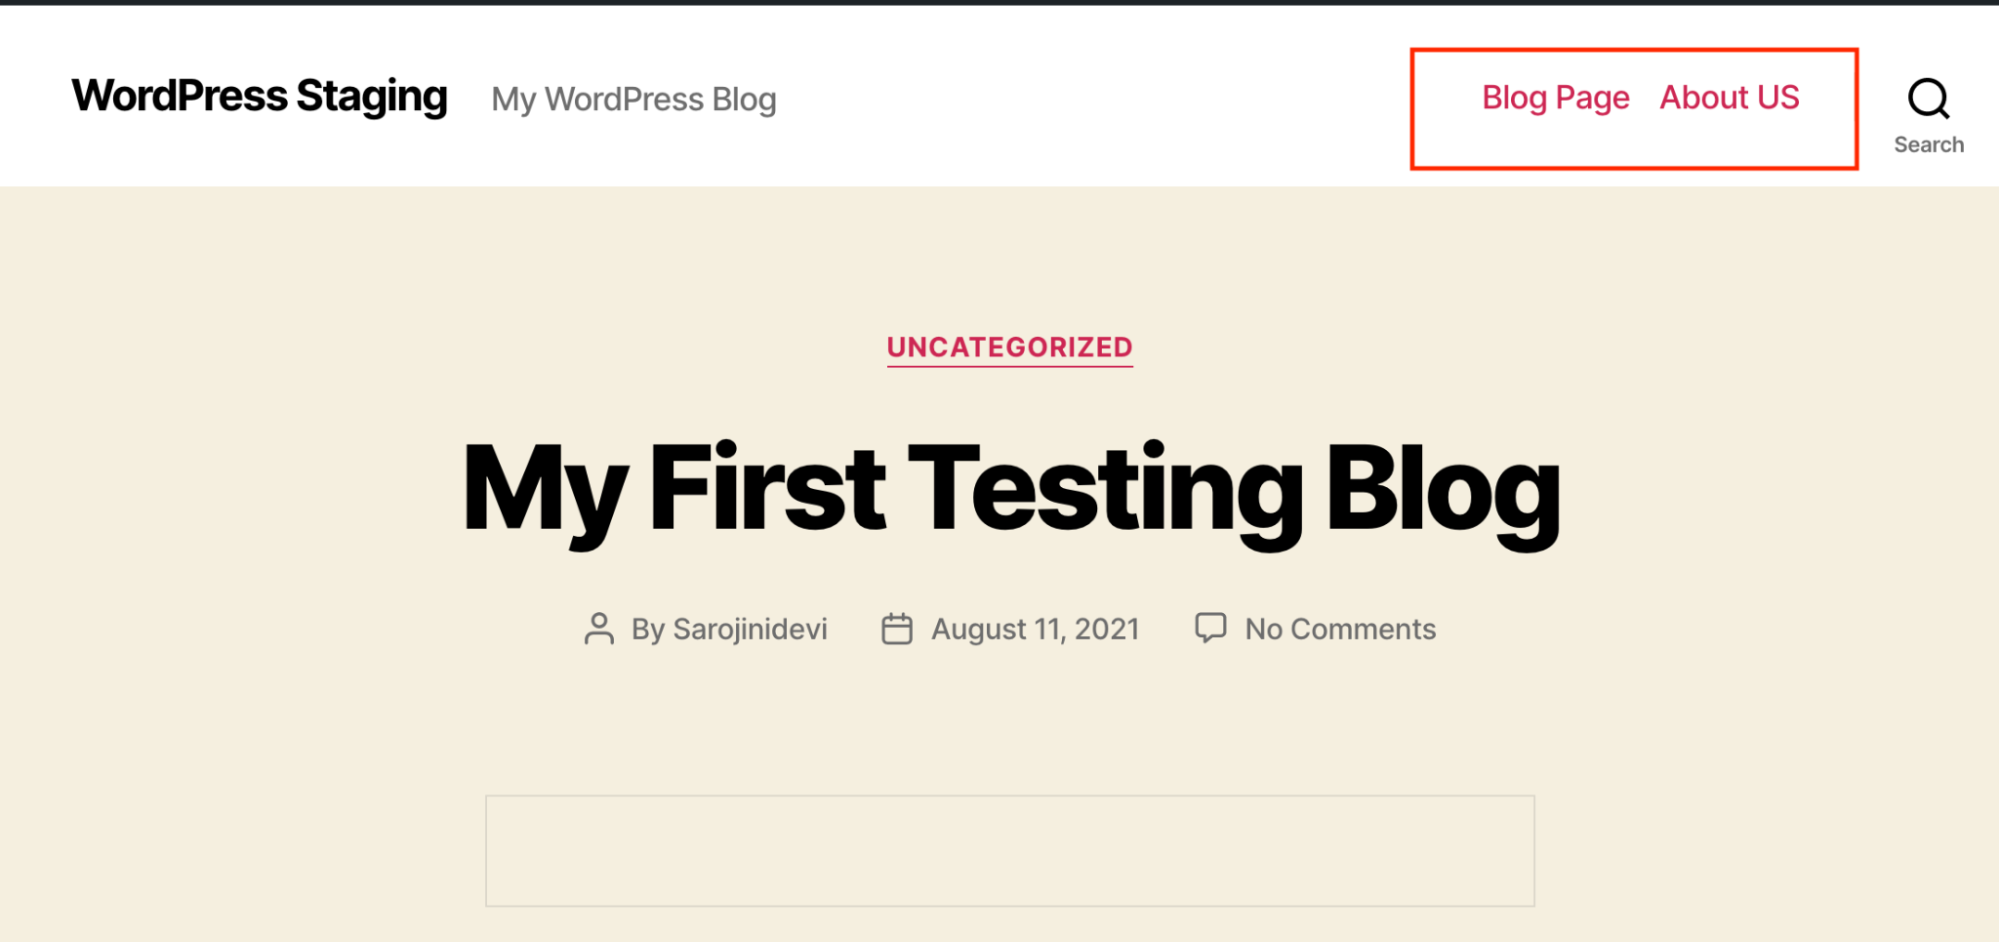
In this example, the menu is displayed on top: