Configuring an e-mail alias in Plesk
Use our video demo to learn how to create an e-mail alias in Plesk, allowing you to keep your e-mail address private without missing any messages sent to your domain.
This article describes how to configure e-mail aliases in Plesk.
NotePlesk is no longer included with new hosting.com plans, but it is still available on legacy Managed WordPress accounts. You can install Plesk manually on unmanaged VPS and Dedicated servers.
E-mail aliases enable you to keep your e-mail address private. For example, if your main e-mail address is[email protected], you probably do not want to publish it on the internet and receive spam. Instead, you can create an alias (for example, [email protected] ) and publish that address instead. When messages arrive for [email protected], you receive them in your [email protected] inbox.
Configuring an e-mail alias
To watch a video that demonstrates the following procedure, please click below:
To configure an e-mail alias, follow these steps:
-
Log in to Plesk.
NoteIf you do not know how to log in to your Plesk account, please see this article.
-
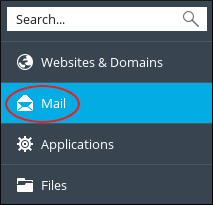
In the left sidebar, click Mail:

-
On the Mail page, click the e-mail address for which you want to create an alias.
-
Click the Email Aliases tab.
-
In the Email alias text box, type the alias for the e-mail address.
TipYou can specify multiple aliases. To do this, click Add email alias , and then type the additional alias or aliases.
- Click OK. Plesk activates the alias (or aliases) for the e-mail account.
More information
For more information about Plesk, please visit https://www.plesk.com.
Related articles
Updated 3 months ago
