Configuring image compression in WordPress
Learn how to configure image compression in WordPress.
WordPress compresses all uploaded images by default. Compressing images is a technique that, in addition to saving storage space, improves the loading speed of your site. WordPress, according to the documentation, compresses JPEG images to 90% quality. Nowadays, every website owner must consider mobile users, especially because the majority of people have limited data plans, and large uncompressed images will slow down loading times, causing users to abandon the site.This articles describes how to configure image compression in WordPress.
Configuring Image Compression
To configure image compression in WordPress, follow these steps:
-
Log into WordPress with the Administrator account.
-
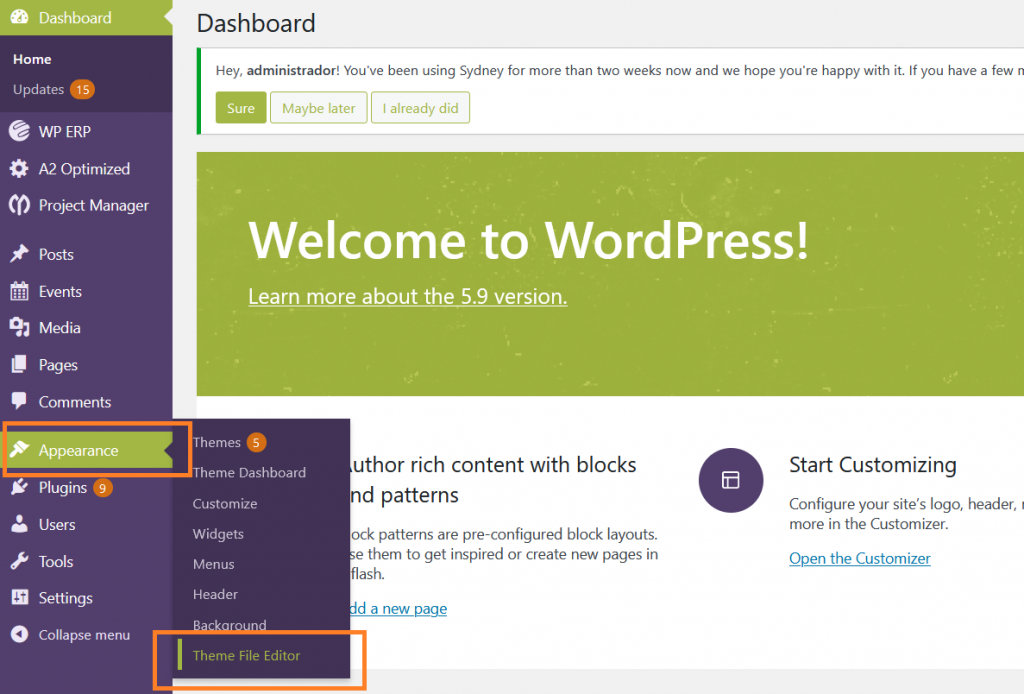
In the left sidebar, click Appearance and then click Theme File Editor:
-
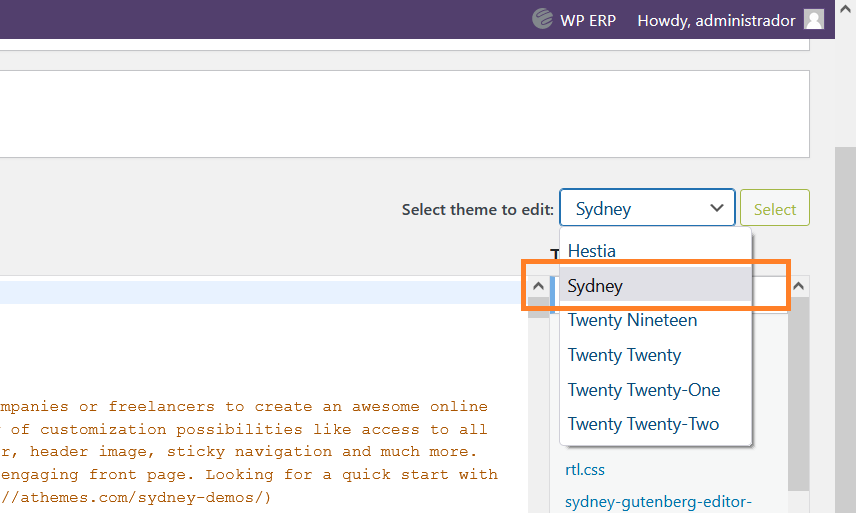
On the theme editor, select the currently used theme:
-
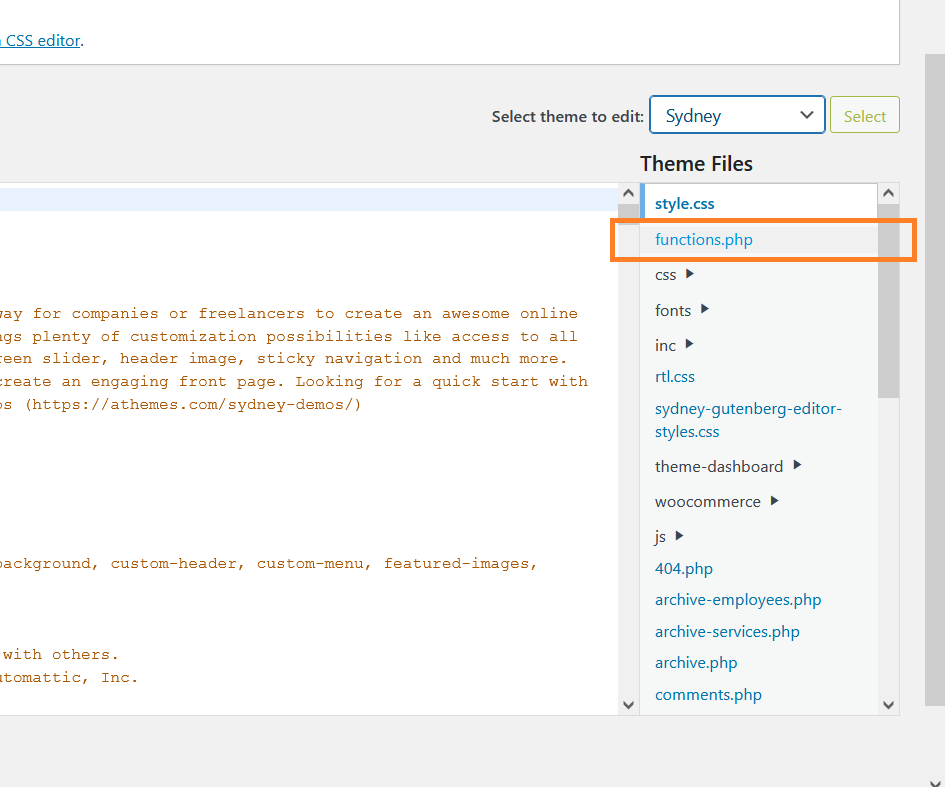
The files of the theme will be listed at the right. Click on the functions.php file:
-
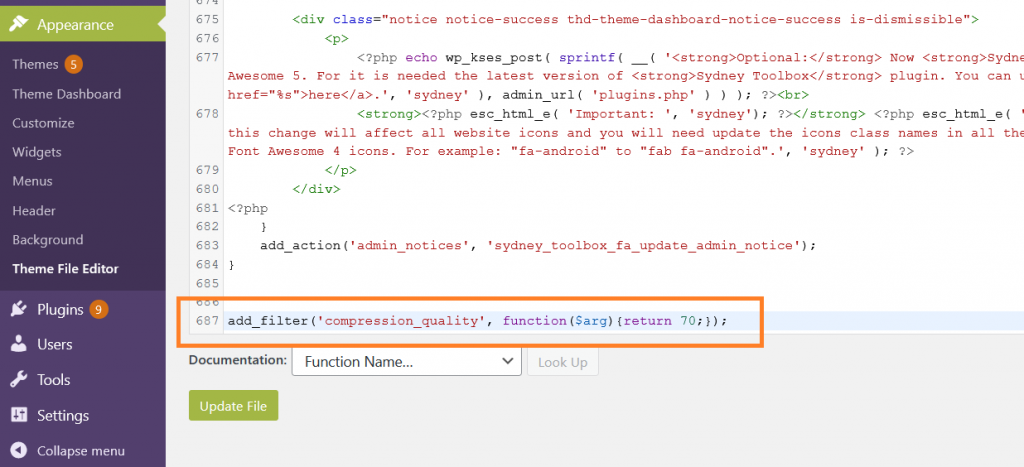
At the end of the functions.php file, insert the following filter to increase the compression quality from 100 to70:
add_filter('compression_quality', function($arg){return 70;});- Click on the Update File to save changes to the functions.php file:
NoteIf you want to apply this change to all images previously uploaded, you will have to regenerate all thumbnails.
More information
For more information about image compressing and optimization, please visit Optimizing images for your website.