Install and configure Custom Adobe Fonts plugin
To install and configure Adobe Fonts plugin, follow these steps:- Log in to your WordPress site with an administrator account.
-
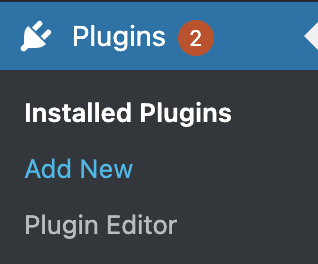
On the Dashboard in the left sidebar, click Plugins, and then click Add New:
-
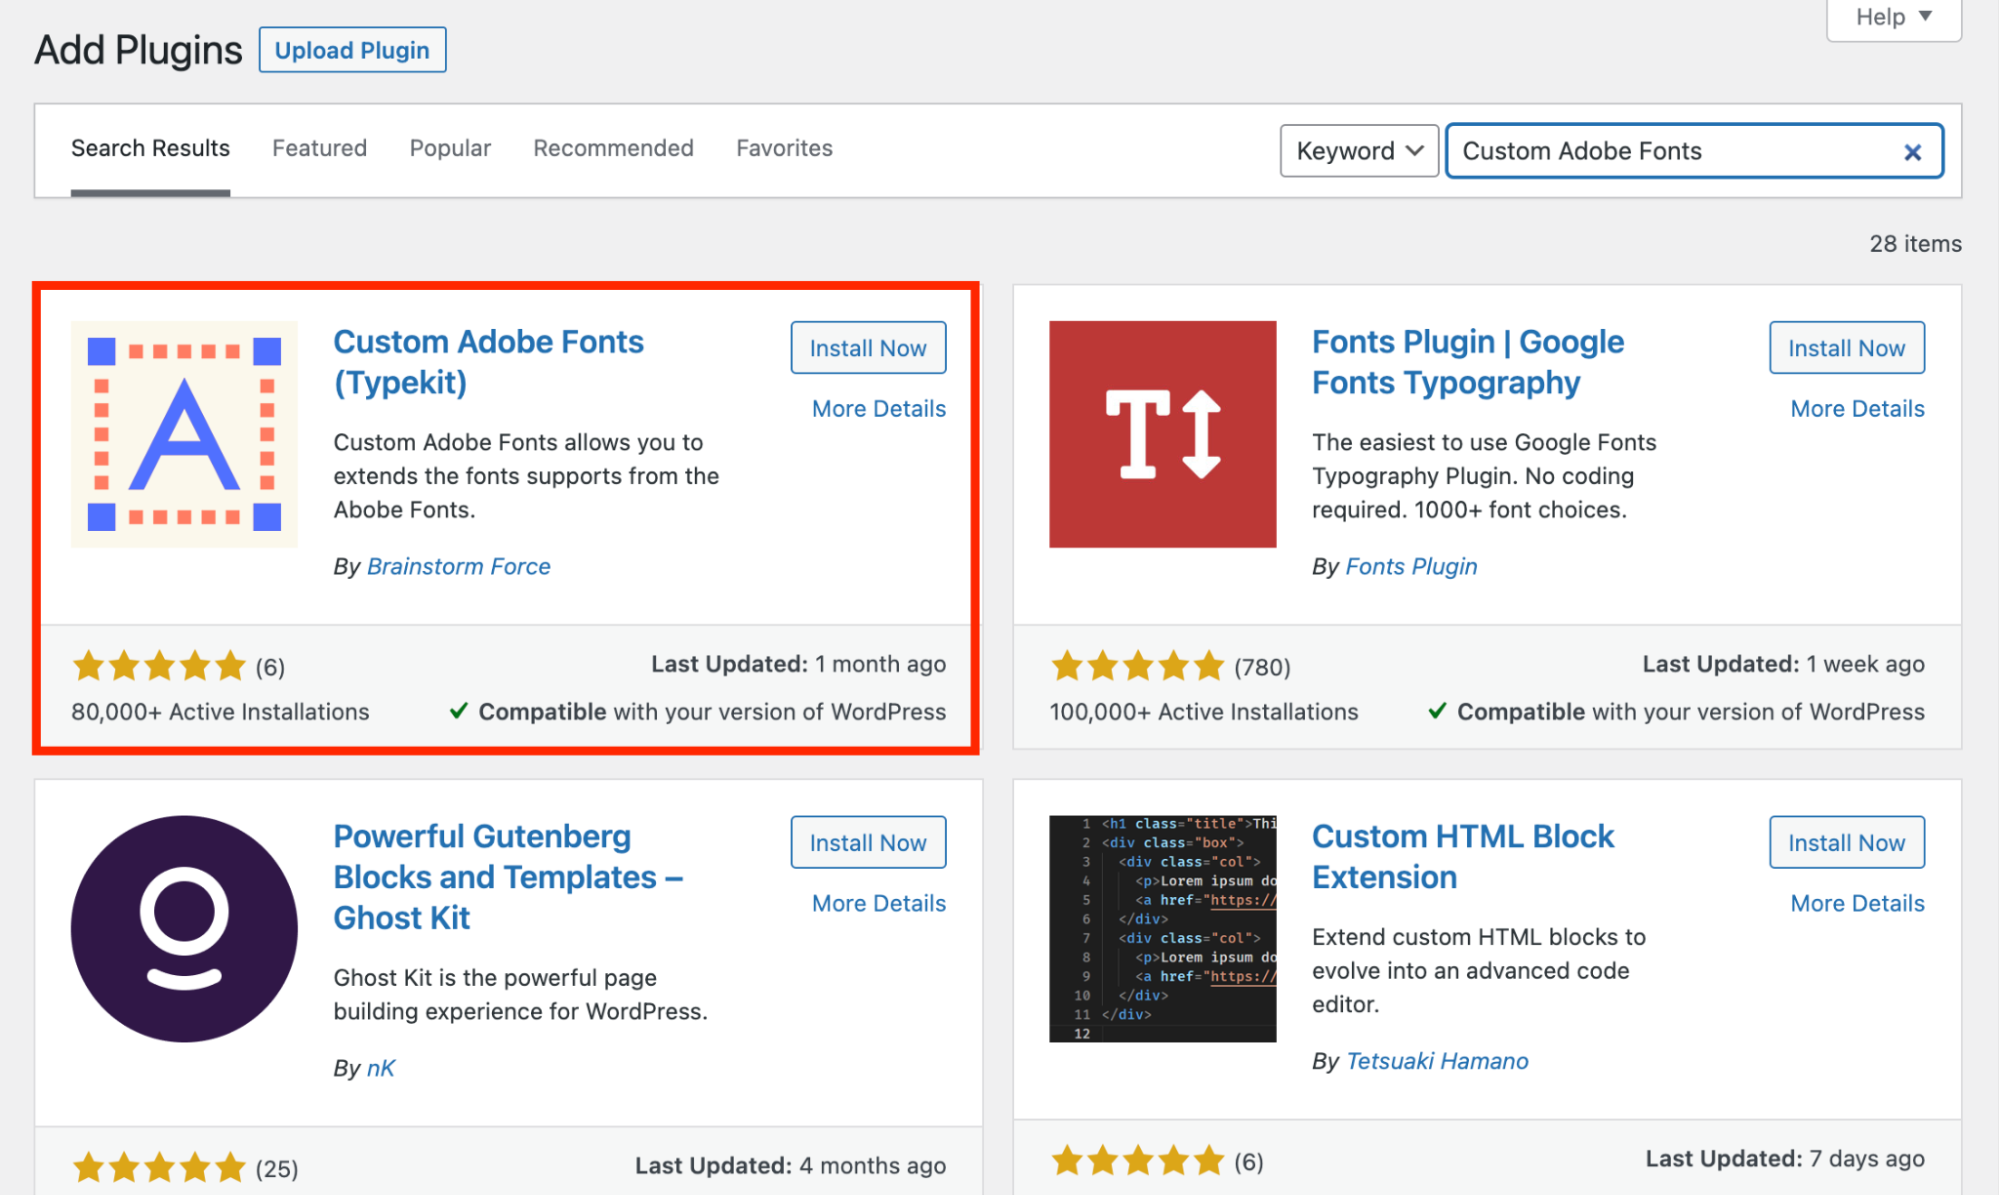
Search for “Custom Adobe Fonts, click Install, and then click Activate the plugin:
-
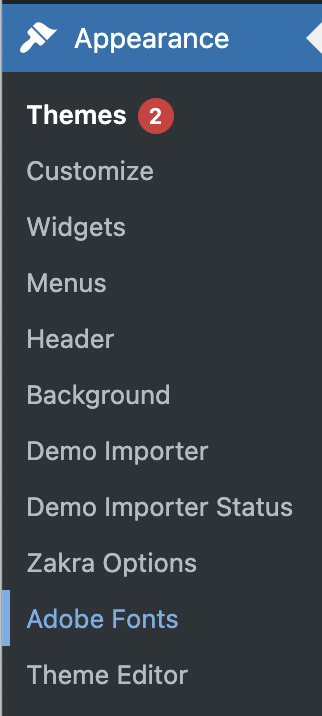
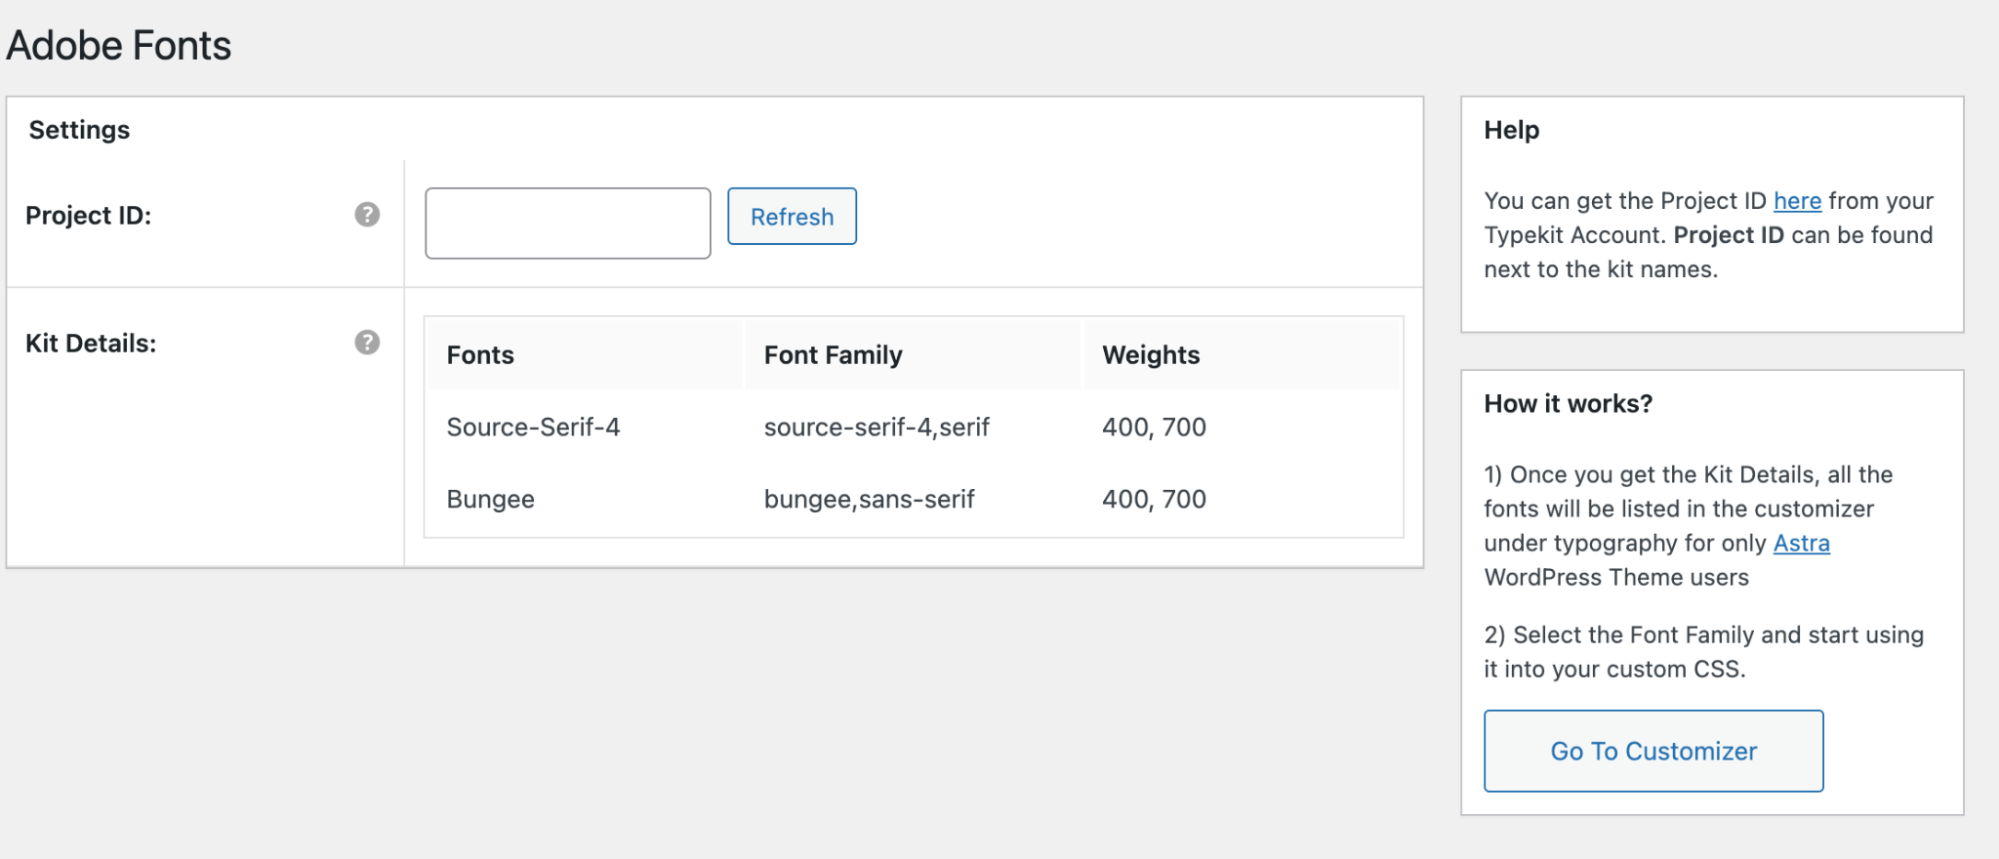
On the Dashboard in the left sidebar, click Appearance, and then click on Adobe Fonts:
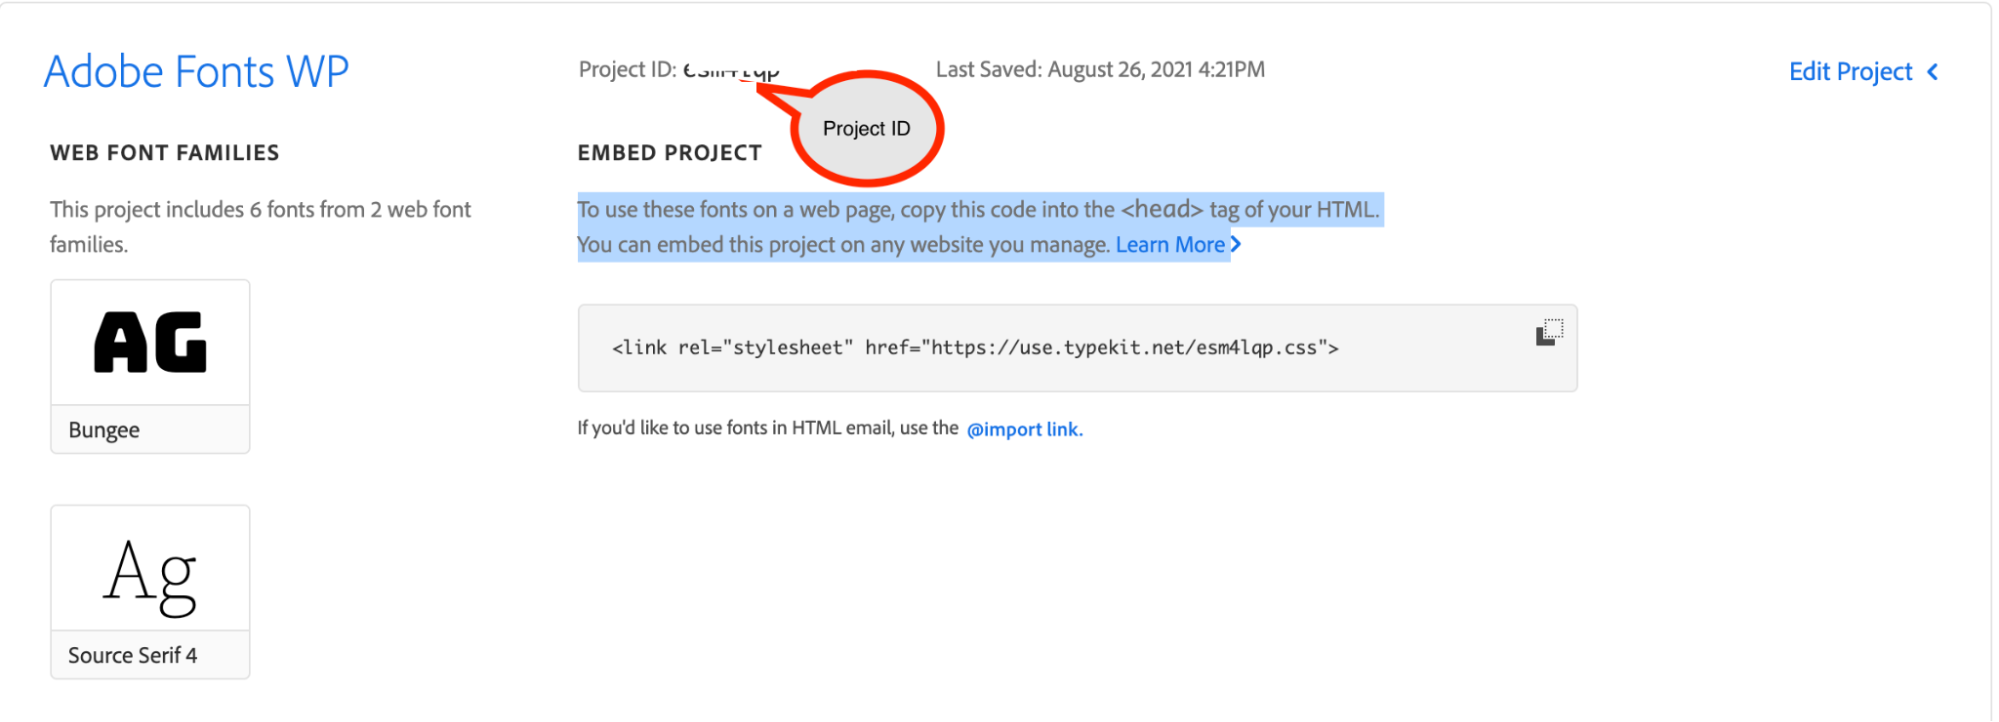
- Create an Adobe Web Project and add the desired font in the project. Refer to this link to create a web project:
-
https://helpx.adobe.com/fonts/using/add-fonts-website.html#. Copy and paste the project into the Project ID text field to retrieve the font kit:
-
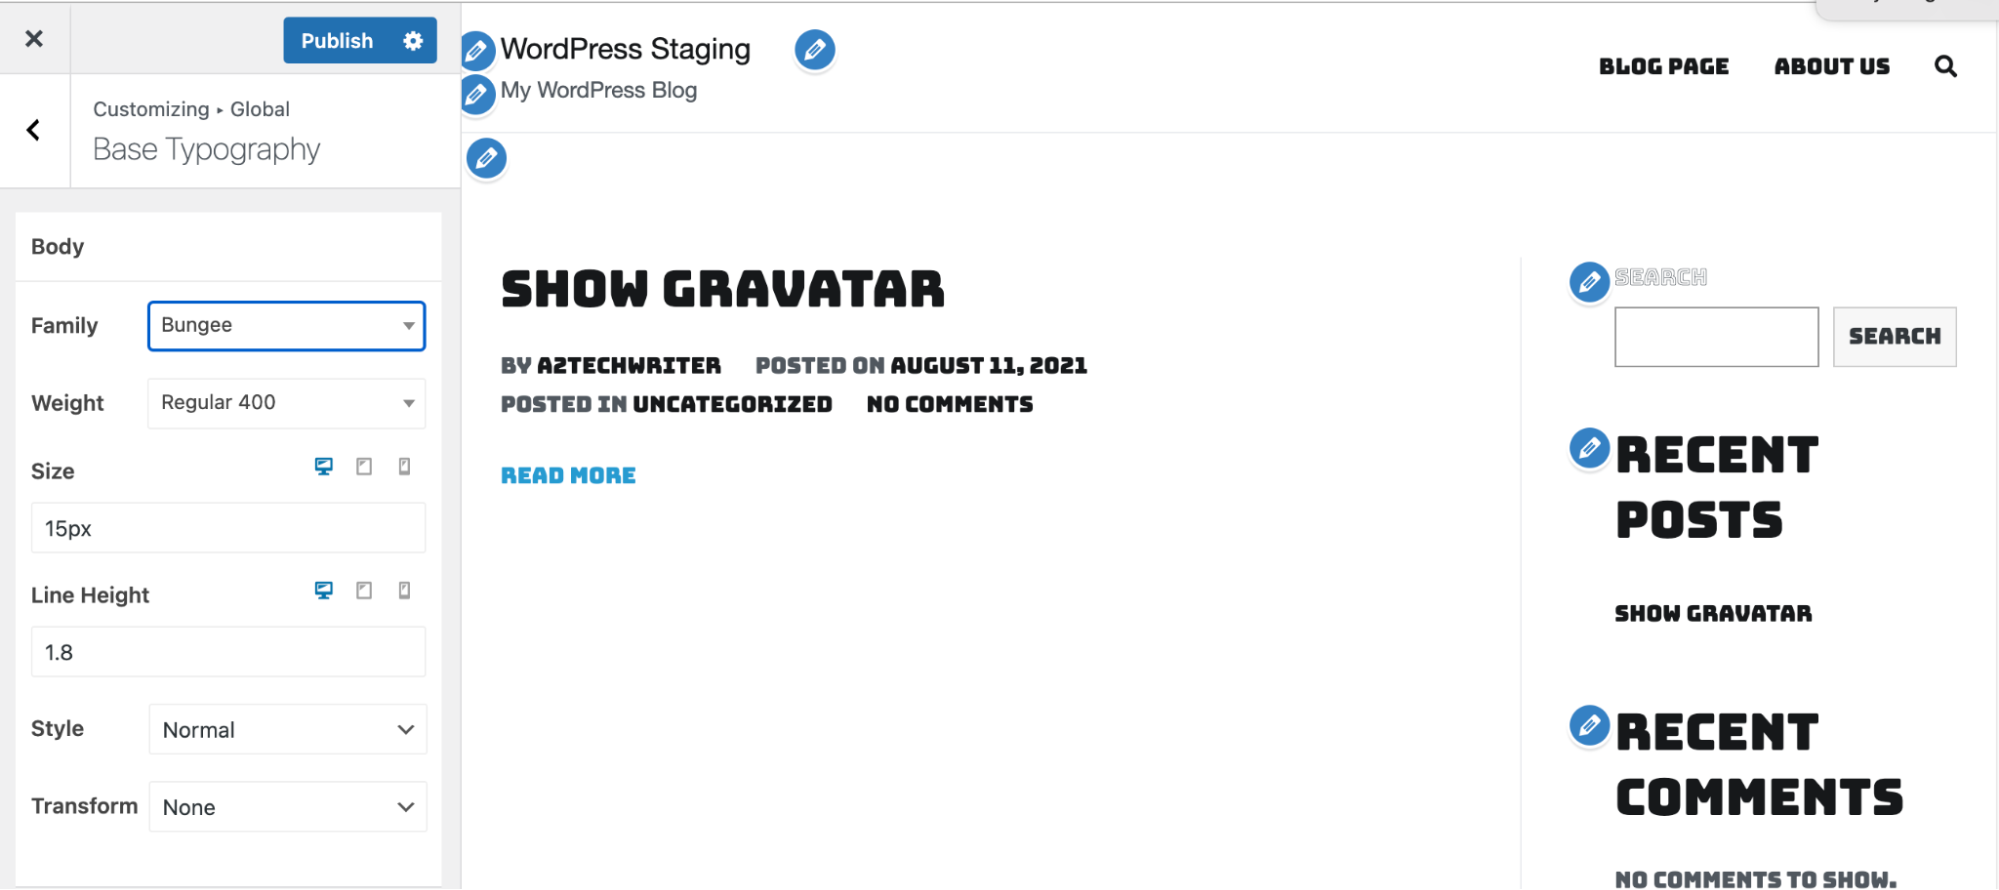
You will be able to see the fonts added in the settings of Astra / Beaver Builder / Elementor. If you’re not using any of the supported plugins and themes, you can write the custom CSS to apply the fonts. The display shows the newly added font in the font family list for the Astra Theme.