- Make sure you have already created at least one e-mail account for your domain. If you have not done this, please see this article to learn how to create an e-mail account using cPanel.
- Log in to the Proton account.
-
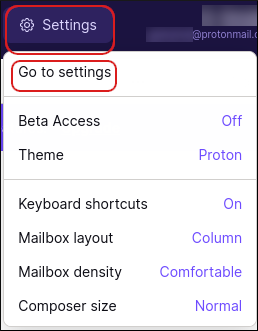
At the top of the page, click Settings and then click Go to settings:
-
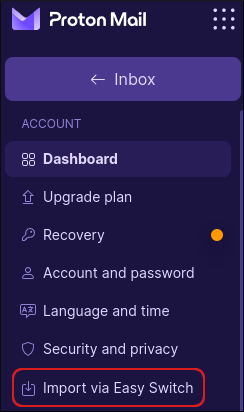
In the left sidebar, click Import via Easy Switch:
-
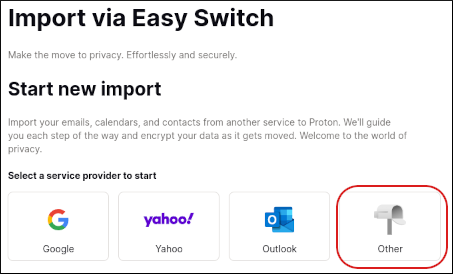
On the Import via Easy Switch page, under Start new import, click Other:
-
Under What would you like to import?, click Emails:
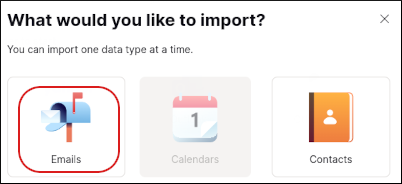
👍 Tip You can only import one data type at a time. After you import email messages from a hosting.com account, you can repeat these steps to import its contacts.
-
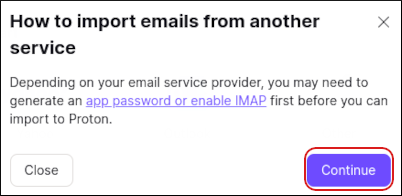
Click Continue:
-
Under Start a new import, in the Email text box, type the hosting.com e-mail address that you want to access from Proton (for example,user@example.com ):
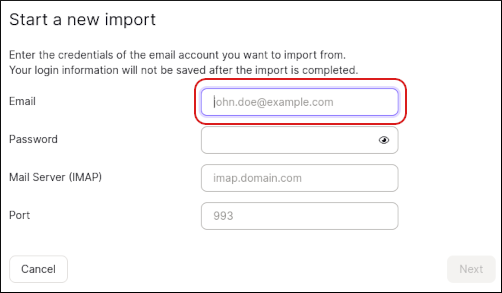
- In the Password text box, type the password for the hosting.com account.
- In the Mail Server (IMAP) text box, type mail.example.com, where example.com represents your domain name.
-
In the Port text box, type
993. -
Click Next. The Start import process dialog appears:
-
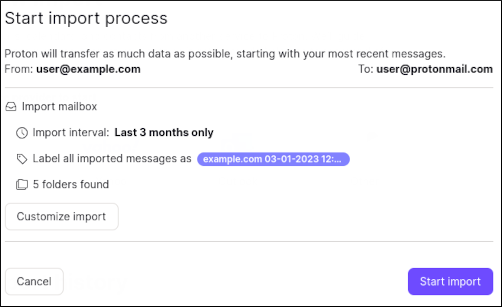
If you want to change the import options, click Customize import. You can change the following options:
- The name of the label to assign to imported messages.
- How far back in time to import messages. (You can also import all messages for the account).
- Which folders to import.
- Click Start import. Proton starts the import process. Under Your import history, you can monitor the import progress, or click Cancel to stop the import.
- Proton sends you a message when the import process is complete. The imported messages appear in your Proton inbox (or whichever folders you selected to import).
e-mail-client-application-setup
Setting up Proton to access your e-mail account
This article provides step-by-step instructions for setting up Proton webmail to access an hosting.com e-mail account.
This article demonstrates how to set up Proton webmail to access a hosting.com e-mail account and import its messages.
To set up Proton to access a hosting.com e-mail account, follow these steps: