Managing web hosting accounts with WHM
Learn how to create, modify, and delete accounts in WHM. Just follow our easy step-by-step WHM instructions.
This article describes how to create, modify, and delete accounts in WebHost Manager (WHM).
NoteThis article assumes that you have set up at least one package in WHM. If you have not already done so, please see this article.
Creating an account
After you have created a package in WebHost Manager, you can create an account. A new account includes:
-
cPanel.
-
Web site functionality (with files hosted in the public_html directory).
-
FTP account.
-
SSH access (if it is enabled in the package).
TipYou can use skeleton files to provide default content that is copied automatically to new accounts. For example, you can create a default index.html file that is used for all new accounts. For information about how to do this, please see this article.
To create an account in WHM, follow these steps:
-
Log in to WebHost Manager.
NoteIf you do not know how to log in to your WebHost Manager account, please see this article.
-
In the search box at the upper left of the WHM screen, start typing account, and then click Create a New Account when it becomes visible:

-
Under Domain Information, type the domain name in the Domain text box. For example, type
example.com.
ImportantDo not add the www subdomain to the domain name.
-
WebHost Manager fills in the Username text box automatically based on the domain name you provide.
-
In the Password text box, type a password for the new account, and then confirm the password in the Re-type Password text box.
TipAlternatively, you can click Password Generator and WebHost Manager generates a random, strong password for you.
-
In the Email text box, type the account owner's e-mail address. This e-mail address receives automatic cPanel notifications regarding the account, such as password reset information.
-
Under Package, in the Choose a Package list box, select a package to use, or select the Select Options Manually check box.
-
Under Settings, select the cPanel theme and locale.
-
Under DNS Settings, we recommend that you leave the DKIM and SPF options checked. You should leave the nameserver option unchecked, unless you are sure that you want the domain to use the registrar's nameservers.
-
Click Create. When account creation is complete, WebHost Manager displays account configuration information.
Modifying an account
To modify an existing account in WebHost Manager, follow these steps:
-
Log in to WebHost Manager.
NoteIf you do not know how to log in to your WebHost Manager account, please see this article.
-
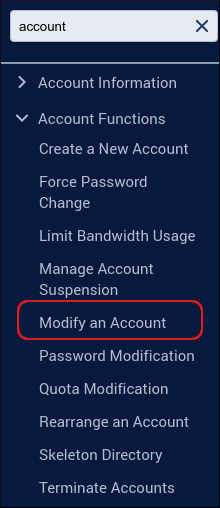
In the search box at the upper left of the WHM screen, start typing account, and then click Modify an Account when it becomes visible:
-
Select the account that you want to modify, and then click Modify.
-
Make the changes to the account, and then click Save.
-
If the account has a package assigned, WHM will display a Package Conflict Resolution dialog box. Select the appropriate option, and then click Proceed.
Deleting (terminating) an account
To delete an existing account in WebHost Manager, follow these steps:
-
Log in to WebHost Manager.
NoteIf you do not know how to log in to your WebHost Manager account, please see this article.
-
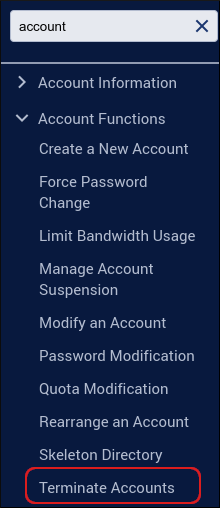
In the search box at the upper left of the WHM screen, start typing account, and then click Terminate Accounts when it becomes visible:
-
The Terminate Accounts page appears with the first page of accounts listed. If the account you want to delete is not shown, type the username or primary domain of the account in the search box until the account appears in the list.
-
When the account is visible, click Remove to the right of the account you want to terminate.
-
Click Yes, remove this account to confirm the termination.
WarningWhen you terminate an account, its data is completely and irreversibly removed from the server. Make sure that you save any account data you want to retain before you delete it.
Listing all accounts
To view a list of all of your accounts in WebHost Manager, follow these steps:
-
Log in to WebHost Manager.
NoteIf you do not know how to log in to your WebHost Manager account, please see this article.
-
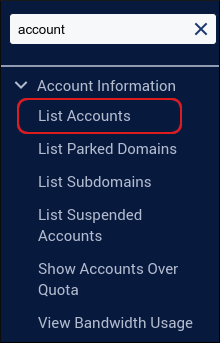
In the search box at the upper left of the WHM screen, start typing account, and then click List Accounts when it becomes visible:
TipYou can perform many common administrative tasks directly from the account list. To do this, click + to view expanded options. You can change an account's password, e-mail address, and more.