Editing .htaccess files with Plesk, cPanel, or the command line
Learn how to edit .htaccess with Plesk, cPanel, or the Linux command line.
The .htaccess file is the local Apache settings document that instructs the Apache web server how to work with your website. Many useful and interesting things are possible with the settings inside .htaccess, but first you must know how to create and edit an .htaccess file. This article shows you how.
See the Related Articles section to see some of the things you can do with .htaccess once you have learned to create and edit the file.
Using the cPanel File Manager
-
Log in to cPanel.
NoteIf you do not know how to log in to your cPanel account, please see this article.
-
On the Tools page, in the Files section, click File Manager:

-
Click the public_html folder in the left panel of the File Manager. Files in public_html are shown in the right panel.
-
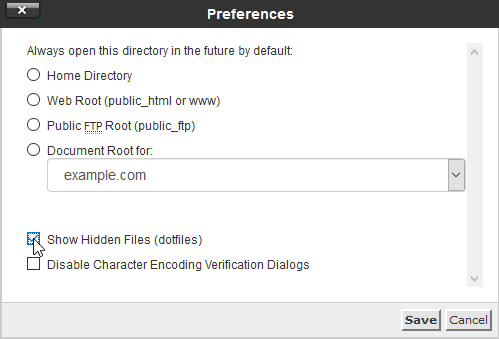
If the .htaccess file is not visible, click the Settings button at the upper right of the File Manager.

-
In the pop-up dialog box, make sure Show Hidden Files (dotfiles) is checked. If it is not checked, check the box and then click Save.
-
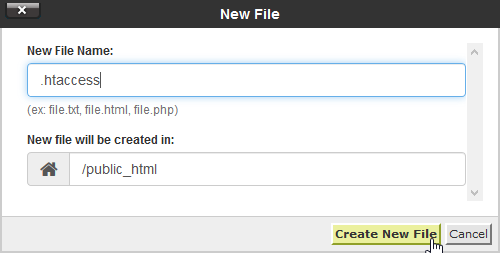
If there is still no .htaccess file visible, click the + File button in the File Manager toolbar.
-
In the pop-up dialog box, enter.htaccess for the file name and click the Create New File button. You should now be able to see the .htaccess file in File Manager.
-
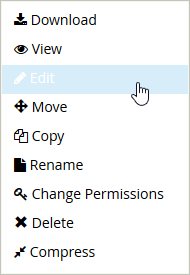
Right-click on the .htaccess file in the right-hand pane of File Manager and select Edit from the pop-up menu.
-
Click the Edit button on the pop-up dialog box.
-
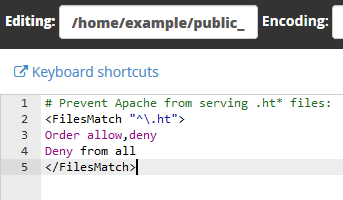
Make any desired additions or changes to the file in the editing area.
-
Click Save Changes at the upper right of File Manager.

-
Visit the site to make sure everything works as expected.
-
Go back to the editor and make corrections or additional changes if needed. The cPanel editor has an undo feature so you can easily roll back any changes.
-
After your changes are complete, click Save Changes to save any changes and then click Close to close the editor.
Using the Plesk File Manager
NotePlesk is used for the Managed WordPress hosting plan which run on Linux operating systems. These instructions only work for Linux-based installations.
-
Log in to Plesk.
NoteIf you do not know how to log in to your Plesk account, please see this article.
-
If there is more than one domain, scroll to the management area for the desired domain.
-
Click on the File Manager icon.

-
The File Manager will open up to the root directory for the domain selected.
-
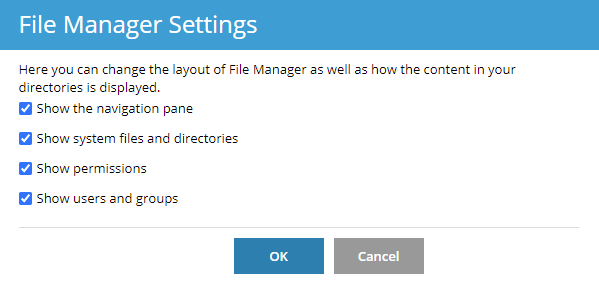
If the .htaccess file is not visible, click the Settings button at the upper right of the File Manager.
-
In the pop-up dialog box, make sure Show system files and directories is checked. If it is not checked, check the box and then click OK.
-
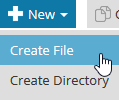
If there is still no .htaccess file visible, click the New button in the File Manager toolbar and select Create File from the drop-down list.
-
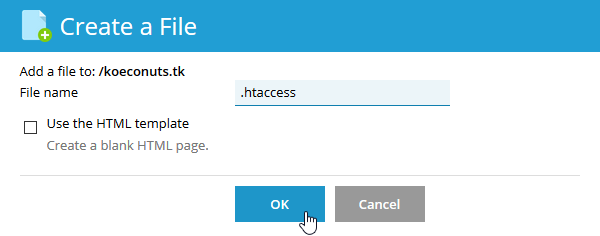
In the pop-up dialog box, enter .htaccess for the file name and click OK. You should now be able to see the .htaccess file in File Manager.
-
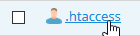
Click the name of the file to open it in the editor.
 Important
The Plesk editor does not have an undo feature. If you are not confident in your editing skills, follow these instructions to make a backup:
-
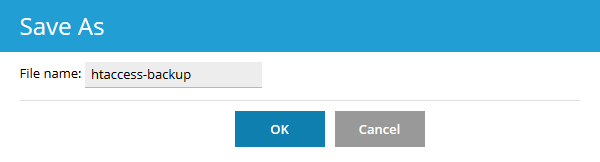
Click the Save As button at the bottom of the editor to create a backup copy of the file.
-
Give the backup a name in the Save As dialog and click OK. The editor will close.
-
Click on .htaccess again to re-open it.
-
-
Make any desired additions or changes to the file in the editing area.
-
Click the Apply button at the bottom of the editor.
-
Visit the site to make sure everything works as expected.
-
Go back to the editor and make corrections or additional changes if needed.
-
Click OK to save the changes and close the editor.
Using the command line
-
Log into the account to be modified using SSH.
NoteIf you do not know how to use SSH, please see this article.
-
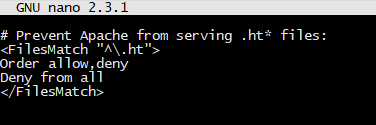
Edit the .htaccess file using the Nano editor by entering the appropriate command below. If the file exists it will be opened. If the file does not exist, it will be created.
- For Plesk
nano httpdocs/.htaccess- For cPanel
nano public_html/.htaccess- For unmanaged servers
nano /var/www/html/.htaccessImportantThe command lines above show common locations for the websites to be stored for the various platforms. Your site may be in another location. Change the path accordingly.
-
Once the file is open, make any desired additions or changes to the file in the editing area.
-
Press Ctrl + O to write out the file. Make sure the File Name to Write is .htaccess. Press Enter.

-
Visit the site to make sure everything works as expected.
-
Go back to the editor and make corrections or additional changes if needed.
-
After your changes are complete, press Ctrl + O to write out the file. Make sure the File Name to Write is .htaccess. Press Enter.
-
Press Ctrl + X to exit Nano.