

- Database queries.
- HTTP request and response headers.
- Scripts, including hooks and actions.
- Site environment information, including the server, PHP, MySQL, and WordPress.
For more information about what Query Monitor can do, please visit https://github.com/johnbillion/query-monitor.
Installing the plugin
To install Query Monitor on your WordPress site, follow these steps:- Log in to your WordPress site as the administrator.
-
In the left sidebar, click Plugins:
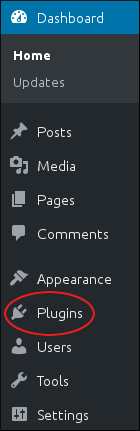
- Click Add New.
-
In the Search plugins text box, type
query monitor, and then press Enter:

-
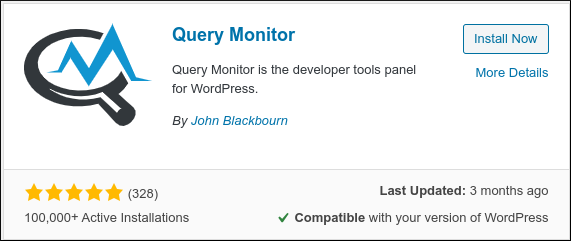
Locate Query Monitor, and then click Install Now:
-
After WordPress finishes installing the plugin, click Activate. The Query Monitor appears in the toolbar:

Using the plugin
After you install the Query Monitor plugin, you are ready to monitor your site. To do this, follow these steps:- Log in to your WordPress site as the administrator.
-
On the toolbar, select an option from the Query Monitor menu:
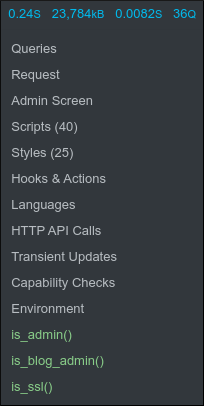
- Queries: This option shows the raw database queries that were used to help generate the current page, as well as the functions that ran the queries.
- Request: This option shows the HTTP request for the current page.
- Scripts: This option shows all of the script files loaded for the current page.
- Styles: This option shows all of the style (CSS) files loaded for the current page.
- Hooks & Actions: This option shows all of the hooks and their associated actions for the current page.
- Environment: This option shows environment settings for the site, including PHP, MySQL, WordPress, and the web server.