Changing the domain in WordPress
This article outlines the steps for changing the domain name for an existing WordPress installation. It includes instructions for using the WordPress administration interface, the WP-CLI command-line tool, and phpMyAdmin.
This article describes how to change the domain name for an existing WordPress installation. You may need to do this, for example, if:
-
You want to use a new domain name for your site.
-
You are migrating your WordPress site.
Step #1: Back up the site
Before changing the domain (or making any other major changes, for that matter), it is a good idea to do a site backup. Then if anything goes wrong, you can restore the site to its previous state.
For information about how to back up WordPress, please see this article.
Step #2: Change the WordPress domain settings
After you do a site backup, you are ready to change the site's domain settings in WordPress. There are several ways to do this; use whichever method is available or easiest for you.
NoteMake sure the new domain is pointing to your site
before you change the domain settings in WordPress. Remember that
DNS propagation can take 24 hours to complete.
Method #1: Use the WordPress administration interface
The easiest way to change the domain name is to use the administration interface in WordPress. To do this, follow these steps:
-
Log in to WordPress.
-
In the left sidebar, click Settings, and then click General:
-
Under General Settings, in the WordPress Address (URL) text box, type the new domain name:
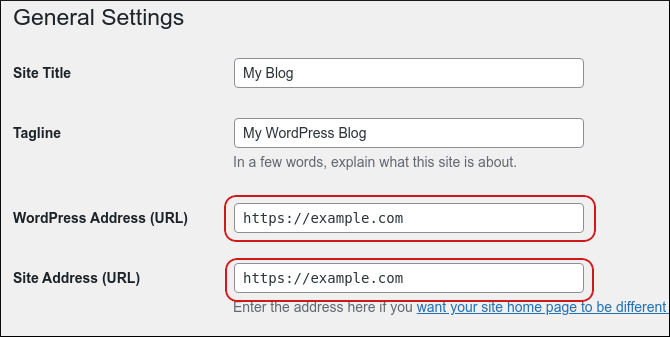
NoteIf your site has an SSL certificate, remember to type https:// instead of http://.
- In the Site Address (URL) text box, type the new domain name.
NoteIf your site has an SSL certificate, remember to type https:// instead of http://.
- Click Save Changes.
Method #2: Use the WP-CLI tool
If the administration interface is inaccessible, or if you prefer working from the command line, you can use the WP-CLI tool to change the domain name. To do this, follow these steps:
-
Log in to your account using SSH.
-
At the command prompt, change to the directory where you installed WordPress.
-
Type the following command. Replace old.example.com with the old domain name, and replace new.example.com with the new domain name:
wp search-replace 'old.example.com' 'new.example.com'WP-CLI replaces all instances of old.example.com in the database with new.example.com.
Method #3: Use phpMyAdmin
If you are unable to access the WordPress administration dashboard, or if you don't want to use the command line, you can use phpMyAdmin to change the domain name settings in the database manually. For information about how to do this, please see this article.
Step #3: Test the site
Lastly, you should test the site to make sure everything works correctly. Be sure to look for any hard-coded URLs that may no longer function with the domain name change.
TipAdditionally, you may want to set up redirects to ensure your visitors go to the correct location. For information about how to configure redirects in cPanel, please see this article.