Enabling auto-reply messages for an e-mail account in Plesk
Use these instructions and learn how to enable auto-reply messages for an e-mail account in Plesk, perfect for when you're out-of-office or temporarily unavailable.
This article describes how to enable auto-reply messages for an e-mail account in Plesk. You may want to do this, for example, if a user is out of the office or temporarily unavailable to respond to e-mail messages.
NotePlesk is no longer included with new hosting.com plans, but it is still available on legacy Managed WordPress accounts. You can install Plesk manually on unmanaged VPS and Dedicated servers.
Enabling auto-reply messages in Plesk
To enable auto-reply messages for an e-mail account in Plesk, follow these steps:
-
Log in to Plesk.
NoteIf you do not know how to log in to your Plesk account, please see this article.
-
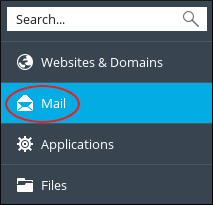
In the left sidebar, click Mail:
-
On the Mail page, click the e-mail address for which you want to set up an auto-reply message.
-
Click the Auto-Reply tab.
-
Select the Switch on auto-reply check box.
-
Next to Message format, select the message format you want to use (plain-text or HTML).
-
In the Auto-reply message text text box, type the content of the message that you want to send.
-
In the Forward to text box, you can optionally specify an e-mail address that receives a copy of the original message.
-
To automatically disable auto-reply messages, select the Switch off auto-reply on check box, and then select the date you want to stop sending auto-reply messages for the account.
-
Click OK.
More information
For more information about Plesk, please visit https://www.plesk.com.