Deleting MySQL database tables using phpMyAdmin
This article covers how to use phpMyAdmin to delete (drop) tables in a MySQL database, with step-by-step instructions provided.
This article describes how to delete (drop) a table in a MySQL database using phpMyAdmin.
WarningBe careful! When you delete a database table, all of the data in it is deleted permanently as well. Make sure you have a current database backup before deleting tables.
NoteThe following procedure demonstrates how to delete a table in a database. If you want to delete an entire database on our managed hosting plans, you cannot use phpMyAdmin. Use the
MySQL Databases tool in cPanel instead.
Deleting a table using phpMyAdmin
To delete a table in a MySQL database using phpMyAdmin, follow these steps:
-
Log in to cPanel.
NoteIf you do not know how to log in to your cPanel account, please see this article.
-
On the Tools page, in the Databases section, click phpMyAdmin:

-
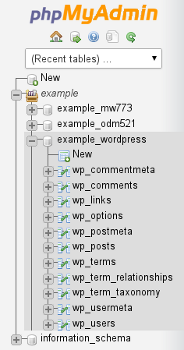
The phpMyAdmin administration page appears in a new window. In the left pane, click the name of the database that contains the table you want to delete. For example, the following image shows the example_wordpress database selected:
-
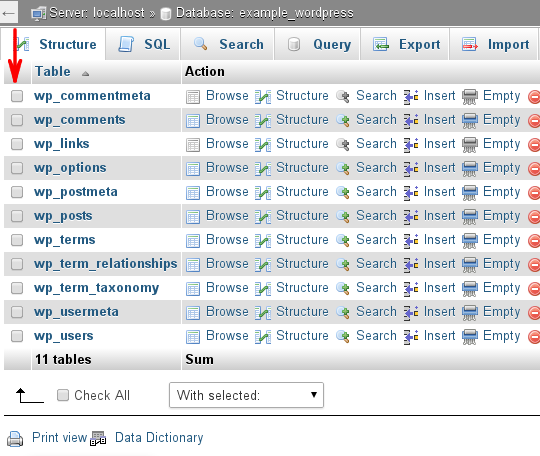
In the right pane, select the check box for the table that you want to delete:
-
In the With selected list box, select Drop.
TipAlternatively, if you want to keep the table, but delete all of the data that it contains instead, select Empty .
-
To disable foreign key checks, clear the Enable foreign key checks check box.
ImportantThe foreign key check is a useful way to help prevent accidental data deletion. Only disable the foreign key check if you are sure of the effects of doing so.
-
phpMyAdmin confirms that you want to delete the table. Click Yes.
More information
For more information about phpMyAdmin, please visit https://www.phpmyadmin.net.