

Method #1: Use the Hosting Panel to determine the server name
You can use the hosting.com Hosting Panel to determine the server name for your account. To do this, follow these steps:- Log in to the Hosting Panel at https://my.hosting.com.
-
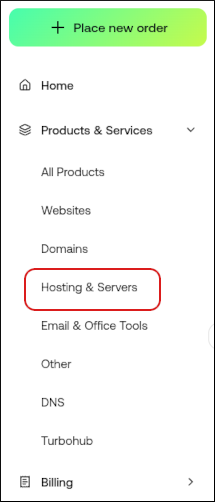
In the left sidebar, under Products & Services, click Hosting & Servers:
- On the Hosting & Servers page, locate your hosting account, and then click Manage.
-
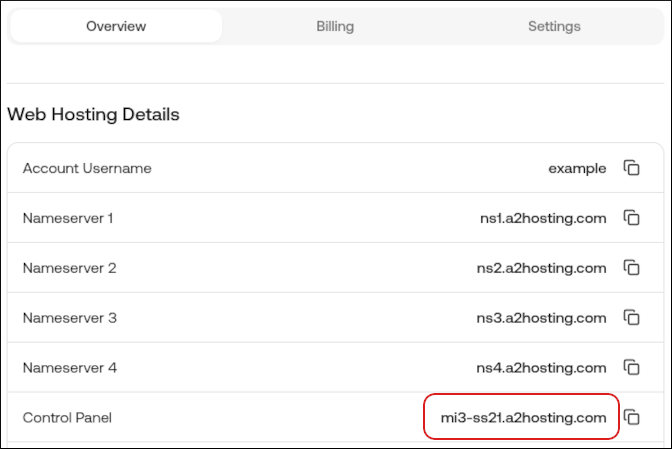
On the Overview tab, look in the Control Panel row. This is the server name:
Method #2: Use cPanel to determine the server name
You can use cPanel to determine the server name. To do this, follow these steps:-
Log in to cPanel.
📘 Note If you do not know how to log in to your cPanel account, please see this article.
- In the right sidebar, click Server Information.
-
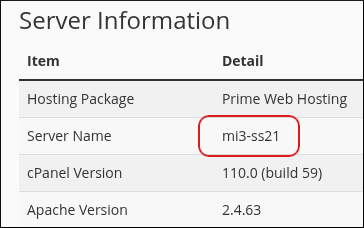
On the Server Information page, locate the Server Name row and note the value:
-
To determine the full server name for your account:
- If you have a shared hosting account, add a2hosting.com to the Server Name value. For example, if cPanel displays mi3-ss21 for your server name, then the complete server name is mi3-ss21.a2hosting.com.
- If you have a reseller hosting account, add supercp.com to the Server Name value. For example, if cPanel displays mi3-sr10 for your server name, then the complete server name is mi3-sr10.supercp.com.
Method #3: Use the command line to determine the server name
You can use the command line to determine the server name for an account. To do this, follow these steps:- Log in to your account using SSH.
-
At the command line, type the following command:
The full server name for your account appears.