These instructions apply to servers with the cPanel control panel and Ruby Selector installed. Check for the Setup Ruby App icon in the Software section of cPanel before proceeding.
Setting up one Ruby version
To set up one Ruby version for use at the command line, follow these steps:- Log into your account using SSH.
-
See the available Ruby versions by typing the command as shown and viewing the results.
The two digits on each line in the listing represent the version number, where the actual version number has a dot between the 2 digits. For example, ruby26 is Ruby version 2.6.
- Choose a version to use. In this example, we use Ruby 2.6.
-
Create a directory for local gems.Some gems are pre-installed globally on the server, but additional gems must be installed in the user account.The directory ~ruby/gems is used here but other values may be used.
-
Edit the file ~/.bash_profile and add these lines at the bottom, replacing ruby26 and ruby red with the desired values for your installation:
-
Update your environment with the following command:
-
Check the installation with this command:
The configured Ruby version will now be available each time you log in.
Setting up multiple Ruby versions with the Ruby Selector
The Ruby Selector makes it possible to use multiple versions of Ruby in your account by creating a virtual environment for each desired version. To create a virtual environment, follow these steps:-
Log in to cPanel.
📘 Note If you do not know how to log in to your cPanel account, please see this article.
-
On the Tools page, in the Software section, click Setup Ruby App:

- Click the Setup Ruby App icon in the SOFTWARE section of cPanel.
-
Select the desired Ruby version from the Ruby version listbox.
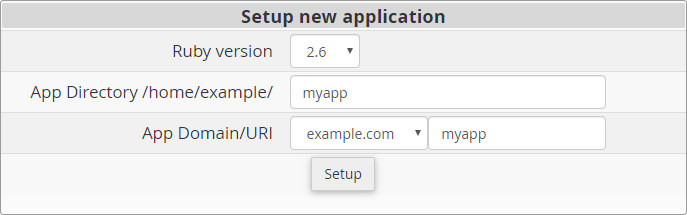
- Enter the desired application name in the App Directory text box.
- Select a domain in the App Domain/URI listbox.You must select a domain even if you will not be using Ruby for a website.
- Optionally, enter a path in the App Domain/URI text box.
-
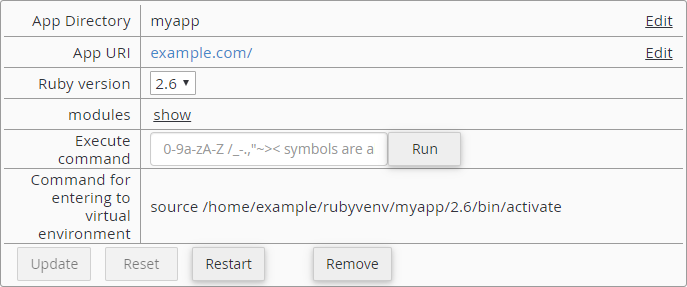
Click the Setup button. The application is set up and a new application detail form is added to the page.
🚧 Important The Ruby Selector adds several lines to the domain selected in step X above:
If you will not be using Ruby for your website you must remove these lines from the .htaccess file.
-
Copy the Command for entering to virtual environment from the application detail form.
- Log in to your account using SSH.
-
Paste the Command for entering to virtual environment on the command line and press enter. The command prompt will change as shown.
-
Enter the following command to check that the installation is successfull:
-
Exit the virtual environment by typing deactivate as shown.