Creating WordPress admin user in MySQL using phpMyAdmin
phpMyAdmin can be used to create a WordPress administrator user on a MySQL database. Learn how to use phpMyAdmin to create a WordPress admin user on MySQL.
You can create a user in WordPress in two ways: through the WordPress admin dashboard or by directly creating a user on the database. If you have lost access to your administrator login, then this article will demonstrate how to create an admin user on a MySQL database using phpMyAdmin for WordPress.
Creating a WordPress admin user in MySQL using phpMyAdmin
To create a user on MySQL using phyMyAdmin, follow these steps:
-
Log in to cPanel.
NoteIf you do not know how to log in to your cPanel account, please see this article.
-
On the Tools page, in the Databases section, click phpMyAdmin:
-
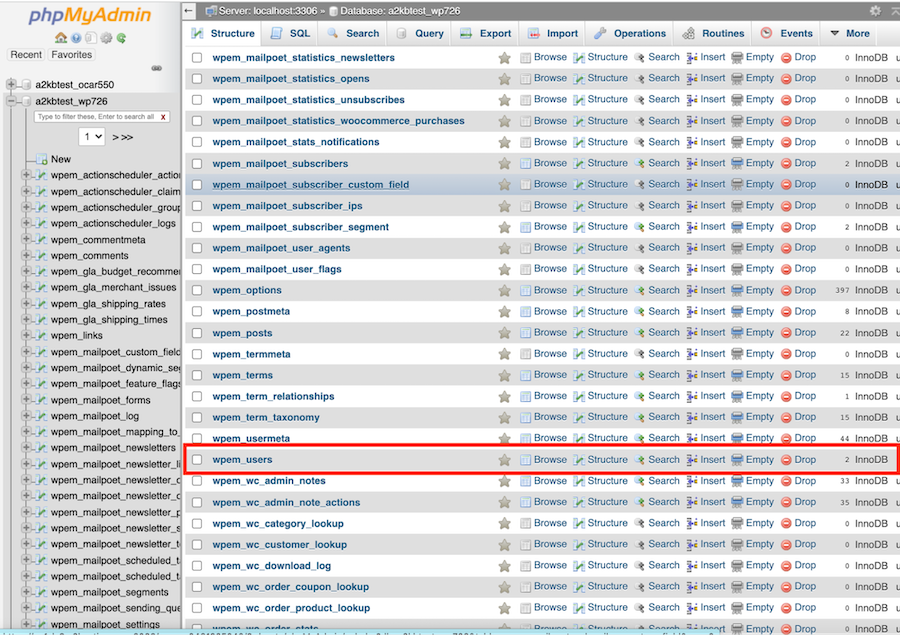
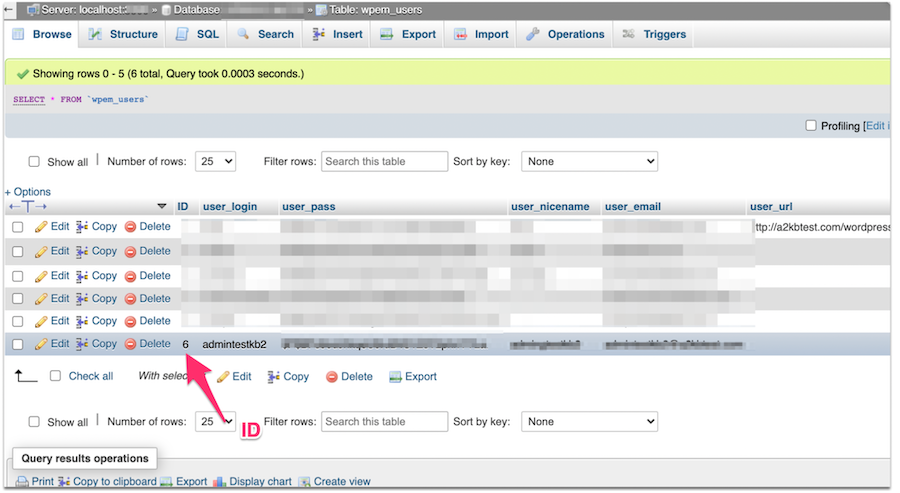
Select the WordPress site’s database from the list of databases, and then click the wp_users table:
NoteUnder hosting accounts the prefix of the wp_users table could be changed for security reasons. Open the table with [anyprefix]_users. For example wpem_users.
-
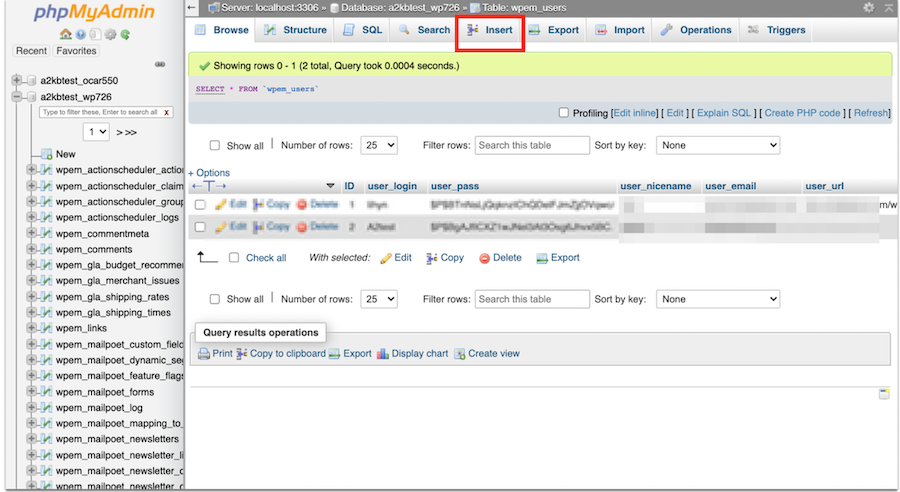
On the wp_users table or prefix_users, click on the Insert tab, and then fill in the form:
-
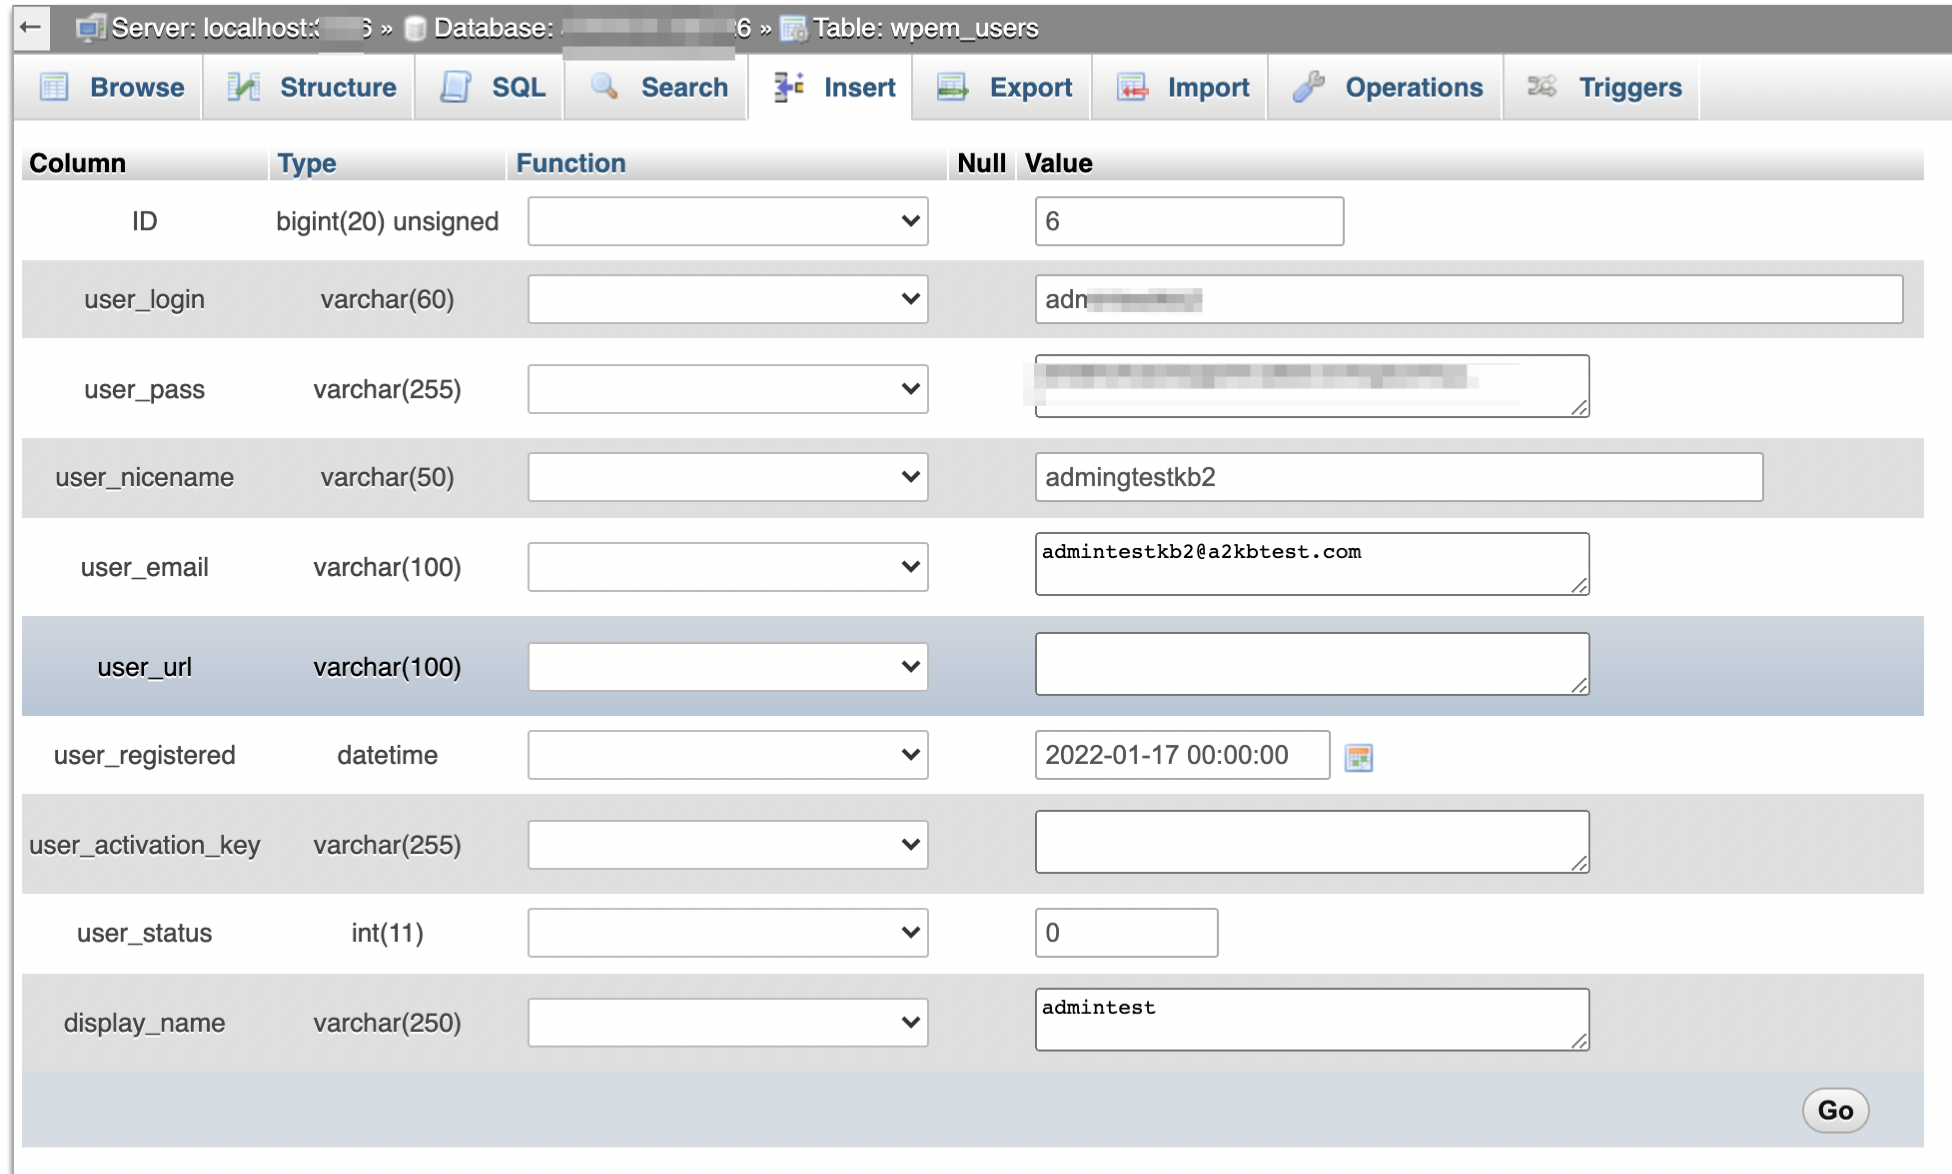
Fill in the user form with the following details, and then to save the details click the Go button:
-
user_login: Insert the username for your new admin user.
-
user_pass: Add a password for the account and select MD5 in the Function drop-down.
-
user_email: Add the email address for the user
-
user_registered: Select the date and time for when the user should be registered.
-
user_status: Set this value to zero.
-
Click on the browse tab to view the newly created user:
-
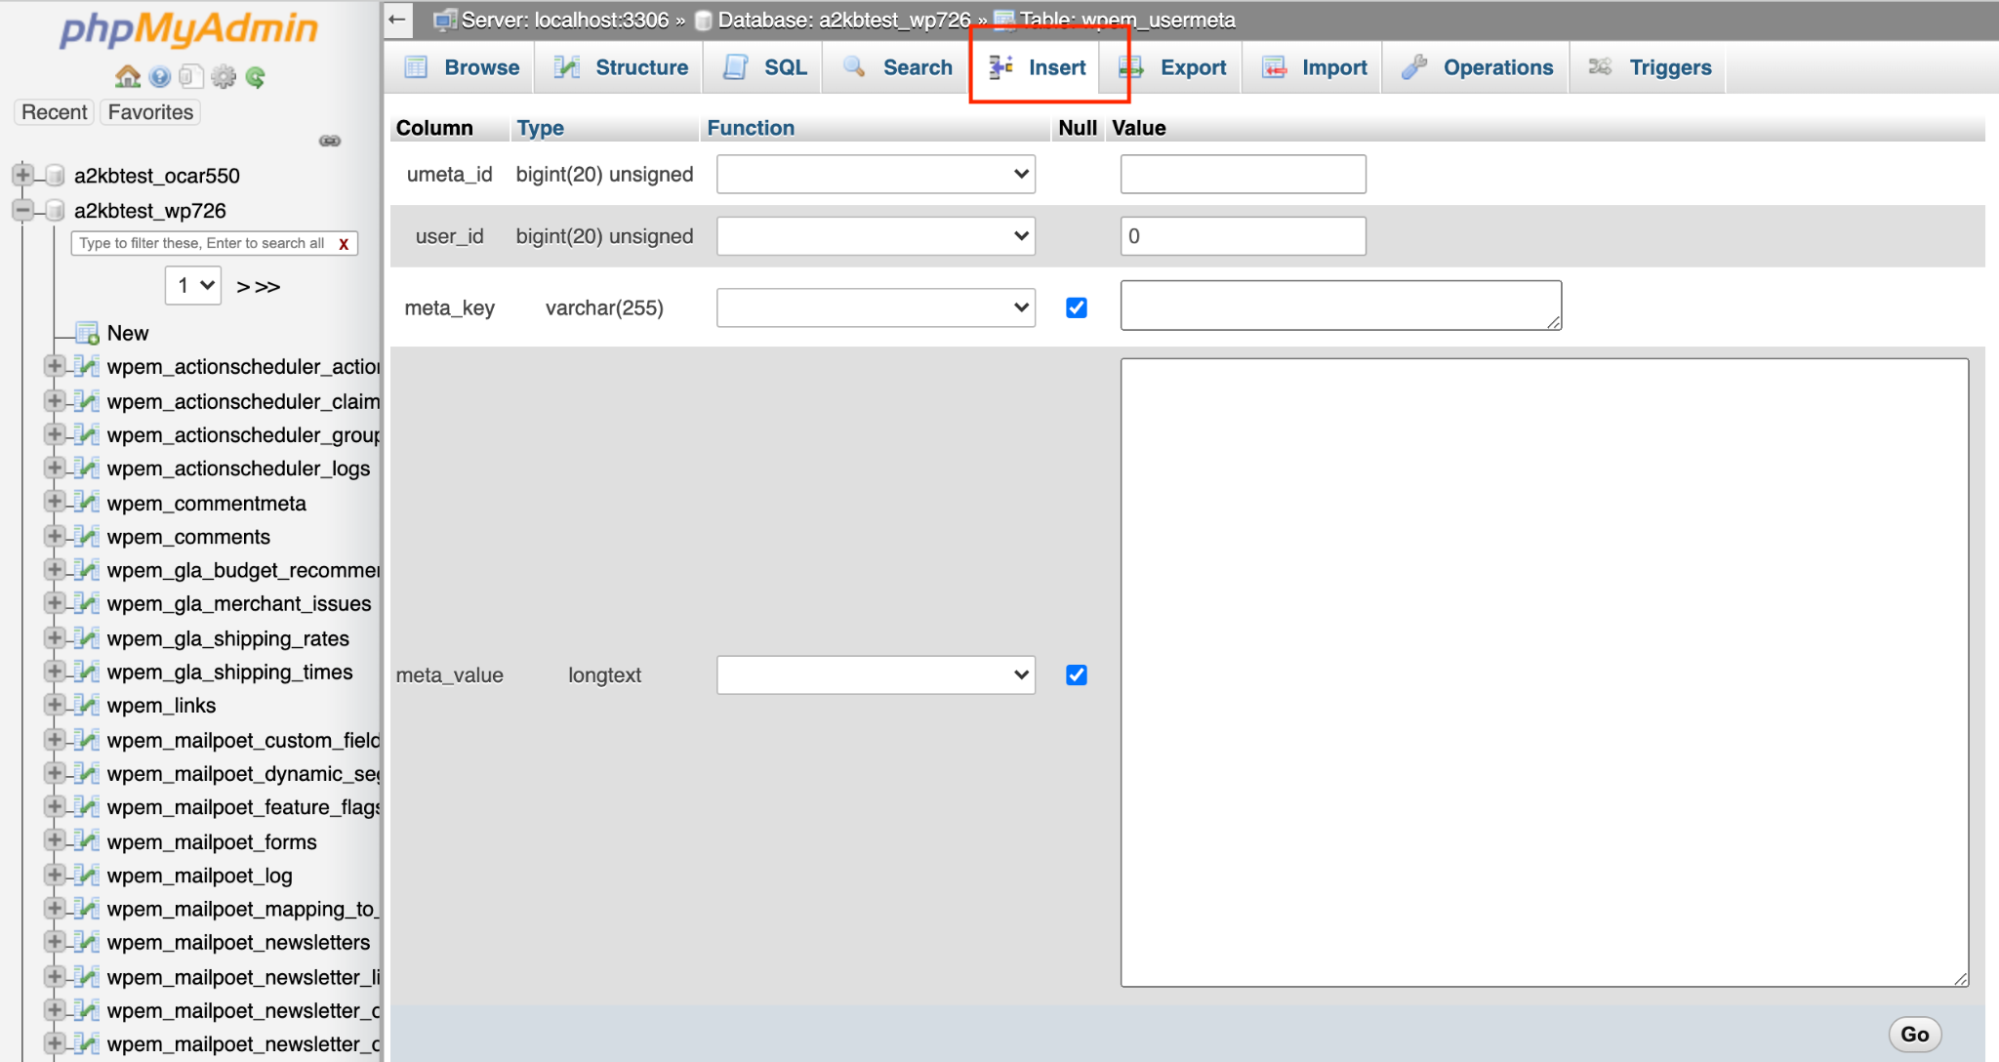
Click on the wp_usermeta or [prefix]_usermeta table, and then click the Insert tab:
-
Fill in the following values (leave the other fields empty) and then click Go:
-
user_id: Fill in the ID of the user you created in the previous step (from the users table).
-
meta_key: Enter wp_capabilities or if your tables have a prefix then enter prefix_capabilities. Example: wpem_capabilities
-
meta_value: Fill in the field with a:1:{s:13:"administrator";s:1:"1";}. If your table name has a prefix then fill in the field with a:1:{s:13:"administrator";b:1;}
- Access WordPress admin login page, and login using the newly created user credentials.
Related articles
Updated 7 months ago