Using SSH (Secure Shell) to access your account
Secure Shell (SSH) provides a secure way for you to access your account from the command line. This article covers how to set up and use an SSH client on Windows, Mac, and Linux computers.
This article describes how to connect to your hosting.com account securely using SSH.
What is SSH?
Secure Shell (SSH) is a protocol that provides secure command-line access to your hosting.com account. By using SSH, you can remotely log in to your account and run commands as if you were sitting right at the server.
NoteSSH is the only protocol that hosting.com supports for access to the command line. For security reasons we do not support telnet.
With its simplified interface, the command line allows you to perform tasks with text commands. You'll also find that SSH is a time-saving solution that can ultimately help speed up many tasks. For example, you can complete tasks at the command line that you cannot do with your account's control panel.
How SSH works
SSH creates a secure connection between two computers. SSH is able to provide a safe, encrypted connection between the client and the server through this encrypted tunnel. From here, you can easily transfer files between connected machines, or run programs and commands that would otherwise require more complicated screen-sharing solutions. It is as if you were right in front of your server, in the data center where it is located.
What you need to create an SSH connection
Just as you need an FTP client to manage files with FTP, you need an SSH client on your computer to make an SSH connection. PuTTY and WinSCP are two popular SSH solutions for Windows users. Both Linux and macOS have built-in terminals, so it is not necessary to download a separate SSH client. Our step-by-step SSH account access instructions, outlined below, will help you access your account remotely.
Viewing SSH connection details for your account
To view the SSH connection details for your account, follow these steps:
-
Log in to the Hosting Panel at https://my.hosting.com.
-
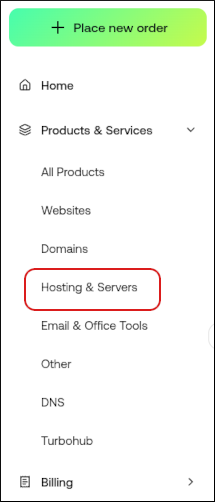
In the left sidebar, under Products & Services, click Hosting & Servers:
-
On the Hosting & Servers page, locate your account, and then click Manage.
-
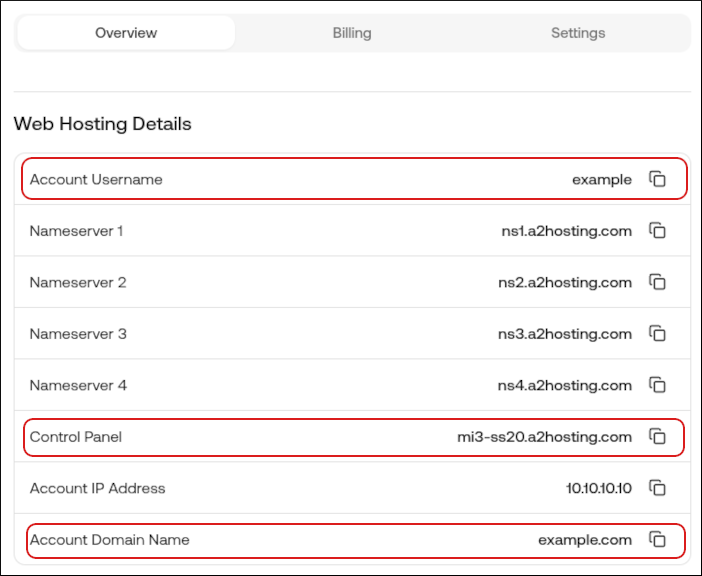
On the Overview tab are the SSH connection details for your account:
-
In the Account Username row is your SSH username.
-
In the Control Panel row is the SSH hostname. Alternatively, you can use your Account Domain Name if your domain name points to our nameservers.
-
How to use an SSH client
Once you have the connection details for your account, you are ready to use an SSH client to connect to the server. Follow the appropriate procedure below for your computer's operating system.
Windows operating systems
You can use any SSH client, but we will show how to use PuTTY, which you can download here. To connect to your account using PuTTY, follow these steps:
-
Start PuTTY.
-
In the Host Name (or IP address) text box, type the hostname or IP address of the server where your account is located.
-
In the Port text box, type
22.NoteMake sure you use the correct SSH port number for your account. For example, some hosting accounts use a different port for SSH, such as 7822.
-
Confirm that the Connection type radio button is set to SSH.
-
Click Open.
-
A PuTTY security alert about the server's host key appears the first time you connect. Click Yes.
-
Enter your account username when prompted, and then press Enter .
-
Type your account password when prompted, and then press Enter .
NoteFor security reasons, no characters appear in the terminal as you type the password.
-
When the remote server's command line prompt appears, you are connected. The initial command line prompt is:
[email protected] [~]# -
You can now run commands. For example, to see a listing of the current directory, type
ls,and then press Enter. -
To close the SSH connection when you are done, type
exitand then press Enter.
macOS and Linux operating systems
Both macOS and Linux include SSH clients, so connecting to your hosting.com account on these operating systems is easy. You do not have to download a special client.
To connect to your account, follow these steps:
-
Open a terminal window. The procedure to do this depends on the operating system and desktop environment.
- On macOS, click Applications, click Utilities and then click Terminal.
-
At the command prompt, type the following command. Replace username with your hosting.com username, and example.com with your site's domain name:
ImportantTo use a different port number, use the -p option. For example:
ssh -p 7822 [email protected] -
Type your password when you are prompted to do so.
NoteFor security reasons, no characters appear in the terminal as you type the password.
-
When the remote server's command line prompt appears, you are connected. The initial command line prompt is:
[email protected] [~]# -
You can now run commands. For example, to see a listing of the current directory, type
ls,and then press Enter . -
To close the SSH connection when you are done, type
exitand then press Enter .TipIn the command in step 2, we explicitly specify the port number, the username, and the hostname. However, you can also define these settings for a remote host in your ~/.ssh/config file as follows:
Host example
    Hostname example.com
    Port 22
    User username
The Host value can be any name you want; it is simply a label for the other settings. The Hostname value is the remote host you want to access, the port number is 22, and the User value specifies your hosting.com account username. With this configuration defined, you can connect to the account by simply using the Host value. You do not have to type the port number, username, and hostname each time. The following command demonstrates how to do this:
ssh example