Setting up e-mail on Windows Phone
Learn how to set up access to a hosting.com e-mail account on Windows Phone devices. This article provides step-by-step instructions and all the information you need to manage e-mail using Windows Phone.
This article demonstrates how to set up access to a hosting.com e-mail account on Windows Phone devices.
To do this, follow these steps:
-
Make sure you have already created at least one e-mail account for your domain. If you have not done this, please see this article to learn how to create an e-mail account using cPanel.
-
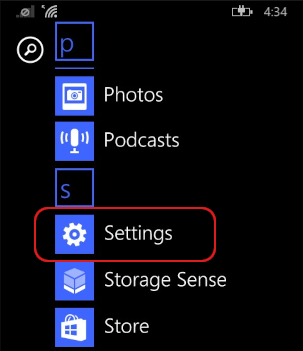
On the Start screen, swipe left to the App list.
-
Scroll down, and then tap Settings:
 Note
NoteThe user interface displayed in these images may differ slightly from the version you have installed.
-
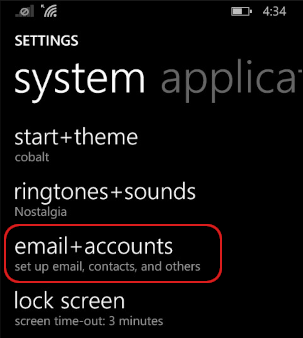
Tap email + accounts:
-
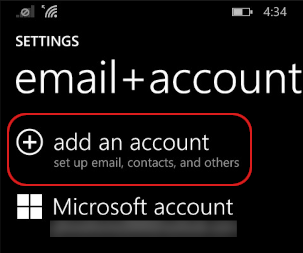
Tap add an account:
-
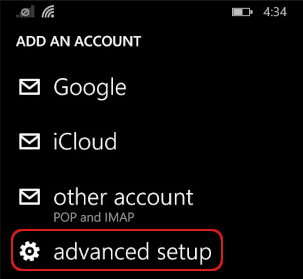
Scroll down, and then tap advanced setup:
-
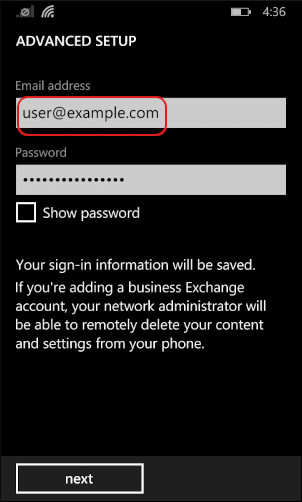
In the Email address text box, type the e-mail address of the account that you created in cPanel (for example,[email protected] ):
-
In the Password text box, type the password for the e-mail account that you created in cPanel.
-
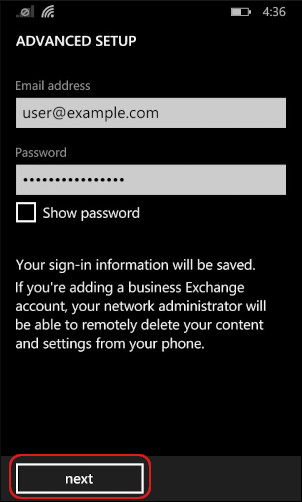
Tap next:
-
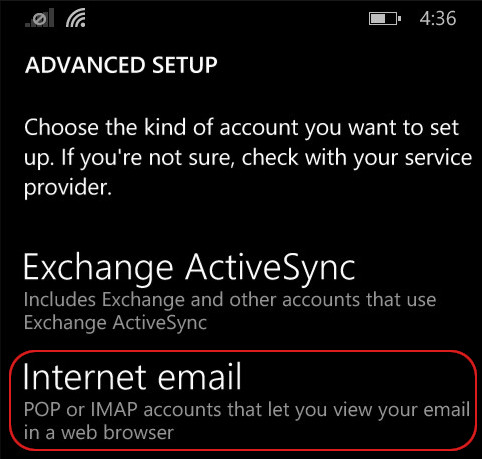
Tap Internet email:
-
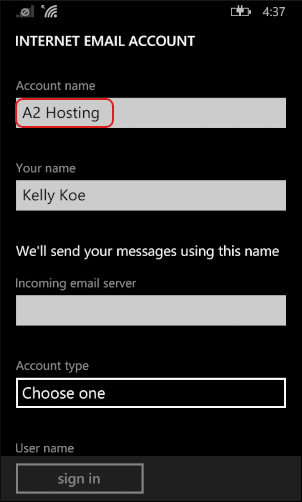
In the Account name text box, type a descriptive name for the account, such as hosting.com. The name can be whatever you want:
-
In the Your name text box, type the name that you want recipients to see on messages you send.
-
In the Incoming email server text box, type the hosting.com server name for your account.
NoteFor information about how to determine your account's server name, please see this article.
-
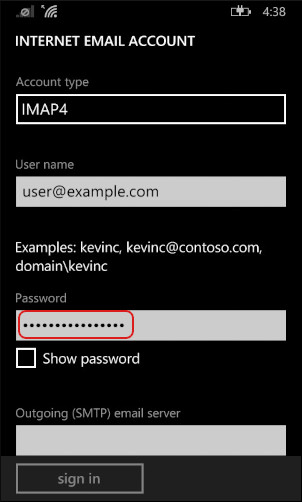
In the Account type list box, select POP3 or IMAP4.
-
Scroll down, and in the User name text box, type the e-mail address of the account that you created in cPanel (for example, [email protected] ).
-
The Password text box should already contain the password you typed in step 8. If it does not, retype the password for the e-mail account that you created in cPanel:
-
In the Outgoing (SMTP) email server text box, type the hosting.comserver name for your account.
NoteFor information about how to determine your account's server name, please see this article.
-
Confirm that the Outgoing server requires authentication check box is selected.
-
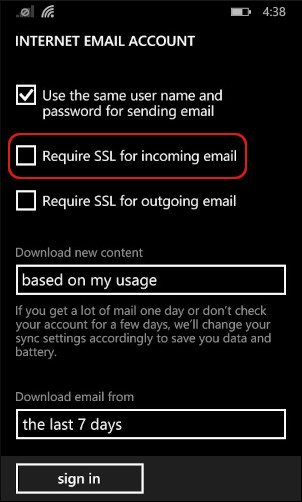
Confirm that the Use the same user name and password for sending email check box is selected.
-
Tap advanced settings.
-
Select the Require SSL for incoming email check box:
-
Select the Require SSL for outgoing email check box.
-
In the Download email from list box, select how many messages you want to download.
TipIf you have a lot of messages in your account, you may only want to download the last 7 days or 2 weeks. If you want to download all of the messages in your account, select any time .
-
Tap sign in. Windows Phone logs in and downloads the messages for the account.
-
On the Start screen, tap the mail tile that shows the account name you specified in step 11:
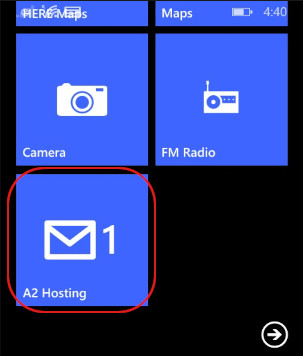
The inbox for the account appears.