Setting up Professional and Business Email
Setting up your hosting.com Professional or Business email is easy, and we'll walk you through each step -- from setting up your user to configuring your devices.
Creating a new user in your account
First, create a new user in your account. To do this, follow these steps:
-
Log in to the Hosting Panel at https://my.hosting.com.
-
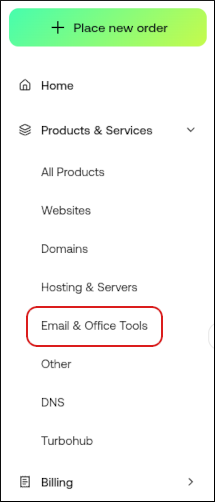
In the left sidebar, under Products & Services, click Email & Office Tools:

-
On the Email & Office Tools page, locate your email account, and then click Admin Login:

-
The administration interface appears in a new tab. On the top menu bar, click More, and then click Domain Settings.
-
In the Users section, click New.
-
Complete the fields, and then click Save.
Setting up your device
Now that your email address and password is set up, here's how to add your new email account to your device:
Pro tip: If your email app (like Outlook) has automatic settings, try those first. It’s usually an easy way to get started. But if you’d rather configure it yourself, use the following settings.
Setting | More information | Example |
|---|---|---|
Username | Enter your email address | [email protected] |
Password | Enter the password you made when setting your email account. Keep it safe! | |
Incoming Mail Server | The IMAP server for Professional/Business is mx4125.usc1.mymailhosting.com | Professional/Business POP/IMAP: |
Incoming Server Port | No need to change anything! Our email servers use all the default incoming server port numbers. |
|
Outgoing Mail Server | The SMTP server for Professional/Business is mx4125.usc1.mymailhosting.com | Professional/Business SMTP: |
Outgoing Server Port | No need to change anything! Most Internet Service Providers (ISP) block port 25 for their own outgoing emails. |
|
Updated 2 months ago
