Setting up BlueMail on Android
Learn how to set up the BlueMail email client on Android to access a hosting.com e-mail account. This article includes step-by-step instructions and all the information you need to manage e-mail using BlueMail.
This article demonstrates how to set up the BlueMail email client on Android to access a hosting.com e-mail account.
To configure BlueMail to work with your hosting.com e-mail account, follow these steps:
-
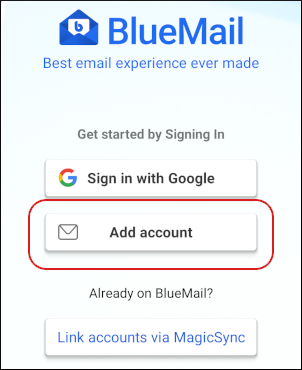
Start BlueMail.
-
Tap Add account:
 Note
NoteThe user interface displayed in these images may differ slightly from the version you have installed.
-
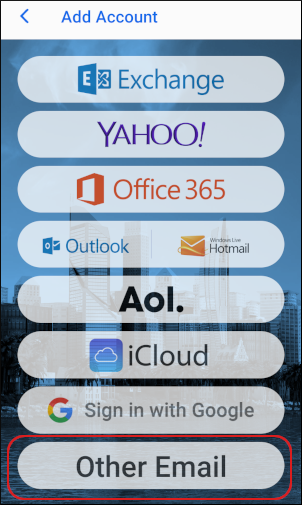
Tap Other Email:
-
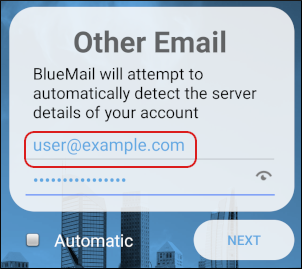
In the first text box, type the e-mail address of the account you created in cPanel:
-
In the second text box, type the password for the account you created in cPanel.
-
Clear the Automatic check box, and then tap NEXT.
-
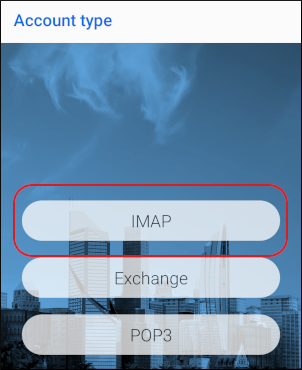
On the Account type page, tap IMAP:
-
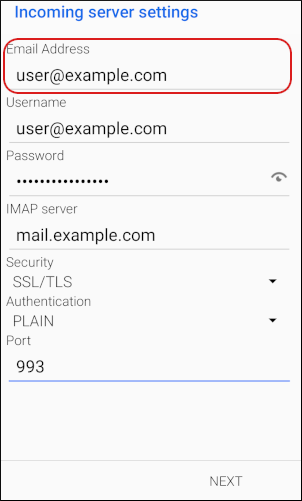
Under Incoming server settings, in the Email Address text box, type the e-mail address of the account you created in cPanel:
-
In the Username text box, type the e-mail address of the account you created in cPanel.
-
In the Password text box, type the password for the account you created in cPanel.
-
In the IMAP server text box, type mail.example.com, where example.com represents your domain name.
-
In the Security list box, tap SSL/TLS.
-
In the Authentication list box, tap PLAIN.
-
In the Port text box, type
993. -
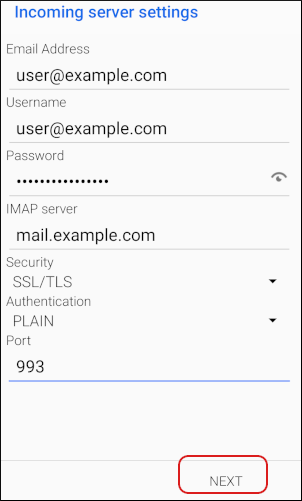
Tap NEXT:
-
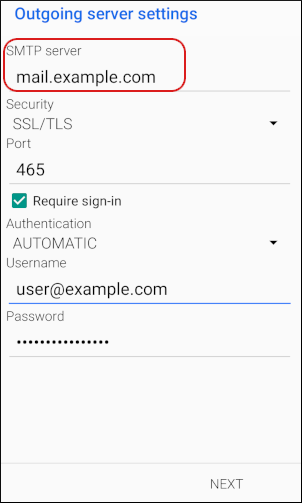
Under Outgoing server settings, in the SMTP server text box, typemail.example.com, where example.com represents your domain name:
-
In the Security list box, tap SSL/TLS.
-
In the Port text box, type
465. -
Select the Require sign-in check box.
-
In the Authentication list box, tap AUTOMATIC.
-
In the Username text box, type the e-mail address of the account you created in cPanel.
-
In the Password text box, type the password for the account you created in cPanel.
-
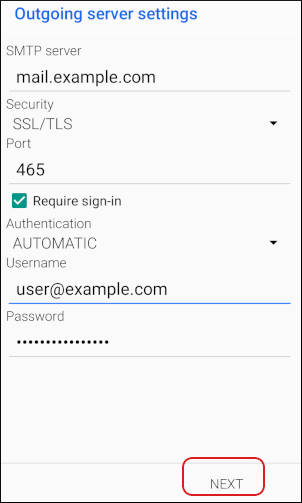
Tap NEXT:
-
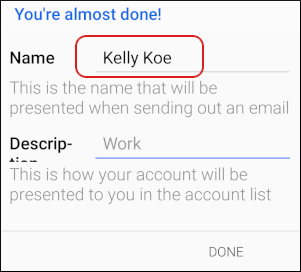
In the Name text box, type the name that you want to appear on messages you send from the account:
-
In the Description text box, type an optional description for the account.
-
Tap DONE.
-
On the Account Notifications page, tap Done:

-
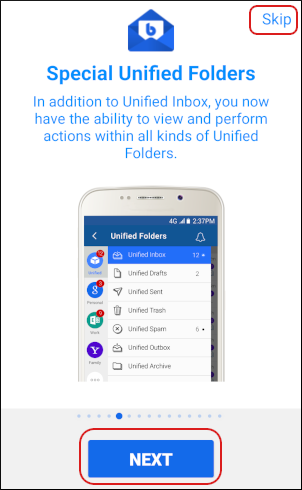
Tap NEXT to view the short introduction, or tap Skip:
-
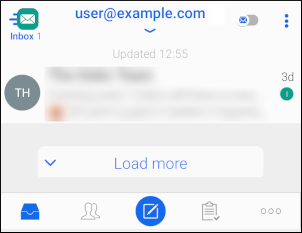
BlueMail downloads any messages in the account, and the inbox appears:
More information
For more information about BlueMail, please visit https://bluemail.me/.