Managing your MySQL databases in the Hosting Panel
Learn how to manage your MySQL databases and users from one convenient interface in the hosting.com Hosting Panel.
Some newer hosting accounts use an administration interface directly within the hosting.com Hosting Panel. Unlike cPanel, there is no separate login — you just log in to your hosting.com account at https://my.hosting.com and control your web site, email, and WordPress from one unified interface.
This article provides an overview on how to use this administration interface to manage your MySQL databases and users. It applies to the following account types:
- Starter Web Hosting
- Plus Web Hosting
- Pro Web Hosting
- Max Web Hosting
Managing database users
Before you create a database, you should create at least one database user that will have access to the database. To do this, follow these steps:
-
Log in to your account as described in Managing your website in the Hosting Panel.
-
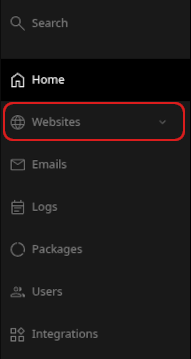
When the control panel appears, in the left sidebar, click Websites:
-
On the Manage websites page, click the website you want to manage.
-
A list of tabs appears at the top of the page. Click the Databases tab:

-
The MySQL databases page appears. Click Add user:

-
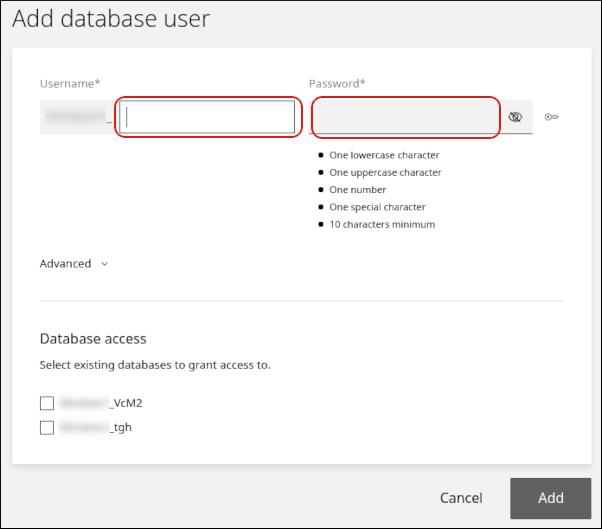
In the Add database user section, type the username and password for the user:
-
If one or more databases already exist, they appear in the Database access section. Select the check box next to any database for which you want to grant the user access.
-
Click Add.
-
Click the Users tab. The new user appears in the user list.
-
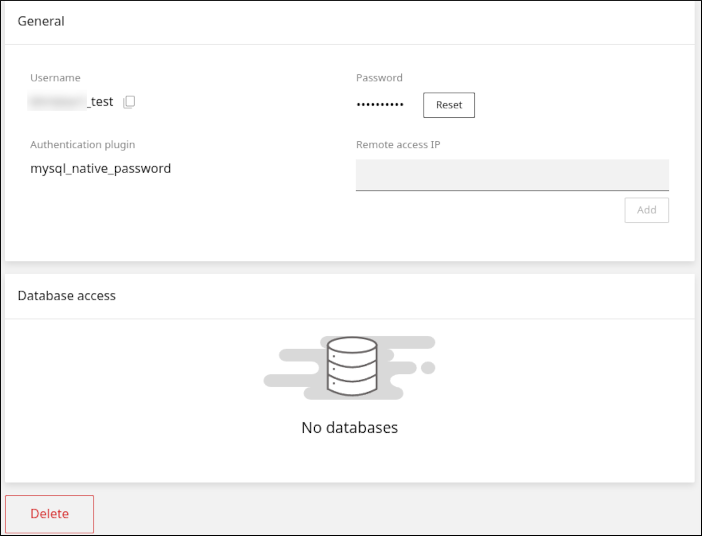
Click the user to modify it. On this page, you can:
-
Click Reset to reset the user's password.
-
In the Remote access IP text box, type an IP address from which the user can access databases.
-
Click Delete to delete the user.
-
Managing databases
You can easily add, modify, and delete databases. To do this, follow these steps:
-
Log in to your account as described in Managing your website in the Hosting Panel.
-
When the control panel appears, in the left sidebar, click Websites:
-
On the Manage websites page, click the website you want to manage.
-
A list of tabs appears at the top of the page. Click the Databases tab:
-
The MySQL databases page appears. Click Add database:

-
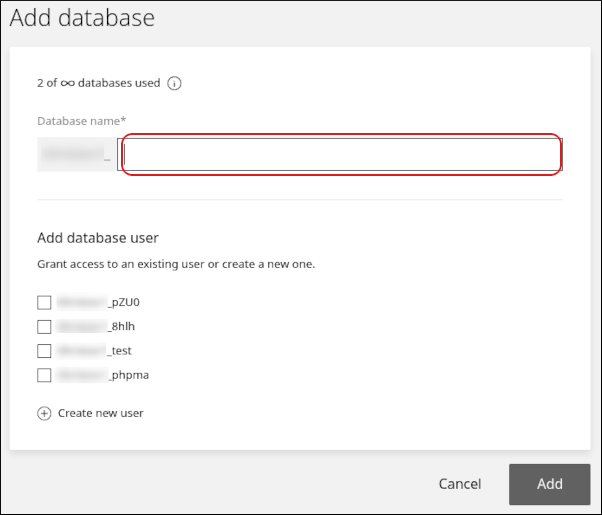
In the Add database section, in the Database name text box, type the name of the database:
-
In the Add database user section, select one or more users that can access the database.
-
To grant all access privileges to a user, leave the All database privileges check box selected. Alternatively, clear the All database privileges check box, and then click the specific privileges you want to grant to the user:
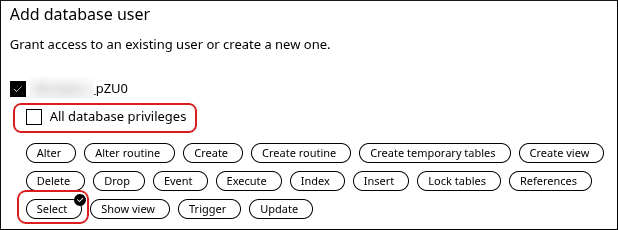
-
-
Click Add. On the Databases tab appears the new database.
-
Click the database to modify it and access additional features. On this page, you can:
-
Click PhpMyAdmin to access phpMyAdmin:
-
Add database users to the database or remove database users.
-
Click Upload to import a SQL file and populate the database:
-
Click Download to export a SQL file containing the database:
-
Click Delete to delete the database:
-