- Make sure you have already created at least one e-mail account for your domain. If you have not done this, please see this article to learn how to create an e-mail account using cPanel.
- Start Outlook.
-
On the File menu, click Info, and then click Add Account:
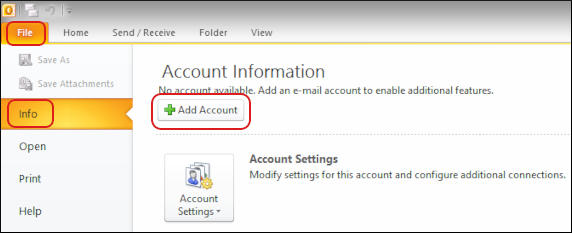
📘 Note The user interface displayed in these images may differ slightly from the version you have installed.
-
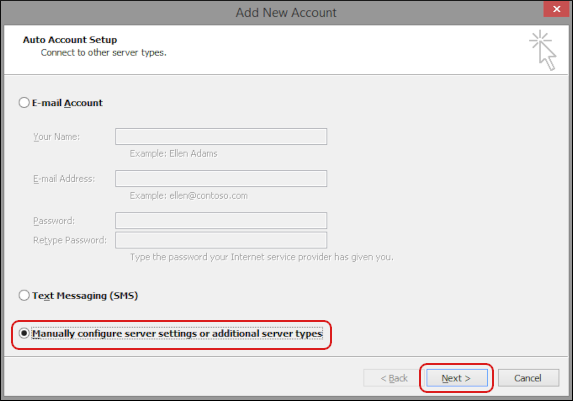
The Add New Account dialog box appears. Select Manually configure server settings or additional server types, and then click Next:
-
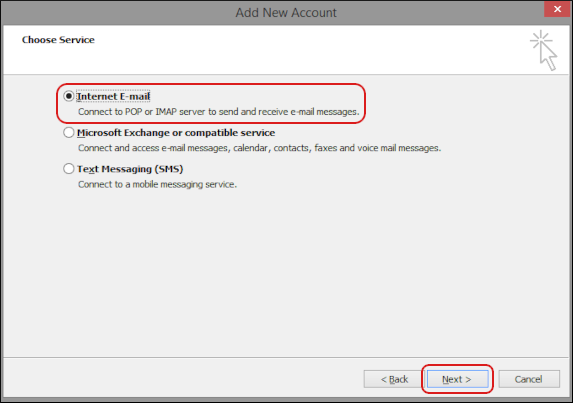
Select Internet E-mail, and then click Next:
-
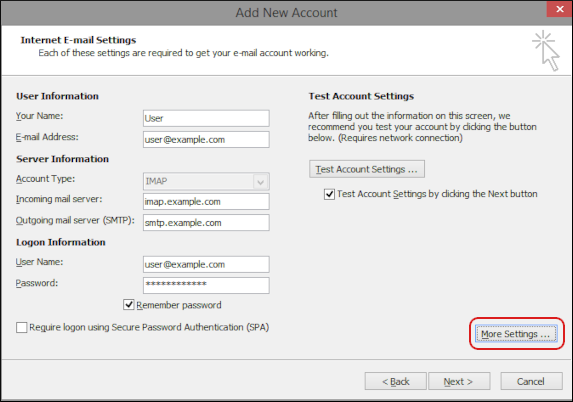
Under User Information, in the Your Name text box, type the name that you want to appear on messages you send:
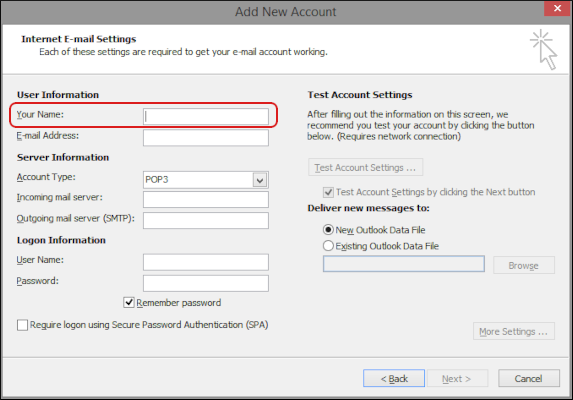
- In the E-mail Address text box, type the e-mail address of the account you created in cPanel.
-
Under Server Information, in the Account Type list box, select the type of incoming mail server that you want to use:
- If you want to use POP, select POP3.
- If you want to use IMAP, select IMAP.
-
In the Incoming mail server text box, type eithermail.example.com, whereexample.com represents your domain name, or the hosting.com server name for your account.
📘 Note For information about how to determine your account’s server name, please see this article.
🚧 Important If you plan on using secure SSL/TLS access with POP3 or IMAP (and we strongly recommend that you do), you should use the hosting.com server name instead of your own domain name. Otherwise, your client application may display security warnings that the shared SSL certificate for the server does not match your web site’s domain name.
-
In the Outgoing mail server (SMTP) text box, type eithermail.example.com, whereexample.com represents your domain name, or the hosting.com server name for your account.
📘 Note For information about how to determine your account’s server name, please see this article.
🚧 Important If you plan on using secure SSL/TLS access with POP3 or IMAP (and we strongly recommend that you do), you should use the hosting.com server name instead of your own domain name. Otherwise, your client application may display security warnings that the shared SSL certificate for the server does not match your web site’s domain name.
- Under Login Information, in the User Name text box, type the full e-mail address of the account you created in cPanel (for example, webmaster@example.com ).
- In the Password text box, type the password for the e-mail account you created in cPanel.
-
If you do not want to retype the account password every time you start Outlook, select the Remember password check box.
🚧 Important
- Do not select the Require logon using Secure Password Authentication (SPA) check box. SPA is a proprietary Microsoft protocol, and hosting.com servers do not support it.
- Remember that if you change the password for a hosting.com e-mail account in cPanel or webmail, you must also specify the new account password in Outlook.
-
Click More Settings:
-
Click the Outgoing Server tab:
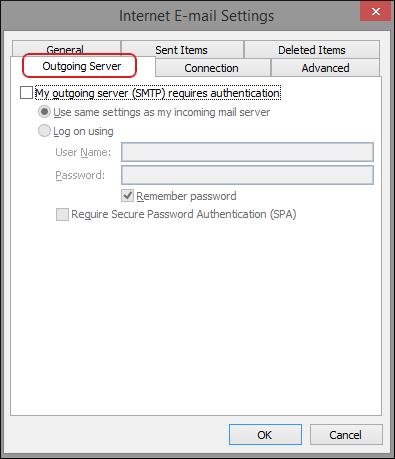
- Select the My outgoing server (SMTP) requires authentication check box.
- Select Use same settings as my incoming mail server.
-
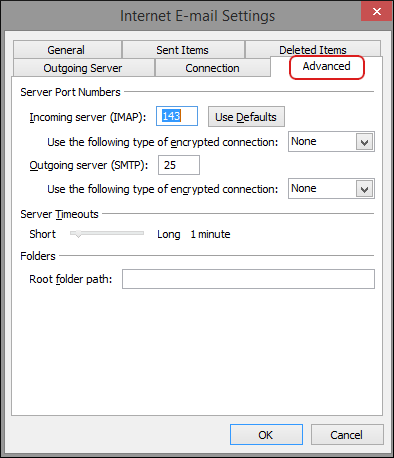
Click the Advanced tab:
-
If you want to use a secure SSL/TLS connection to the hosting.com mail servers (and we strongly recommend that you do), use the following settings:
-
If you are using POP for incoming mail, in the Incoming server (POP3) text box, type
995, and then select the This server requires an encryptedconnection(SSL) check box. -
If you are using IMAP for incoming mail, in the Incoming server (IMAP) text box, type
993, and then in the Use the following type of encrypted connection list box, select SSL. -
In the Outgoing server (SMTP) text box, type
465, and then in the Use the following type of encrypted connection list box, select SSL.
-
If you are using POP for incoming mail, in the Incoming server (POP3) text box, type
- Click OK.
-
In the Add New Account dialog box, confirm the Test Account Settings by clicking the Next button check box is selected, and then click Next:
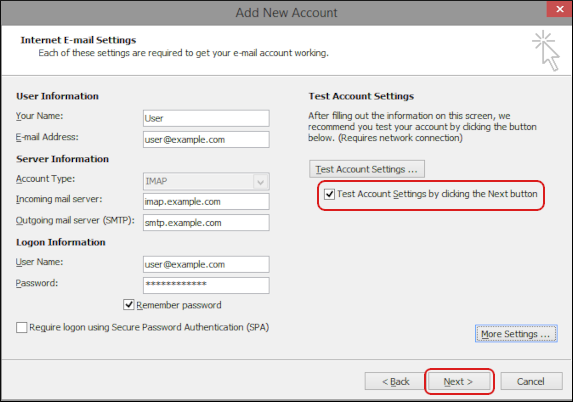 Outlook tests your incoming and outgoing mail settings. If the tests complete successfully, go to the next step. Otherwise, check the settings you provided in steps 6 to 19, and then try again.
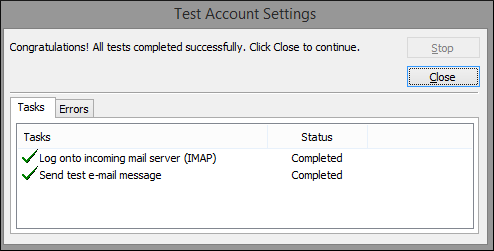
- Click Close, and then click Finish. Outlook downloads any messages in the account.
e-mail-client-application-setup
Setting up the Microsoft Outlook 2010 and 2013 e-mail clients
Set up Microsoft Outlook 2010/2013 to access your hosting.com email with our step-by-step guide.
This article demonstrates how to set up the Microsoft Outlook 2010 and 2013 e-mail client applications to access a hosting.com e-mail account.
To configure Outlook 2010 or Outlook 2013 to work with your hosting.com e-mail account, follow these steps: