Getting started with Managed WordPress in Plesk
This article provides a brief introduction to the major features of Plesk-based Managed WordPress. Learn how to log in, use the WordPress Toolkit, and more.
Mananging a WordPress installation can be complex. Managed WordPress simplifies every part of the process. This article introduces the tools available in the Plesk-based Managed Wordpress product.
ImportantThe information in this article applies to older Plesk-based Managed WordPress hosting accounts. For information about Managed WordPress powered by Rocket.net hosting plans, go to Managed hosting for WordPress powered by Rocket.net.
Logging in to Plesk
To start using the Managed WordPress features, log in to Plesk. For information about how to log in to Plesk, please see this article.
Installing WordPress
Managed WordPress comes with WordPress pre-installed so installation may never be needed, but if it is, a step-by-step option is provided. To install WordPress, follow these steps:
-
Log in to Plesk.
-
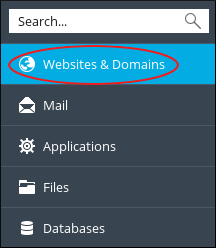
In the left sidebar, click Websites & Domains.
-
Scroll to the management area for the domain on which you want to install WordPress.
-
In the management area, click Install:

-
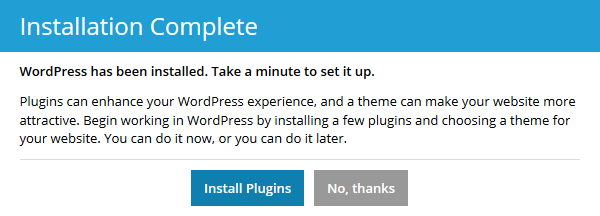
WordPress is installed with default options, and then a dialog box appears with the option to install additional plugins. Click Install Plugins or No, thanks:
-
If you click No, thanks, installation is complete.
-
If you click Install Plugins, in Step One, choose the type of site being created by clicking the appropriate button.
-
In Step Two, several appropriate plugins are presented for installation. Select the green check marks to de-select any plugins you do not want, and then click Install & Continue.
-
In the Confirm Installation dialog, click OK.
-
After confirmation, the selected plugins are installed and additional plugins are offered.
-
Install any additional plugins you want, and then in the left sidebar, click Websites & Domains.
Using the WP Toolkit
Managed Wordpress includes the WP Toolkit, which provides many helpful options directly from the Websites & Domains option.
Simplified WordPress login
To log in to the WordPress admin interface, click Log In. The toolkit logs in without requiring an additional password.
Check security
To check the security of the site, click Check Security. The security check includes nine security checks to help keep your site secure and optimized.
Manage plugins
To manage plugins, click Plugins. This feature enables installation, update, activation, and removal of plugins without logging in to the WordPress admin panel.
Manage themes
To manage themes, click Themes. This feature enables installation, activation, and removal of themes without the necessity of logging in to the WordPress admin panel.
Clone a site
To clone a WordPress installation for backup or development, click Clone. This feature creates a complete copy of a WordPress installation, and makes all the necessary configuration changes to create a working site at a subdomain of the original installation.
Sync a site
To sync a cloned site with another WordPress installation, click Sync. This feature provides options for syncing files, the database, or both.
Keep a site up-to-date
The WordPress toolkit presents a notification when updates are available. To review and apply updates, click Details.
Additional toolkit features
For additional WP Toolkit features, in the left sidebar, click WordPress:

Jetpack
Jetpack is a powerful toolkit/plugin loaded with resources to enhance your WordPress account and site. It bundles a number of helpful tools to help you design, secure, and grow your site. Jetpack includes:
-
Daily automated backups
-
Photon Unlimited Image CDN (Content Delivery Network)
-
Lazy loading images
-
Brute-force protection
-
Automated spam filtering
-
Website stats
-
Hundreds of free WordPress templates
Jetpack is installed automatically, and you can set it up in WordPress the first time you log in.
Updated 7 months ago