Backuply is currently available on VPS and Dedicated servers.
Configuring backups
The following procedures describe how to configure and schedule backups in Backuply.Adding a remote backup server
You can create a local backup without any additional server configuration. Most likely though, you will want to configure offsite backups for extra data protection and redundancy. To configure a remote backup server, follow these steps:-
Log in to cPanel.
📘 Note If you do not know how to log in to your cPanel account, please see Logging in and out of cPanel.
-
On the Tools page, in the Software section, click Backuply:

-
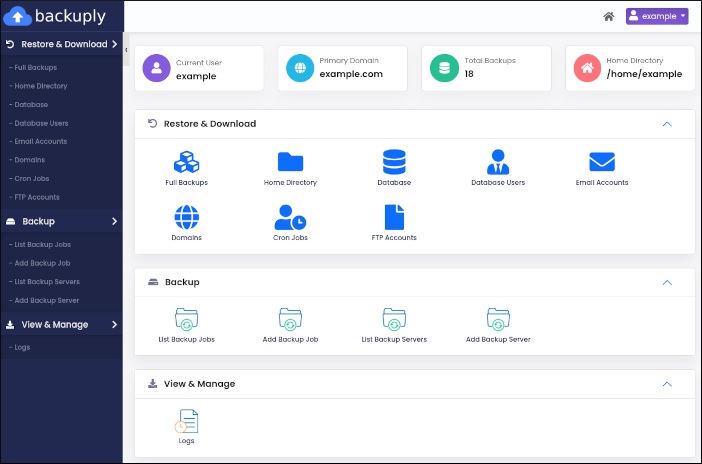
The Backuply dashboard appears:
-
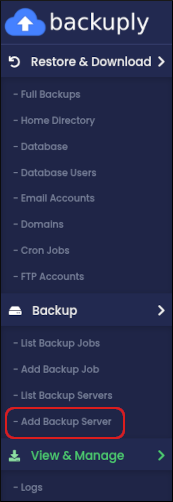
In the left sidebar, in the Backup section, click Add Backup Server:
-
The Add Backup Server page appears. In the Type list box, select the type of backup server you want to configure:
- SSH
- Amazon S3 and S3 compatible
- FTP
- Google Drive
- Microsoft OneDrive
- The configuration options vary based on the type of backup server you select. Complete the options for the backup server type you selected in step 5.
- Click Test Connection. Backuply checks that the connection settings are valid. If you receive a Test Connection Failed message, check the information you provided in step 6, and then try again.
- After you receive a Test Connection Successful message, click Submit. Backuply saves the server configuration.
-
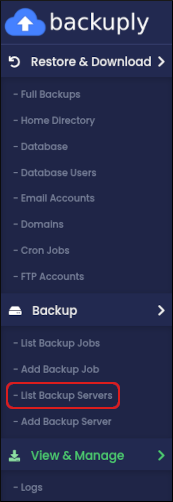
To view, edit, or delete the server configuration, in the left sidebar, click List Backup Servers:
Scheduling a backup
To schedule an automated backup, follow these steps:-
Log in to cPanel.
📘 Note If you do not know how to log in to your cPanel account, please see Logging in and out of cPanel.
-
On the Tools page, in the Software section, click Backuply:
-
The Backuply dashboard appears:
-
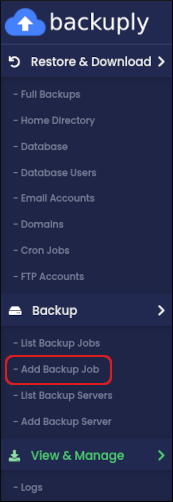
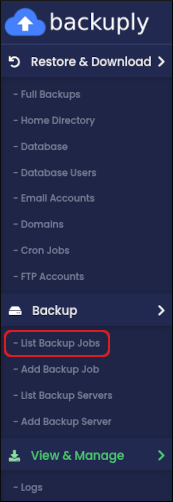
In the left sidebar, in the Backup section, click Add Backup Job:
- The Backup page appears. In the Select Backup Server list box, click Local to create a local backup. Alternatively, click the name of a backup server you configured in the previous procedure.
-
In the Type list box, select what you want to include in the backup:
- Full Backup: This backup includes all of the next three items.
- Home Backup: This backup includes all of the files in your home directory.
- Database Backup: This backup includes all of your MySQL databases.
- Mail Backup: This backup includes the files for all of your email accounts.
- In the Max Retries text box, type how many times you want to retry creating a backup file in the event of a failure.
-
On the Backup Scheme tab, select the schedule you want for backup creation. You can select a daily, weekly, or monthly schedule.
👍 Tip Alternatively, to set up a custom cron job, click the Backup Cron tab and select the schedule you want to use.
- Click Schedule. Backuply saves the backup job.
-
To view, edit, or delete the backup job, in the left sidebar, click List Backup Jobs:
Creating an instant backup
You can create a backup immediately without scheduling it. To do this, follow these steps:-
Log in to cPanel.
📘 Note If you do not know how to log in to your cPanel account, please see Logging in and out of cPanel.
-
On the Tools page, in the Software section, click Backuply:
-
The Backuply dashboard appears:
-
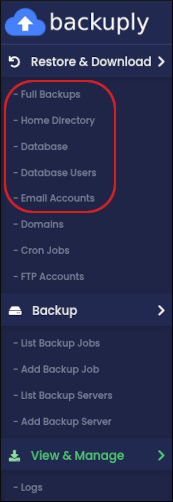
In the left sidebar, in the Restore & Download section, click the item you want to back up. You can create immediate backups of the following items:
- Full backups.
- Home directory files.
- MySQL databases and users.
-
Email accounts.
-
Click Backup Now:

Restoring backups
To restore a backup using Backuply, follow these steps:-
Log in to cPanel.
📘 Note If you do not know how to log in to your cPanel account, please see Logging in and out of cPanel.
-
On the Tools page, in the Software section, click Backuply:
-
The Backuply dashboard appears:
-
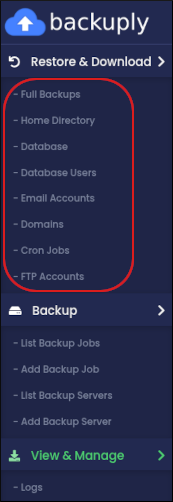
In the left sidebar, in the Restore & Download section, click the item you want to restore. You can restore the following items:
- Full backups.
- Home directory files.
- MySQL databases and users.
- Email accounts.
- Domains.
- Cron jobs.
- FTP accounts.
-
In the list of backups for the item you selected, locate the backup you want to restore, and then click the yellow arrow icon:

👍 Tip To delete a backup from the list entirely, click the red trash can icon:

- To confirm the restore, click Yes.
Viewing backup logs
You can view log information about your backups. To do this, follow these steps:-
Log in to cPanel.
📘 Note If you do not know how to log in to your cPanel account, please see Logging in and out of cPanel.
-
On the Tools page, in the Software section, click Backuply:
-
The Backuply dashboard appears:
-
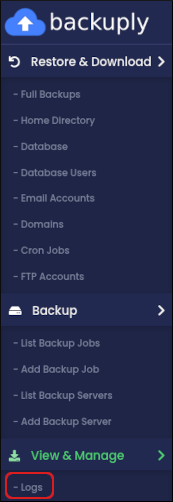
In the left sidebar, in the Backup section, click Logs:
-
On the Logs page, information appears about backup jobs that have previously run:
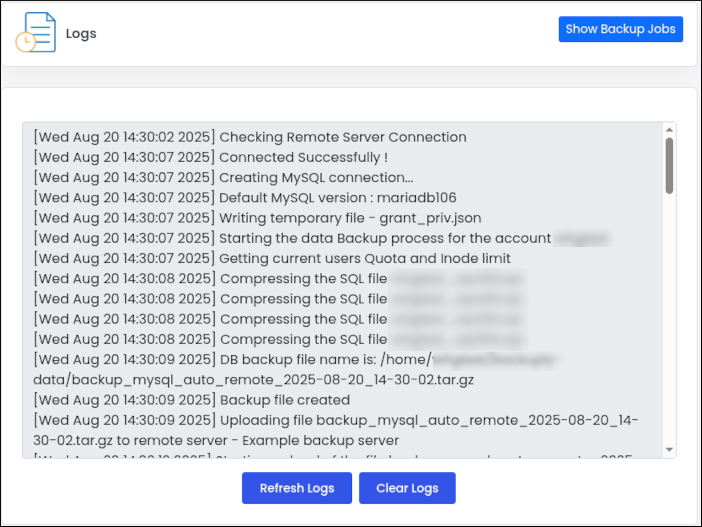
- To refresh the log information, click Refresh Logs.
- To clear the log information, click Clear Logs.