How to create a staging site for Rocket.net Managed WordPress
Learn how to create a staging site to test changes and new ideas before you take them live.
Making changes to your live, revenue generating site can be problematic and even devastating. A staging site is designed to let you test new themes, plugins, style changes, and even trying new ways to create posts and articles, all without making changes to your live website.
You can think of a staging site as a sandbox to play in without affecting your live website.
Creating a staging site
Note
Staging is only supported for standalone WordPress installations. Multisites cannot be staged.
To create a staging site, follow these steps:
-
Log in to the Hosting Panel at https://my.hosting.com.
-
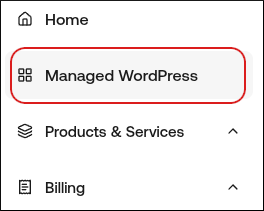
In the left sidebar, click Managed WordPress:

-
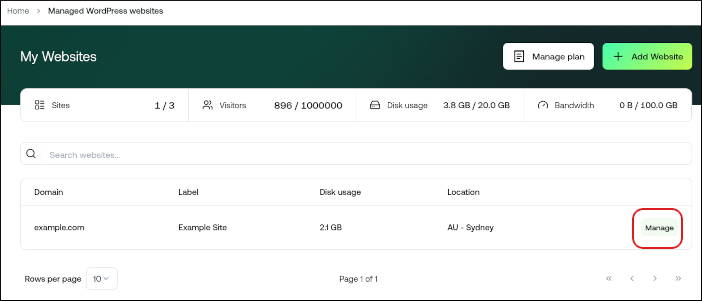
On the My Websites page, locate the site, and then click Manage:

-
On the Rocket dashboard, click Create Staging. This process can take a few moments to complete. When it does, a message appears stating you are now in staging mode.
-
You can now work with the staging site to perfect the changes you’d like to make.
Publishing your staging site
When you’re ready to make the staging site live, click Publish in the top right corner.
Important
Publishing a staging site overwrites your live site.
Deleting your staging site
To delete your staging site, follow these steps:
- Confirm that the staging site is selected the top left corner, where the white box says staging.
- Click Delete Staging to the right.
Important
Deleting a staging site is not reversible — when you delete it, it is gone for good.
Updated about 10 hours ago
