Giving access to individual sites on Rocket.net Managed WordPress
Learn how to create and configure site users so they can access your sites on Rocket.net Managed WordPress.
With our Site User feature, you can delegate site access to individual users without having to give them access to your entire Rocket.net Managed WordPress account!
Creating the first site user
To create a site user, follow these steps:
-
Log in to the Hosting Panel at https://my.hosting.com.
-
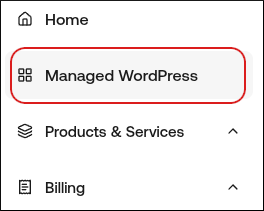
In the left sidebar, click Managed WordPress:
-
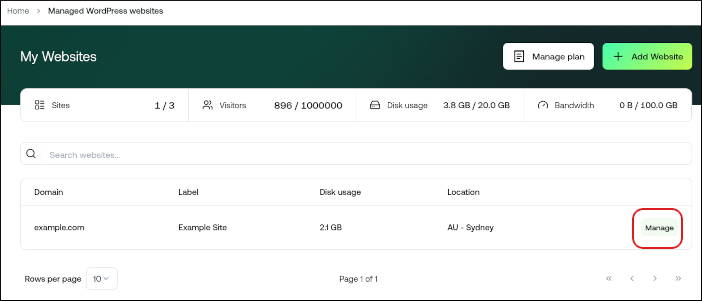
On the My Websites page, locate the site, and then click Manage:
-
On the Rocket dashboard, on the Overview tab, scroll down to the Site Users section, and then click Invite Site User.
-
In the First Name, Last Name, and Email text boxes, type the details for the user you want to invite.
-
Click Add User.
-
Instruct the new user to check their email inbox:
- There will be two emails, both from [email protected]. The new user must open the Create wpsitecontrol.com account email first and click the provided link. They will be taken to wpsitecontrol.com where they can set their password.
- After they have set a password, the new user can go back to their email and click the link in the Start Managing email that was also sent. The user will be automatically logged into the site for the first time.
Adding more sites
If a user with a pre-existing WPSiteControl account is added to additional sites, then they will receive another Start Managing email with a link to accept the invitation. The user can accept the invitation by clicking the link, or they can log in to WPSiteControl and accept the invitation there.
Updated about 2 hours ago